When trees are growing quickly, it’s not uncommon to find wire marks along the trunk.
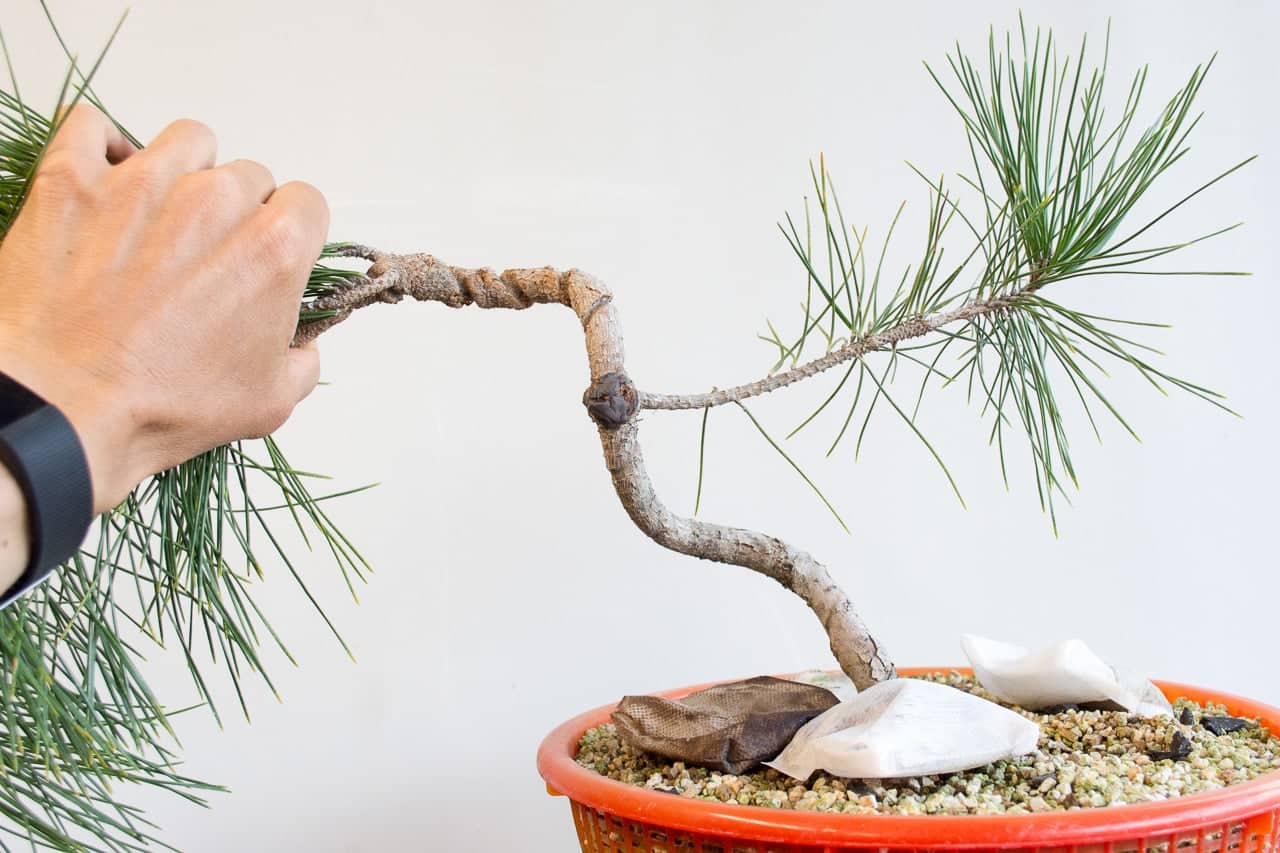
Wire marks above the first branch
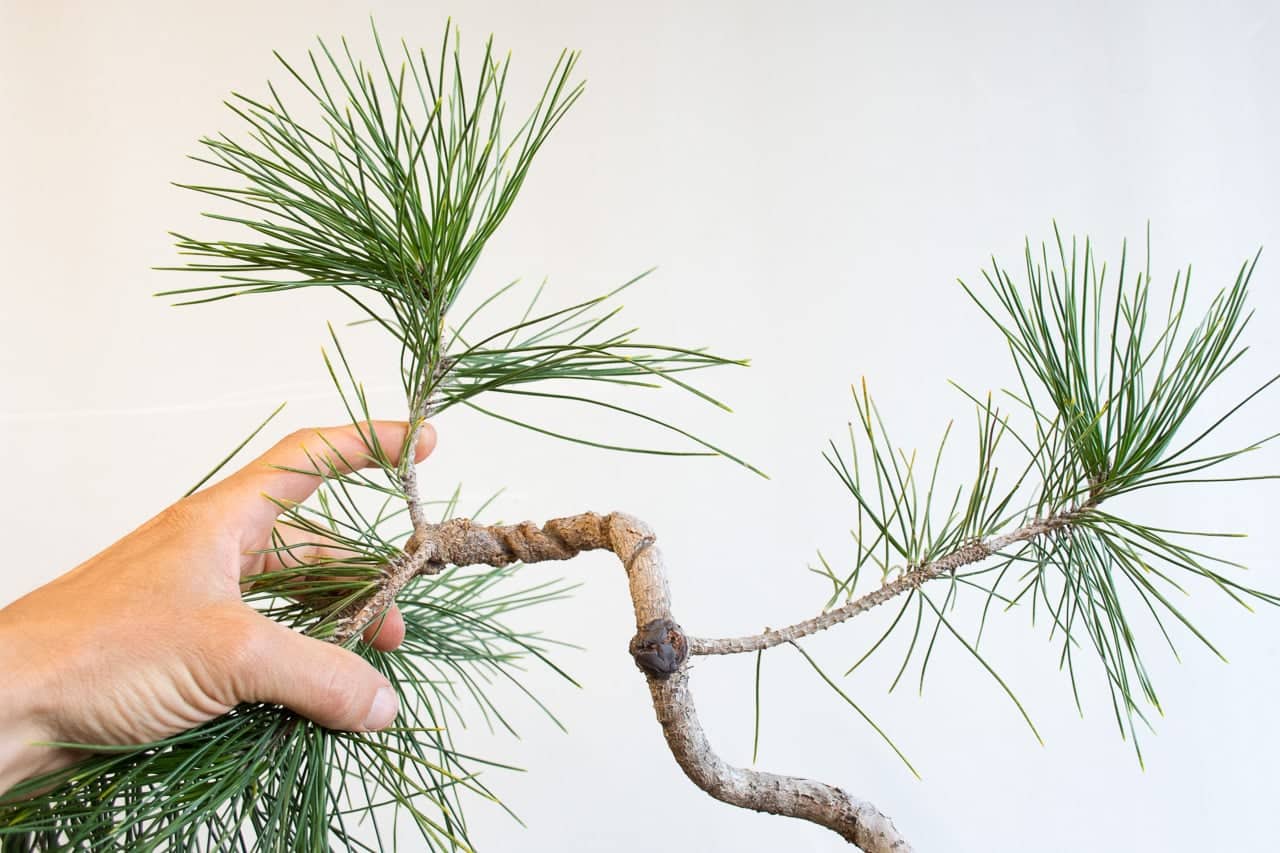
For young trees early in the development phase, it’s not much of a problem when the wire cuts in at the base of the trunk. Cut marks cause swelling and swelling near the base of the trunk can be a good thing.
If, however, the wire cuts in higher up along the trunk, the resulting swelling can cause reverse taper.
Depending on the available branches, there are three basic approaches we can take to reduce the impact of the swelling.
- Thicken the whole trunk, from top to bottom
- Focus on thickening the section below the scars
- Remove the section with scars
Here’s how these options might play out with the present tree.
Option 1
If I want the trunk to become 2-3″ in diameter near the base, the swelling caused by the wire marks will disappear long before the trunk reaches that size. I can let the new leader and sacrifice branches grow freely.
Option 1: let new leader (at top) and sacrifice branch develop freely
Option 2
If I want the lowest part of the trunk to be thicker than the section with wire marks, I can let the lowest branch grow freely for several years. This will thicken up the lower section while having no effect on the rest of the tree.

Option 2: let the lowest branch grow freely to thicken the first section of the trunk
Option 3
If I want the trunk to remain thin, I can remove the section with wire marks and use the first branch to become the new leader.
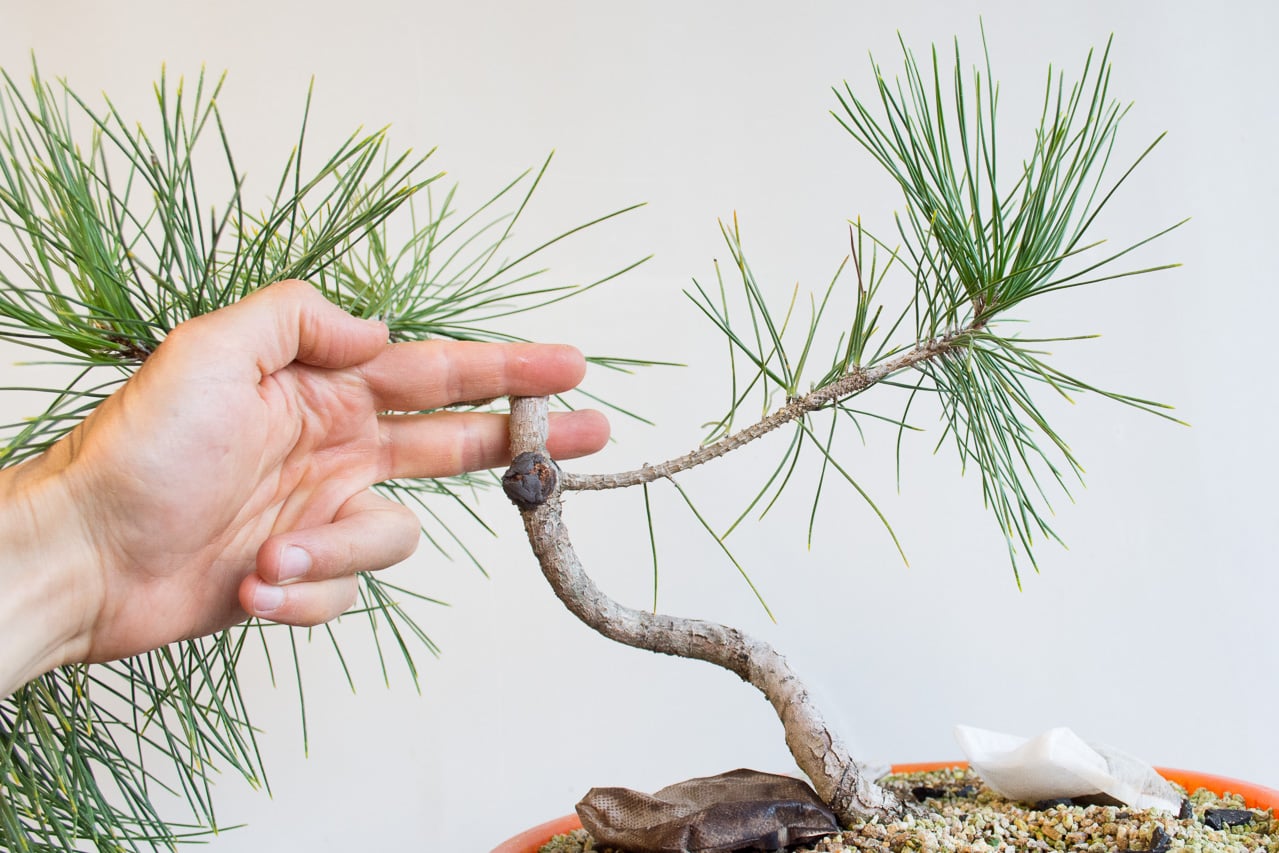
Option 3: remove the section of the trunk with wire marks and use the first branch as the new leader
About this (Occasional) Series
Over the years I’ve written a lot about basic approaches to developing bonsai – especially pine bonsai. Although I have fairly specific instructions for the first few years, the instructions tail off somewhat after that. The reason is two-fold.
For starters, I don’t have a lot of pines between 5 and 13 years old. As I do, I’ll write more about them.
More importantly, the recipe gets a bit fuzzy after 3-4 years. I tend to address specific situations during these middle years rather than execute step-by-step plans.
Some topics, including the present one, may seem obvious – especially to experienced growers. My intention is less geared toward demonstrating novel solutions and more focused on presenting the options I consider when working on young trees.
Many of the examples will feature black or red pines, though I hope for most of the topics to apply equally well to other varieties.
Let me know if any of this sounds useful or if these tips are best left in the workshop. Am looking forward to hearing what you think!
Subscribe to Bonsai Tonight
New Posts Delivered Every Tuesday and Friday
Brian says
Hi Jonas- this is a nice write up, and it’s a great read. Even as a beginner, this material is somewhat obvious, theoretically, but… I don’t actually have as many trees. So this write up helps me visualize the concepts in action, which is very valuable.
Andrew says
You say that you don’t have many pines in the [5, 13] year interval. So, you don’t actually know what you’re trying to convince us of with such a “confidence”: that your one or two year seedlings will become great bonsai with application of your techniques?
I say that you either show us (and I mean now) what those seedlings will become or relax your clairvoyance a little.
Andrew
Brian says
There is way too much info on this blog. It’s fun going back to his 2009 blogs, and start tracking the progress of some trees started from seeds, although in 09′ they were already a few years in; Unfortunately the write ups tracking the trees are not in sequence. I saw a few of those trees when I visited his nursery, recently. They are looking pretty sweet.
Laura says
Well, Jonas doesn’t CURRENTLY have pines in the 5-13 year range to post as examples of techniques, but that’s because the first ones he grew from seed are older than that now! I trust his knowledge of that stage of development, and am looking forward to his younger batch reaching the stage where he can use them in relevant tutorials.
Hoa says
As always Jonas good work, clear steps for us follow. Thank for taking the time to produce this stuff.
Mark comstock says
There is so much bad info out there. I will never turn away from your pine musings,,,,if we don’t start properly we certainly will not end properly. We all need to hear the fundamentals
Charlie Mosse says
Since JBPs are less forgiving than most other bonsai genus and species, having good info from the start is imperative. I have found that it does take a bit of clairvoyance in bonsai in general and a lot more for JBPs since they develop more slowly and making mistakes will cost one years. Appreciate the insights.
Kurt says
Thank you for your posts on black pines. You have a great way of explaining the information. That I can understand. I appreciate you taking time to do this. Please keep coming with more info on pines.
Cheers
Jonas Dupuich says
Thanks Kurt, will do. I have lots of pine-related fun planned for upcoming posts!
Laura says
Hi Jonas,
All your pine development posts are incredibly useful because they are illustrated so clearly. Please continue share your experiences, even if some of them may seem rudimentary to you! They are very much appreciated by me—and I’m sure by many others who don’t have easy access to a local bonsai club or workshops.
Thank you!
Laura
Jonas Dupuich says
Thank you Laura – am happy to hear you’re finding the site useful! Feel free to let me know if you ever have suggestions 🙂
Dirk Cilissen says
Hi Jonas
Its very nice to read your blog! We here are aswell growing and sowing and doing all kinds of stuff bonsai and garden related. So reading others experianses are a great help!
Keep up the good work!
Greetz from Belgium.
Dirk
Jonas Dupuich says
Thanks Dirk – great job with your blog, btw!