[8/16/16 – See the updated and expanded version: How to grow Japanese black pine from seed]
I planted pine seeds again this year – black and red. The seeds came from Shikoku, Japan. It’s legal to import pine seeds – permits are available from the USDA – and the process is surprisingly simple. Once I got them home, I waited impatiently for late winter to begin preparing them for spring planting.
In past years, I soaked the pine seeds in water for one to three days and then planted the seeds that sank to the bottom of the glass. This year, at the advice of a friend, I scarified and stratified the seeds before planting (thanks “Juan”!). Instead of dropping the seeds into tap water, I poured near-boiling water over the seeds and let them cool and soak for 24 hours. The hot water scarifies the seeds by softening up their hard coating – a necessary step for germination. I then placed the seeds in plastic bags filled with moist white sphagnum moss. I placed these bags in the refrigerator where they were intended to sit for one to two weeks. By stratifying the seeds – placing them in a cold, moist environment that simulates natural spring conditions – I help the seeds break their dormancy so they can sprout.
One thing seemed to lead to another and I didn’t get around to actually planting the seeds for over a month. No matter – the seeds sprouted just fine.
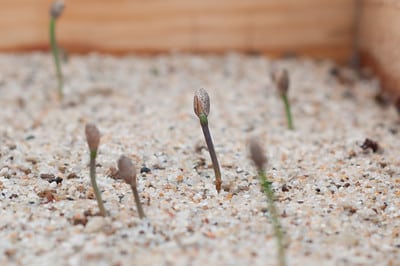
Seedlings rising from the sand
To better gauge the effect of stratification, I planted a number of seeds directly after soaking them for 24 hours. In the photo below, you can see that the stratified seeds, on the left, have germinated much faster and with greater consistency than the un-stratified seeds to the right of the aluminium wire.
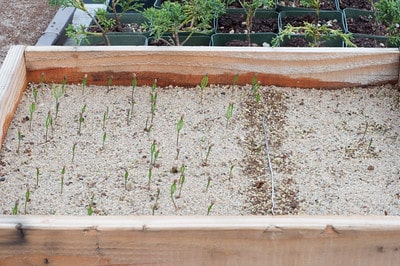
Stratified seeds :: un-stratified seeds
Continued warm weather is bringing more seeds into the light each day. It’s been a fun process to watch.
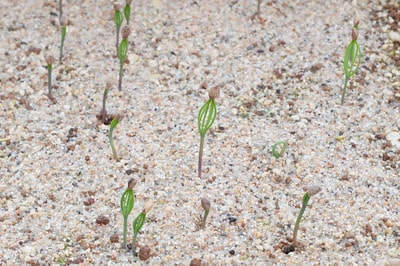
A seedling prepares to cast off its protective shell.
How are last year’s seeds doing? Pretty well. Most survived the seedling-cutting process and are now growing quickly. I’ve found that my pines take about two years to reach the height seedlings in Japan reach in their first year (see Bonsai Today #12 or #20 for comparison).
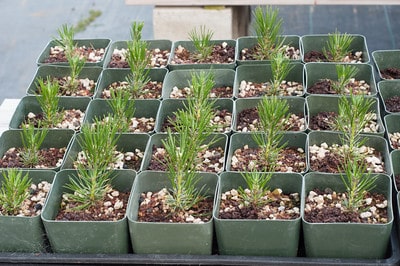
Two-year old seedlings
Not all, however, are as healthy as this. The most vigorous 2-4″ tall – the stragglers, somewhat less. You can see the range of heights below.
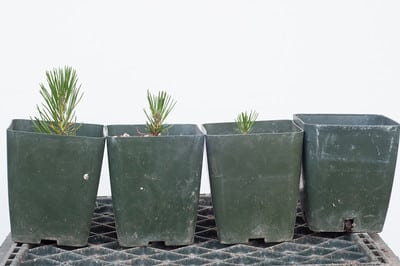
Two-year old seedlings
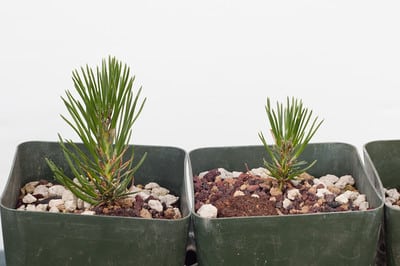
More vigorous seedlings
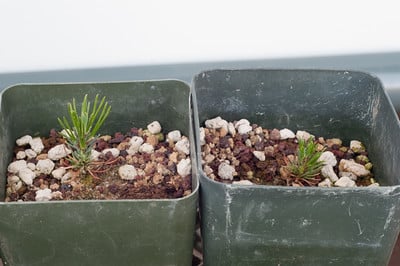
Less vigorous seedlings
For those who missed my posts about collecting and planting pine seeds, check out the following:
- Pine cone technique
- More pine cone technique
- Planting pine seeds
- How to create seedling cuttings – Japanese black pine
Subscribe to Bonsai Tonight
New Posts Delivered Every Tuesday and Friday
Tom Tynan says
Jonas – Do you ever have a problem with “damping off” – whereby the seedling extends, the casing or seed pod drops off – at that point the first few needles differentiate – then it wilts and dies? I am thinking our Northeast climate makes this harder than perhaps it should be…..do you typically cut all of your seedlings, and re-root to get the lower buds/branches at the base of the tree ? best wishes from New York, Tom Tynan
Jonas Dupuich says
Hi Tom – we don’t have as much trouble with damping off in Northern California. The biggest failure point I’ve noticed is after making the seedling cuttings. Almost all cuttings callus, and most of these root, but not all really take hold. Even now, almost a year after making seedling cuttings, I have a few green, but not growing, seedling cuttings that are headed for the dump.
yenling29 says
Wow what a differnce, I will try the same next time, thanks for showing your results!
Juan says
Nice results. Juan
pwk5017 says
Hey Jonas, do you prefer a sandier soil for rooting cuttings? I have a batch of 50+/- in a homemade flat in a soil of 50% sand 25% organic soil and 25% perlite and the root systems are incredibly compact. Compare this to another batch of 50 seedlings in 50% turface 50% perlite that have much longer and leggier root systems. Top growth is about the same for both soil types, but do you find it beneficial to have a medium that retains more water?
Jonas Dupuich says
Thanks pwk, that’s interesting to hear about the different root growth that results from using different soils for cuttings. These results are in line with the idea that coarse soils lead to coarse growth – at least for roots in this case.
I found it useful to use sandier soil that retained more water because I didn’t water carefully. The cuttings planted in coarse soil dried out a lot and didn’t fare well. Had I watered carefully or maintained more consistent humidity, I think the cuttings would have done best in less sandy soil.
Chris says
Hi Jonas,
I love your blog, and it’s been a great source of guidance for me. It was good to see how your cuttings from last year have fared, because I read your post on making the cuttings, and I’m about to make cuttings of my own. My seedlings have healthy-looking center buds, but grew really tall (about 2 inches) before they started growing the center buds, and the stems have not turned red – they’re still very green and have just begun showing a little bit of yellow/red at the very base. Do you think I should hold off on making the cuttings until the stems turn red? Or is is more important for the center buds to be ready? I’m in Southern California, so I wonder if the differences could be due to the warmer climate?
Jonas Dupuich says
Hi Chris, good questions – I’m curious myself. I want to make the cuttings before the center bud becomes too large but I also want to wait for the stems to change color. I started making my cuttings yesterday, erring toward cutting when the center buds are just opening up rather than waiting for the stems to turn color. I don’t know what the color change signifies, but have noticed that the three Japanese articles I have on the topic all suggest waiting for red stems. We’ll see how it goes. I may try to experiment a bit, and I’ll post an update later this week.
Erica Gunn says
I’m very new to bonsai, and I’ve just discovered your blog. This was very interesting; I’ve often considered scarifying seeds for garden plants, but have never done a side-by-side comparison like this. I can’t wait to read more about your experiments!