Sometimes during repotting, I feel like I’ve passed a point of no return. The feeling struck when I was working on a black pine this past winter.

After combing out the roots – there’s no going back
The pine – see Friday’s “Cleaning up a black pine” for a look at the tree today – is undergoing the transition from landscape material to bonsai. One of the more radical aspects of the transition happens in the pot – the switch from nursery soil to bonsai soil.
The first time I repotted the tree, I had to remove a lot of roots to get it into a smaller pot. This didn’t provide a good opportunity to change out much old soil as I wanted to keep the tree strong. Two years later, the tree was strong enough for a more invasive repotting so I went about bare-rooting half of the rootball.
Bare-rooting bonsai typically reduces vigor greatly and it can kill conifers. For this reason, it’s common practice to bare-root a portion of the rootball – maybe 1/3 or 1/2 of the rootball – one year and bare-root another portion in a subsequent repotting 1-2 years later. That’s the approach I took with this black pine. Here’s the tree before repotting.
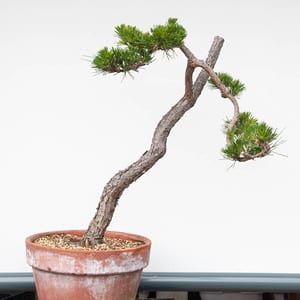
Before repotting
After removing the tree from the pot, I had to decide which side to bare-root. I selected the side with the least amount of roots. This reduced the stress to the tree – I could preserve more fine roots this way – and it left me with a solid chunk of soil that would help me anchor the tree in the pot.
When bare-rooting, I try to remove old soil without damaging the roots. This involves carefully combing out the roots with root hooks and chopsticks – a labor-intensive process. Depending on the condition of the old soil, I’ll sometimes rinse off the bare-rooted half of the rootball with water to completely remove the old soil.
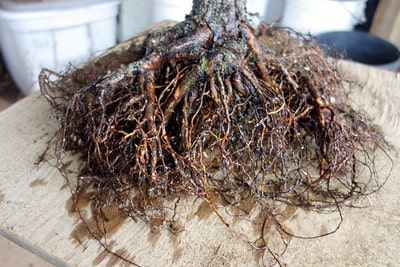
The bare-rooted half of the rootball
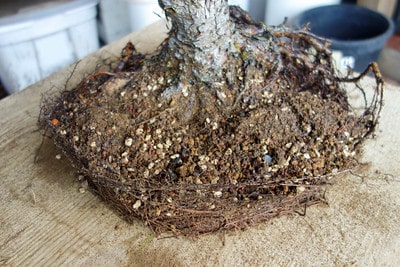
The intact half of the rootball
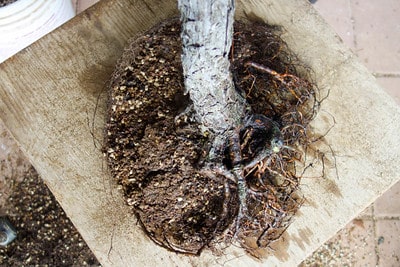
Half-bare rooted rootball from above
When the rootwork is complete, I take care to ensure the intact part of the rootball stays together. After adding a drainage layer to the pot, I nestle the tree into place and make sure it’s centered and positioned at the right height. Once the tree is set, I begin adding soil.
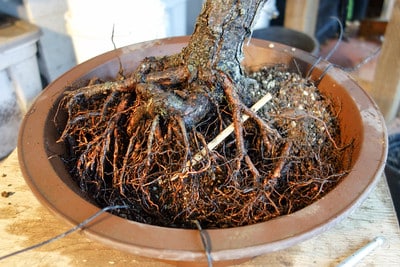
After setting the tree
I used a chopstick to prop up a root that was growing downward. In this new position, it can form part of the surface roots.
Typically, the next step is wiring the tree into the pot. When working with exposed roots, however, I work in soil between the roots before wiring the tree into place to avoid crushing the roots.
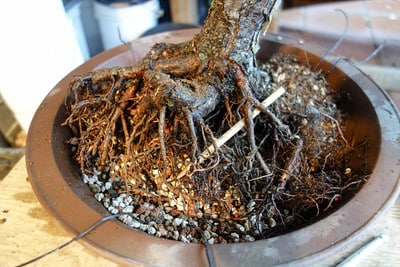
After adding some soil between the roots
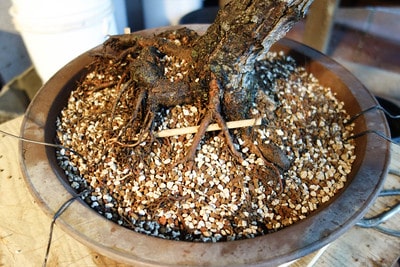
After adding more new soil – just a bit more to go
When the soil has covered the roots, I can wire the tree into place like I normally would.
If the tree is wobbly after wiring the rootball to the pot, I’ll add a prop or a guy line to help hold the trunk in place. The roots and intact portion of the rootball provided a good anchor for this tree so wire sufficed.
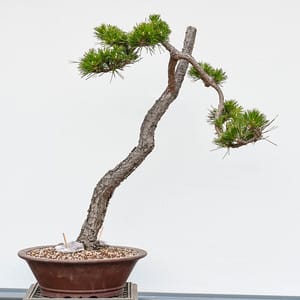
After repotting
I began fertilizing the tree a few weeks after repotting and am now feeding heavily in anticipation of decandling later this spring. I’ll think about removing the rest of the old soil in a year or two depending on how the tree grows in the meantime.
Subscribe to Bonsai Tonight
New Posts Delivered Every Tuesday and Friday
Paul says
Jonas, it looks as if you have really jammed the roots into a small pot. Is there an advantage to doing that or Is there any advantage to placing the bare rooted tree into a larger pot and then place the root ball into a smaller pot in one or two years?
Jonas Dupuich says
Hi Paul – good question. I would have used a slightly larger pot if I had one that was maybe an inch or two taller and wider. The new pot is almost as big around as the previous pot, but it’s shallower – a more appropriate shape given the style of the tree. After bare-rooting the tree, the roots didn’t take up much space so it wasn’t difficult to fit the tree into the new pot. Planting a bare-rooted tree in a larger pot can make care tricky as the soil with no roots will dry out more slowly than the soil with the roots.