Pines can look great after decandling and needle thinning. It’s when we have the best view of a tree’s structure which makes it a great time for making styling decisions and wiring.

Japanese black pine after decandling and needle thinning
About a week after decandling, you may notice some brown needles on your pine bonsai. This is most often due to improper handling of the foliage.
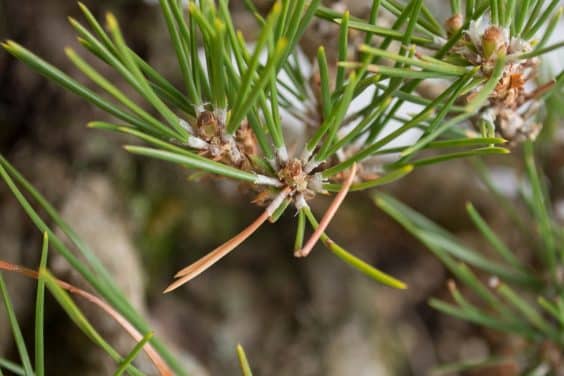
Damaged needles
Damage to needles can take a number of forms, from bends to breaks to scratches.
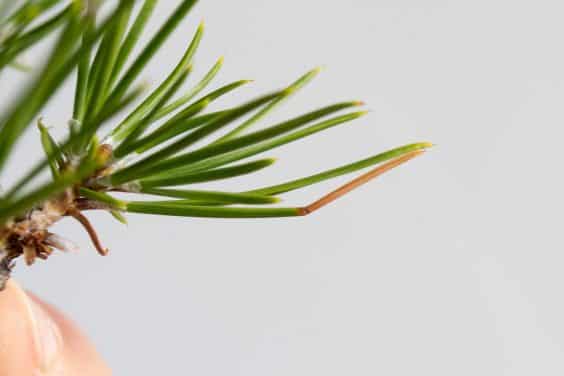
Broken needle
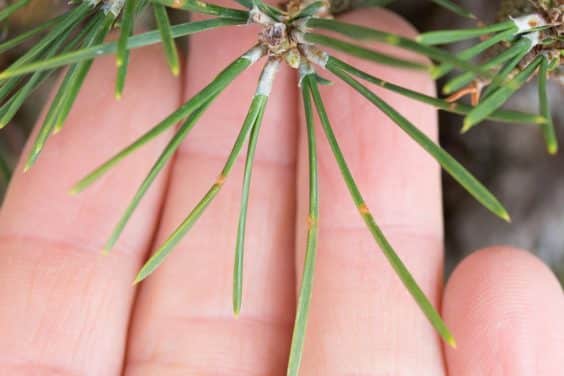
Brown spots where needles were bent
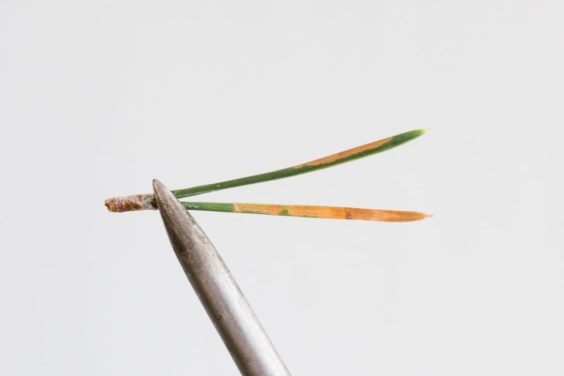
Damaged needles – likely the result of scratching with tweezers
There’s an easy to learn technique that can dramatically reduce damage to pine foliage. Simply put, move your hands through the foliage from the bottom of the tree to the top and never do the opposite. Reaching into a pine from the top down is a sure way to damage needles.
While simple in approach, this technique takes some getting used to, especially if old habits are well ingrained.
Here’s an example of what this looks like. If I want to work with a branch near the top of the tree, I start at the bottom and work my way up, following the direction of the needles.
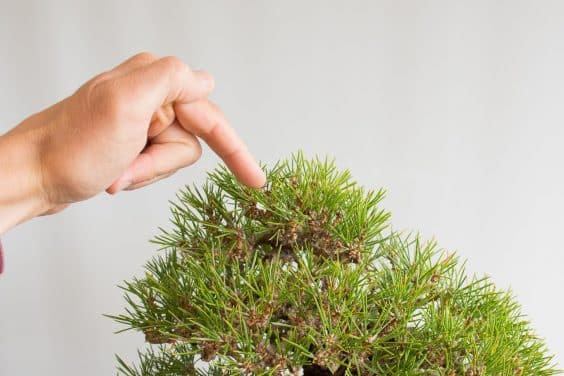
The branch I want to work with
I start at the bottom as there are no gaps between branches large enough to accommodate my hand.
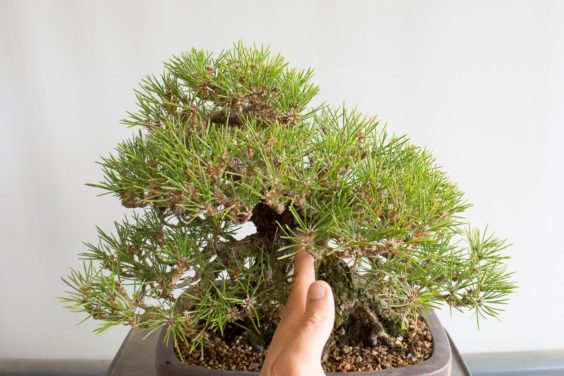
Finding a way in – starting at the bottom
From there I work my way up until I reach the target branch.
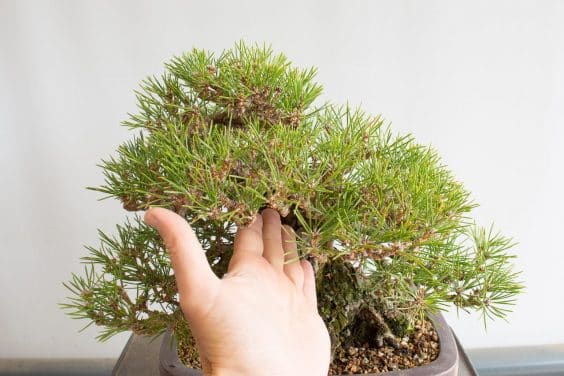
Working my way up
If I can’t go through a branch, I go around it.
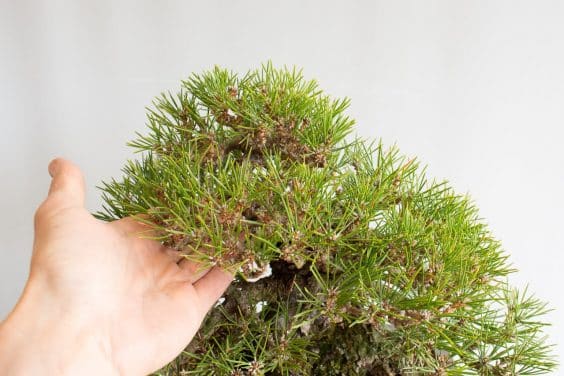
Going around a branch that is too large to pass through
At every turn my hand is pressing against needles, but as long as I’m moving in the direction in which the needles are growing, there will be no damage.
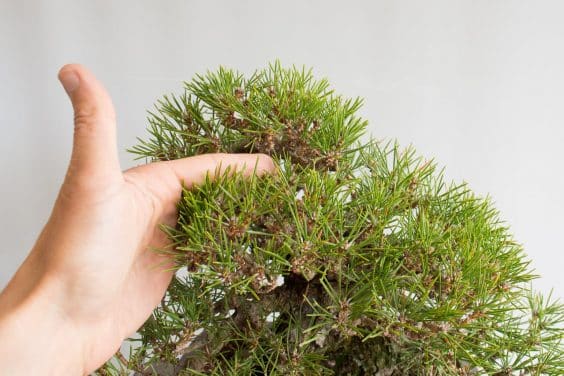
Almost there
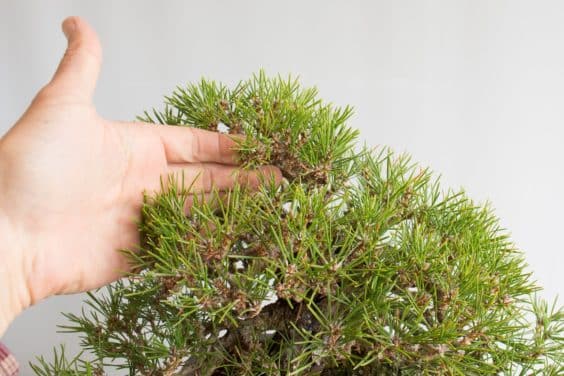
Made it!
If you look closely, you can see that I’m holding the branch between my second and third fingers. While using my thumb might give me a better grip, this is the best option for isolating the branch without damaging needles.
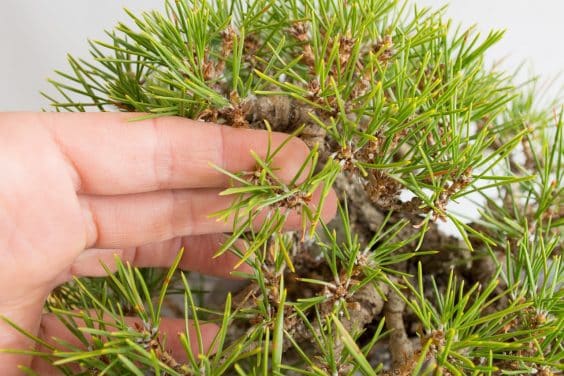
Holding a branch with my second and third fingers
From here I can count or pluck needles on the isolated branch or determine an approach for wiring the apex. Whatever the goal, when I’m done, I’ll continue moving my hand upwards until it’s clear of the foliage.
Why try to avoid breaking needles? The obvious reason is that brown needles are unsightly. And in cases where we’re accurately counting needles during thinning, broken needles undo our careful work and reduce the foliage beyond what we intended.
I remember when I first started working with pines that I thought I was doing a good job. About a week after decandling workshops, however, it became clear that the work was not as gentle as I’d thought. Over time things improved and moving through pine foliage became natural, and even fun. I hope the same is true for you and your pines too!
Subscribe to Bonsai Tonight
New Posts Delivered Every Tuesday and Friday
Ed Stanton says
A very helpful article on a subject that is rarely treated. As usual on Bonsai Tonight, the combined text and photos were perfect. Thank you, Jonas.
Jonas Dupuich says
Thanks Ed!
JC says
Hi Jonas
Great advise for all to understand in how to protect the remaining solar panels from damage.
JC
RA says
Well said–and it is so very basic……..and not just for pines.
Michael I says
How do you wire Japanese Black Pine without damaging the needles? Is it much the same technique?
Jonas Dupuich says
Super question. The simple answer is yes, a similar technique is used any time a pine is handled, including wiring. The only thing I can add is that great care must be taken, especially for more dense specimens.
Alexander Hoffman says
This is practically a perfect post:
1) Informative.
2) Illustrative photos (and really good ones, at that) that show what the text couldn’t possibly quite make clear.
3) Text that matches and explains the photos, while explaining things that the photos couldn’t possibly quite make clear.
3) Not redunanct with a billion other posts all over the internet.
4) Limited to a single lesson.
5) A very useful lesson.
6) The point is very clearly explained.
7) The value of of lesson is very clearly explained (the point about appearance and future foliage.
8) Useful and understandable for beginners, intermediate and advanced bonsai folks.
7) Comes off as humble, in the end.
Great job!
Jonas Dupuich says
Thank you Alexander! Feel free to let me know if you can think of additional topics to cover and I’ll see what I can do.
Laura says
Thank you Jonas, the photos are so helpful! I now realize that some places where I thought I had weird needlecast patches are actually physical damage. 🙂