When everything goes just right, a tree collected from the mountains begins to grow and gain vigor. After a while, it’s ready to begin the journey of becoming a bonsai.
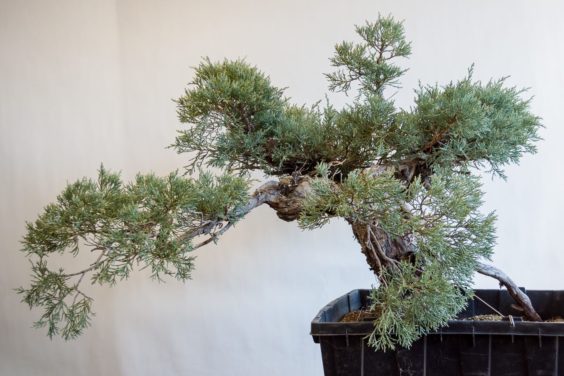
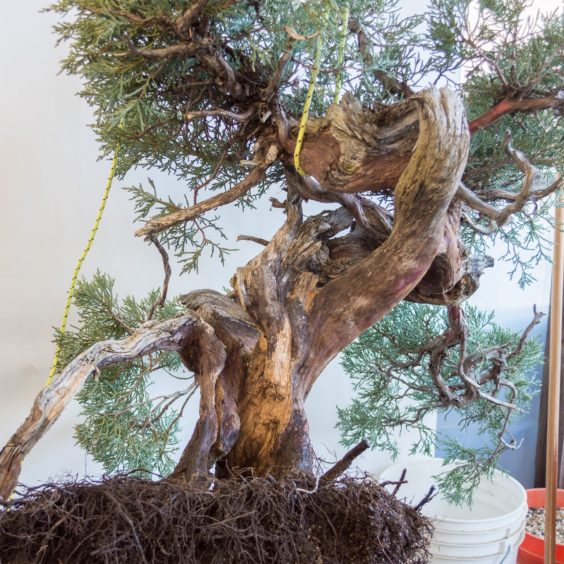
The Sierra juniper below is showing strong signs of vigor. Although it’s strong enough to begin styling work, I wanted to know what I was dealing with under the soil before committing to a design. The first step would be repotting.
Sierra juniper
Even though the styling will wait, the repotting is a great opportunity to start thinking about the front of the tree and the optimal potting angle.
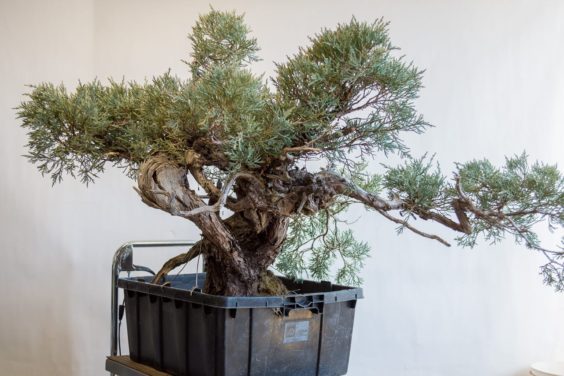
As seen from the back
As seen from the right side
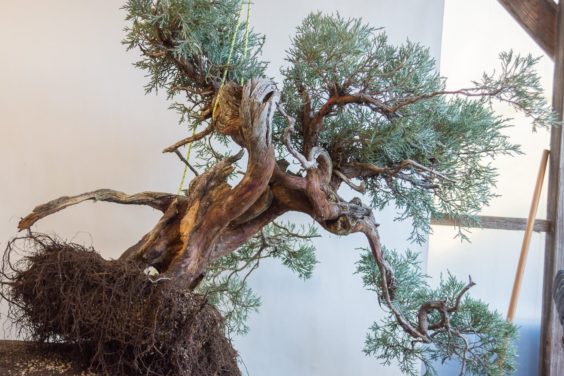
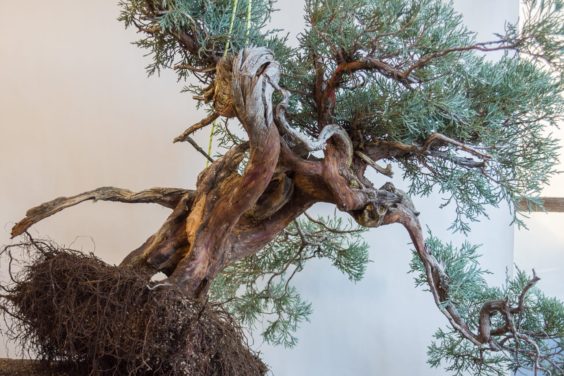
Daisaku Nomoto and I worked together on the roots and cleared away some soft deadwood near the center of the trunk. After some basic root work, we started looking at options for the front.
Upright but leaning strongly to the right
The view from further to the right
A better view of the jin coming towards the front
At this point I’ll state the obvious and note that the trunkline has an unusual shape. Some views of the trunk offer more movement, other views offer more deadwood. And as it is with so many trees, some of the most interesting views of the upper trunk left the viewer with the most narrow view of the lower trunk. Some compromises would be in order.
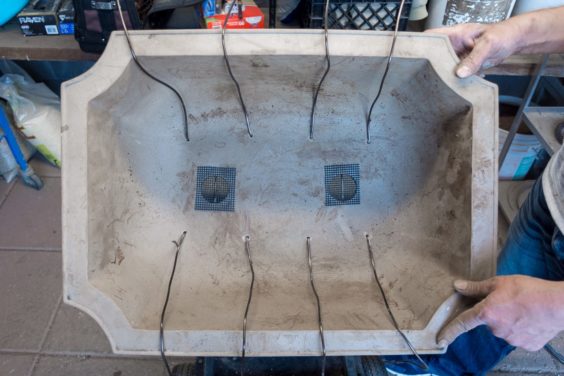
The pot, too, would have some say in the matter. I drilled extra holes in a large pot to accommodate extra tie-down wires before getting a close look at the roots. In the end, the tie-down procedure was simple and only a few of the wires were needed.
Preparing the pot
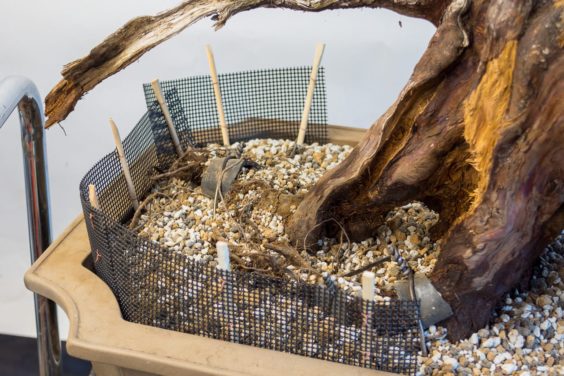
Daisaku and I ended up selecting a front that’s close, but not quite what we were looking for – some large roots prevented us from situating the tree at the selected potting angle. This left a large root slightly above the edge of the pot so we mounded up some extra soil and held it in place with a drainage mesh fence.
Chopstick and drainage mesh fence
Because the roots don’t stick up much, I’ll look to reduce the soil behind the fence starting in a few months. If all goes well, I’ll remove a little bit every couple months until the soil level is closer to the lip of the pot.
Alternatively, I could leave the fence in place all year and lower the soil level all at once this fall. Will wait and see how the tree is doing before making any decisions.
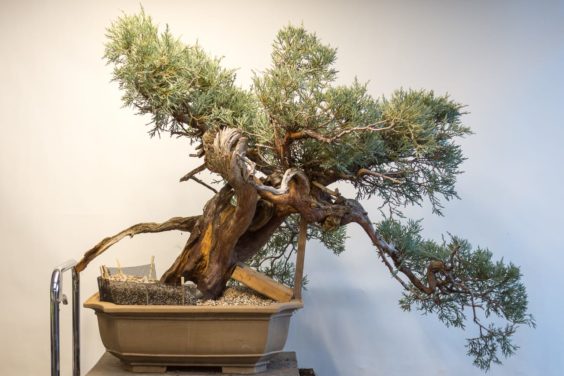
Here’s what we ended up with.
Repotting complete
I’d like for the tree to lean a bit more to the right and to bring the lower right branch slightly forward by twisting the trunk clockwise during the next repotting. In the meantime, I’ll be happy with the tree at this angle for the next 2-3 years.
Subscribe to Bonsai Tonight
New Posts Delivered Every Tuesday and Friday

Joe Graviss says
Great post! Thanks! How long did you leave it in the initial garden container after collecting it before re-potting please? Is there a basic rule of thumb, or just once it gets vigorous again however long that takes? Thanks!
Jonas Dupuich says
Hi Joe – the tree had been growing almost three years since it was collected. It’s common to let a tree get established before starting work, often about 2-4 years or more depending on how it’s growing.
Mark says
Great post as always. A couple of questions if I may. How long after collecting a juniper like this from the wild would you know if it is going to survive and what signs do you look for? How long after collecting this juniper did it start showing this type of vigor?
Mark says
Sorry, got ahead of myself and didn’t read the above comment and reply about how long it had been in the container before working on it.
Derek Belt says
Very nice tree. I plan on going to the Sierra’s this year to collect material. Is it hard to find somthing the right size you can work with?
Jonas Dupuich says
Ha, yes, it is not easy to find good material.