Several years ago, I published a series on how to repot bonsai. For those who missed it the first time, here is an edited version of the series in a single post. Enjoy!
How to Remove a Bonsai Tree from the Pot
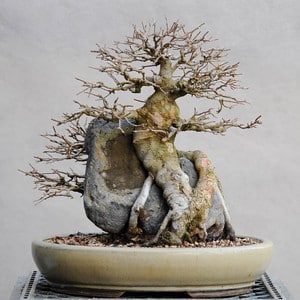
Before a bonsai can be moved into a new pot, it must be removed from its current pot. Here’s a trident maple bonsai before repotting.
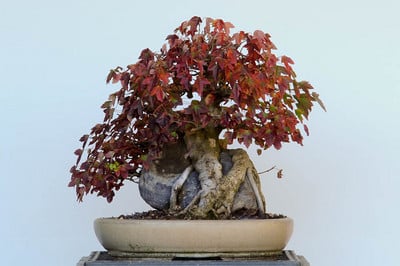
Root-over-rock trident maple
The first step is to remove all wires that poke through the bottom of the pot. I usually begin with the tie-down wires and then remove the clips that hold the drainage screen in place.
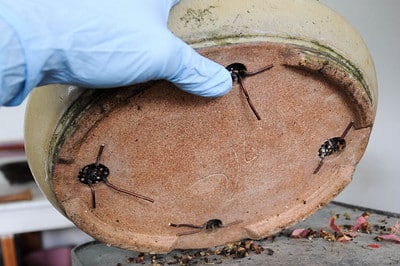
Tie-downs cut
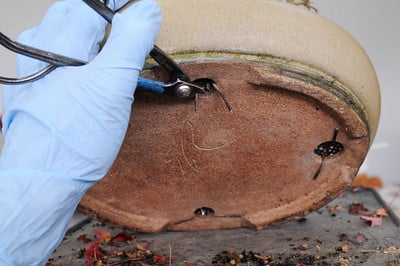
Cutting the clips
I’m always sure to remove all of the wires as a single remaining wire can help a tree cling to its pot with surprising tenacity. Once the wires are removed, I set the pot back down and get out the sickle.
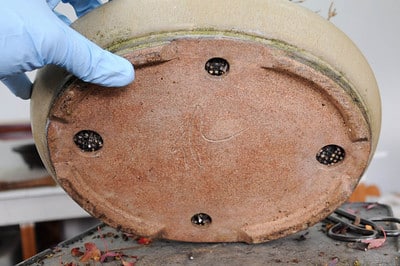
Wires removed – ready for the next step
Using a small sickle or a sod-knife, I carve a narrow trough between the rootball and the sides of the pot. This is the most dangerous part of the process. While one hand holds the pot in place, the other works quickly with a sharp implement. Watch out for your fingers!
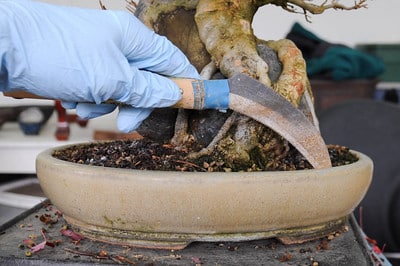
Separating the rootball from the sides of the pot with a sickle
I’ve found that a smooth, scraping motion works better than vigorous jerking or saw-like motions. How much scraping you do depends on the tree and the pot. Since the idea is to disturb the roots as little as possible at this point, it’s important to do no more scraping than necessary. That said, trying to remove a tree before the roots are free can damage roots.
For square, rectangular, and oval pots, work on the two short sides of the pot and one large side. Trees usually release from round pots after about half of the diameter has been cleared. In all cases, scrape to the very bottom of the pot. Because roots tend to circle at the bottom, stopping short of this mass can prevent the tree from coming out.
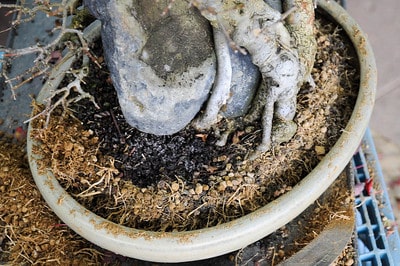
Soil cleared
Once the soil has been cleared down to the bottom, it’s time to remove the tree from the pot.
This step requires care. Try to keep the pot on the workspace while tipping the tree away from the pot by raising the end of the rootball that has been cleared with the sickle. Dangers at this stage include crushing branches and flicking pots to the floor.
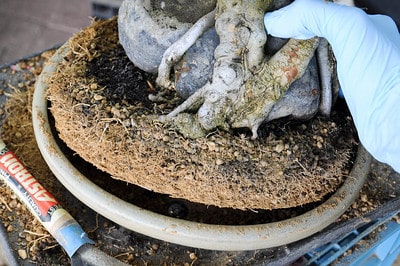
Tilting the rootball away from the pot
While this procedure may seem a bit formal, the idea is to avoid common pitfalls.
Preparing the Pot
The next step is preparing the pot into which the bonsai will be planted. This year I’m repotting the trident maple back into the same pot. I usually go out of my way to make a change when I repot, but it’s OK to reuse the same pot too.
It’s best to prepare the new pot before working on the roots. Preparing the pot involves scrubbing, covering the drainage holes with screen, and wiring the pot.
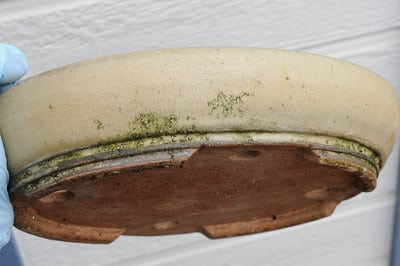
Grimy pot
I like to use a natural-bristle brush, but plastic brushes work well too. What’s important is the extent to which you clean.
I cannot overstate the importance of this next bit: do not be over zealous in your scrubbing! It’s easy to remove both grime and patina when scrubbing, though the goal is to remove the grime while preserving the patina.
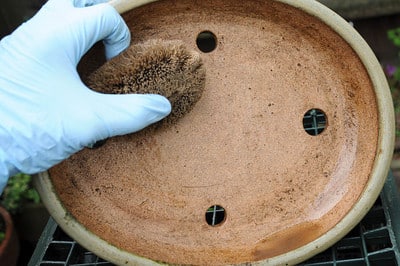
Scrubbing away soil residue
How much to scrub? A good way to start is to scrub lightly. This will remove most of the crust or loose dirt that can cling to pots. Beyond that, proceed with care. Some white residue from hard water is acceptable, too much is not. Green colored build-up is rarely appropriate. If you ever have a question about cleaning a specific pot, don’t hesitate to take it to someone you trust for advice. It’s not worth the risk and it could save you some effort.
Once the pot is relatively clean, it’s time to cover the drainage holes. The process is simple once you know how to do it. Measure a piece of wire about four times the diameter of the drainage hole. Bend the wire into a “z” shape with your hands and finish the bends with a pliers. From there, bend down the ends so they just fit inside the drainage holes. A good fit will prevent the screen from moving around. This helps keep soil in and bugs out.
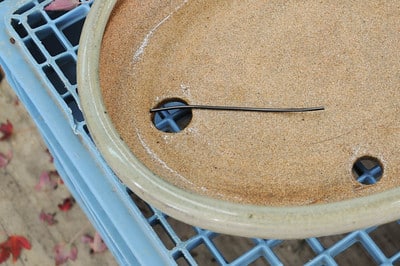
Measuring wire for the clip
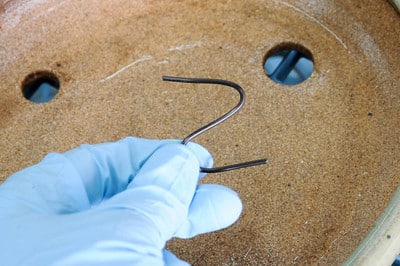
Starting a clip
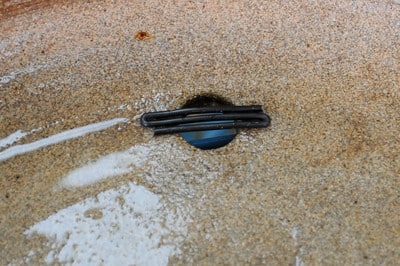
Checking the size of the clip
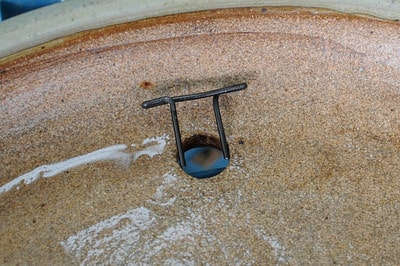
A completed “clip”
After the screen is in place, measure the tie-down wire. For rectangular and oval-shaped pots, get the length of the tie-down wire right by measuring two long sides and one short side of the pot as a guide. Differing shapes and drainage hole arrangements necessitate adjustments. Getting the length right becomes easier with practice.
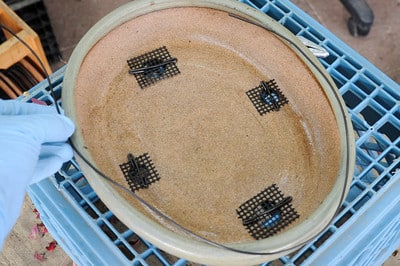
Measuring the tie-down wire
There are a number of techniques for securing trees in bonsai pots. Each method entails a certain arrangement of the tie-down wires. For the method I’ll be using with this trident maple, I arrange the wires as follows:
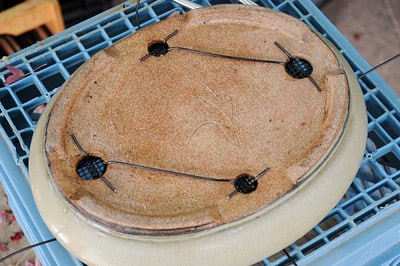
From below
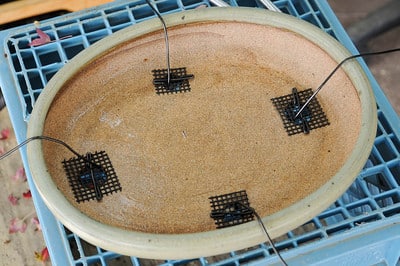
From above
Once the wires are in place, I bend them out of the way and set the pot aside until I’m ready to set the tree.
Why bother with wires at all? It’s a reflection of the difference between a nursery trees and bonsai. Bonsai typically require more care. Holding the roots in place while they grow into their new environment minimizes the damage that can result from jostling a tree around. It keeps expensive trees from blowing out of their pots and tippy trees from falling over. It’s a sign that we really care about the well-being of our trees.
Root Work
Great bonsai work requires great tree health, and great tree health begins with the roots.
Cutting too many roots can weaken or kill a tree – not cutting enough can lead to root rot or dieback and prevent good surface roots from developing. When done well, however, repotting can invigorate bonsai and give them the strength to recover from the most intensive styling techniques.
Trident maple is best repotted in late winter or early spring. And while most deciduous trees are typically repotted before they leaf out, tridents can be repotted as long as the new leaves are reddish in color. Repotting this late can slow a tree down a bit, but if it’s in otherwise good health, it won’t skip a beat.
Root-work begins, in this case, with the bottom of the rootball. After removing the tree from the pot, I can see that the roots are loose where the sickle passed, but nice and compact on the other side. Tipping the tree onto the untouched side can protect the rootball while I work on the base.
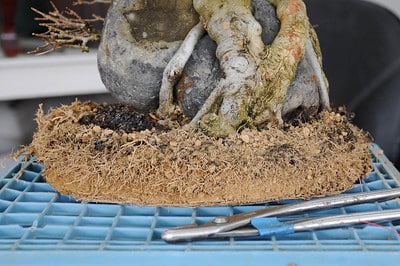
Rootball – where the sickle passed
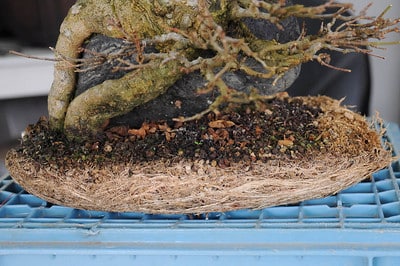
Rootball – the untouched side
I’m fairly picky about the tools I use when I repot. I’ve found that the rake below is perfect for combing out the roots on the bottom of the rootball. I work from the center and drag the rake outward while keeping it parallel with the base of the tree.
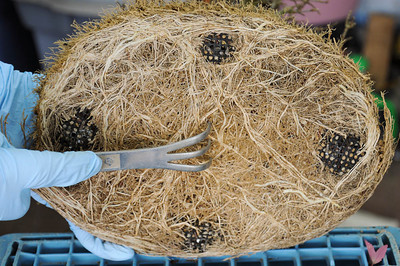
Raking the base of the rootball
I try to keep the base as flat as possible when I work to avoid causing air pockets when I set the tree in the pot. Holding the rake at an angle or working for too long in a single area can quickly create pockets, and in some cases, can weaken the entire rootball.
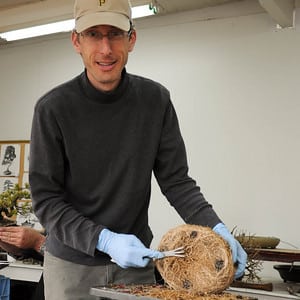
Working on small trees planted in good soil is fun work
Cutting roots flush with the soil can make it hard for the roots to grow into new soil. By leaving a little root sticking out from the rootball when I cut, I can help the roots integrate into the new soil.
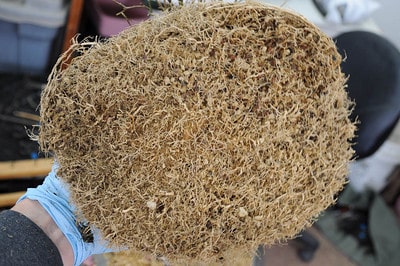
Root-work completed on the bottom of the rootball
Once the base is done, I can set the tree down and work on the top and sides of the roots. Bent-nose tweezers are great for this. I’m careful, however, not to hold the tweezers too high when I work. Holding tweezers at steep angles can snag roots, causing them to snap or tear. By holding tweezers at a lower angle, I can help the tips glide over roots without damaging them.
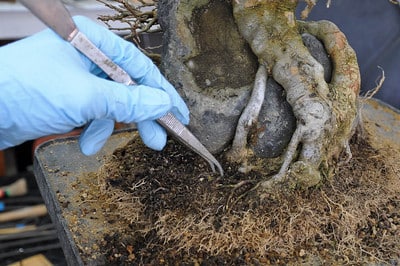
Improper tweezer technique (angle too high)
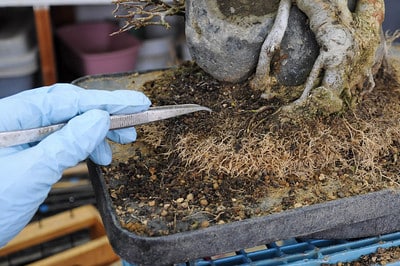
Better tweezer technique (appropriate angle)
You may have noticed that the soil is darkest near the surface of the roots. That’s evidence of the organic fertilizer I use – cottonseed meal, in this case. To improve the drainage, I scrape away as much of it as possible. When I’m done, I cut the roots just past where they come out of the soil.
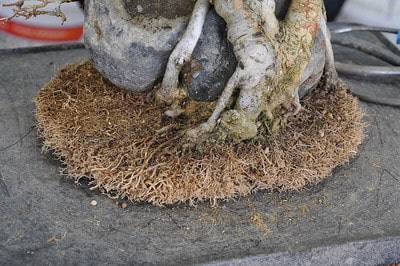
Root-work completed
Securing the Tree in the Pot
Once the tree and pot are ready, it’s time to put them together. For starters, the pot gets a drainage layer of pumice. If the pot were much thinner or the climate warmer I might skip this step, but I’ve found my trident maples do well with a pumice drainage layer.
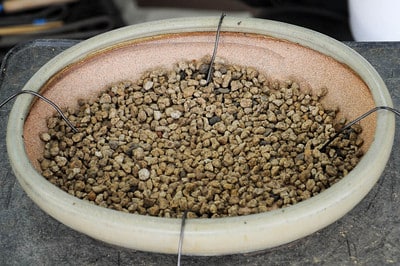
Pumice drainage layer
After spreading out the drainage layer, I add my deciduous bonsai mix – mostly akadama with pumice, lava and charcoal. I typically form a mound in the center of the pot when I pour in the mix to help prevent air pockets from forming when the tree is set. If the base of the rootball is concave, this is important.
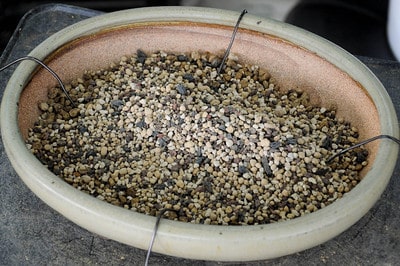
Mound of bonsai soil
Next comes one of the most important parts of the whole process – setting the tree. Although it’s not a very technical maneuver, it requires care to make sure the tree ends up in the right spot. After nestling the tree into place, check the location of the tree, the height of the rootball, the tilt of the tree, and the front. Make any adjustments, if necessary, before securing the tree into place with wire.
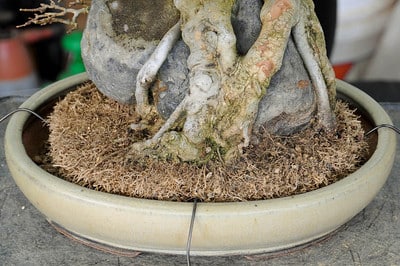
Setting the tree
There are many ways to secure a bonsai in a pot. The goal is to prevent the tree from moving to avoid damaging new roots.
Before I attach the first two wires to each other, I add a “tail” – an extra piece of wire that will help me make my final connection as I work my way around the rootball.
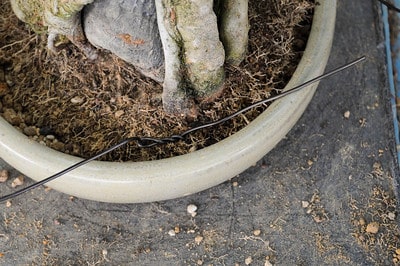
Adding a “tail”
I then pull the first wire to a location above the spot where the second wire comes through the drainage hole. I make a few twists by hand and continue around the tree until it’s time to connect the final wire with the “tail” I attached to the first wire. This final connection requires pliers.
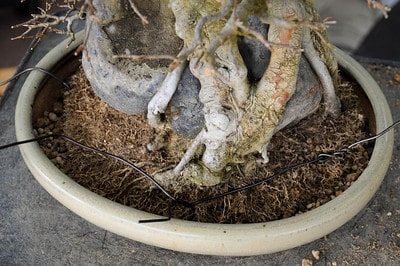
Securing the tree
A subtle but important trick to using pliers: pull, then twist. If you’ve repotted at Boon’s, you’ve heard the phrase before. The idea is to pull the wires taught, then slightly release the pressure as you make the twist. Doing this helps one avoid breaking the wire.
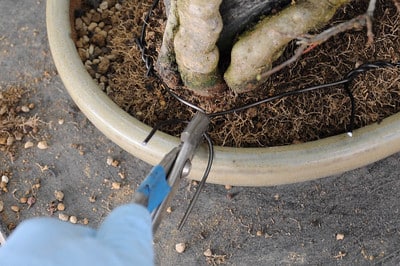
Proper plier technique: pull
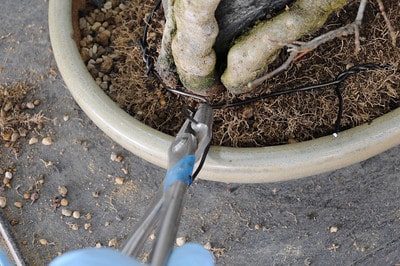
Then twist
When done well, using the pliers for the final connection tightens all of the other wires. It’s a fast and effective way to secure a tree.
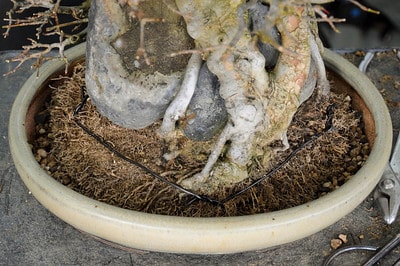
Tree secured
Before adding more soil, I trim any extraneous wire.
Finishing Touches
The hard part is over. The next step is to add more soil to the pot.
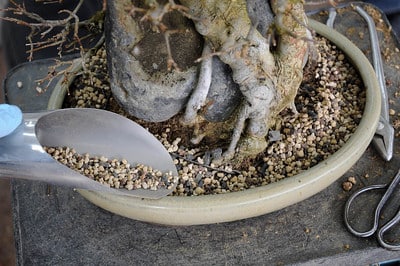
Pouring the soil with a scoop
When working the new soil into the roots, chopsticks come in handy. I usually jab lightly at the soil with one hand while holding the pot and soil in place with the other. Skipping this step can result in air pockets that make it tough for the roots to take hold.
It’s fun, at this stage, to wiggle the chopsticks about. Wiggling really works the soil into place and is especially effective at filling pockets between large roots or cavities beneath the trunk. Over-wiggling, however, is counter-productive. Unless there is a big gap to fill, it doesn’t take much.
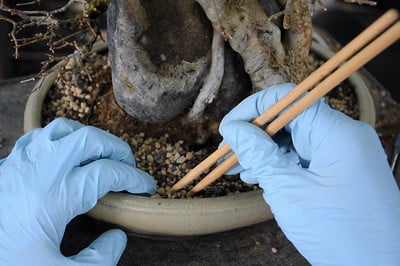
Working the soil between the roots with chopsticks.
Before getting a final level on the amount of soil in the pot, a careful bump can settle things a bit. When doing this, I very carefully hold the tree and pot in place with one hand while bumping – just once or twice – with the other. Careless bumping can upset the soil and occasion a do-over. If the soil drops dramatically, it’s a sign that I didn’t use chopsticks enough to work the soil into place.
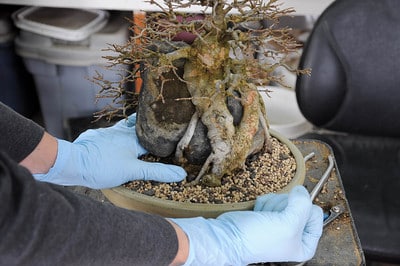
Bumping the pot
A small brush can help get the soil to the proper level. Of brush-technique: holding the brush at a high angle makes it hard to level the surface of the soil and can easily gouge out additional soil. Holding it close to parallel to the surface of the soil pulls the largest soil particles out of the mix and makes for a nice level.
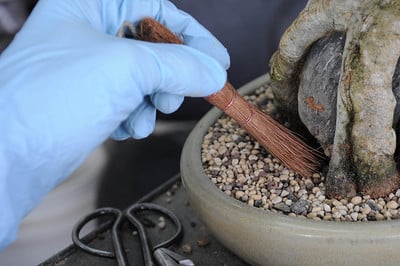
Leveling the soil in the pot – improper brush-technique
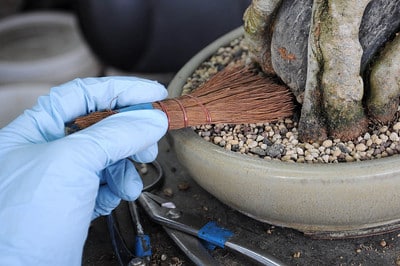
Proper brush-technique – the brush is nearly parallel with the surface of the soil
A trowel can make the surface neat and tidy. I’ve seen long trowels and short trowels, custom trowels and mass productions. I have two, but I rarely use them. I like patting the surface of the soil with my hands instead. It works almost as well and is much faster.
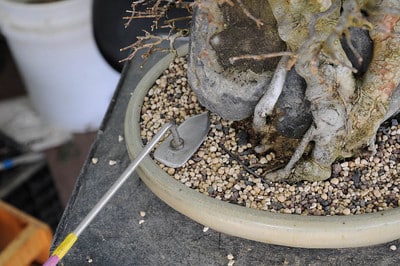
Tamping the soil with a trowel
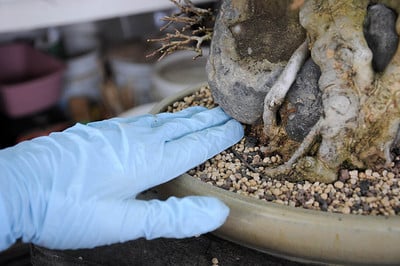
Tamping the soil with my fingers
As soon as this is done I go outside and water the tree. The rule about watering until the water runs clear is sound. The more dust particles you can wash from the soil, the better the soil will drain. It’s at this point that I gauge the effectiveness of the work. If the drainage is poor after repotting, I need to start over.
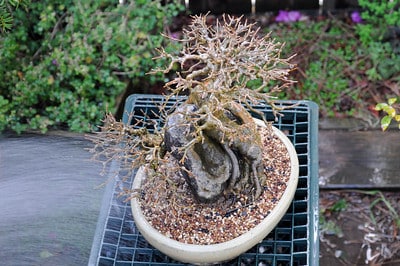
Watering the tree
The tree is now set for the coming year.
Repotting complete
The above covers many of the repotting basics. But as with so many bonsai techniques, there is a lot more to say on the topic. If you still have questions about how and when to repot, don’t hesitate to ask someone with experience growing bonsai in your area – it’ll be worth it!
Subscribe to Bonsai Tonight
New Posts Delivered Every Tuesday and Friday
mybabyciv says
Sweet tips for people getting into the hobby! Glad that you have the time and resources to provide us with accurate info on repotting!
Russell Stevens 502-594-0508 ISA Arborist KY-0790A http://www.twistednaturebonsai.com
Please excuse the brevity as this message has been sent from a mobile device.
>
Dave Martin says
Excellent in depth post Jonas??
Todd says
I don’t see the step where you defoliated the tree. Had this tree just leafed out (spring)? Or was it later in the summer? Would you defoliate tridents any time you repot them, if they are in leaf?
Jonas Dupuich says
Good question Todd – the tree in this case was repotted in late fall. It’s common to remove the leaves once the majority of them have turned color.
Gary Croft says
Thanks Jonas for an informative,concise aticle.
My guys have started to move early this year and have caught me on the hop-climate change has knocked schedules out a bit. But Tridents are tough little devils I’ve found
Am heading off to Tokyo/Omiya in 11wks time taking a friend who wants to see quality gardens in Japan.
Then heading into Hokkaido.
Would have liked to catch up with Juan but he has finished at Aich-en I have read
Jonas Dupuich says
Thanks Gary – have a great trip!