Almost a year ago to the day I wrote about a Japanese maple I’d taken on that was ripe for several long-term projects (see Restoring an old Japanese maple). I started on the first, an air-layer, this past weekend at a BIB workshop.
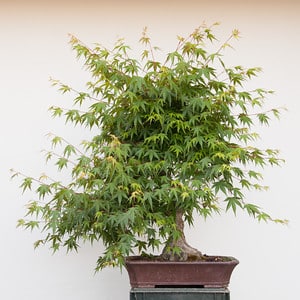
Japanese maple
I would have layered the tree last year, but I had just repotted it and I wanted the tree to be strong before starting a layer. Now quite healthy, the tree is ready for layering.
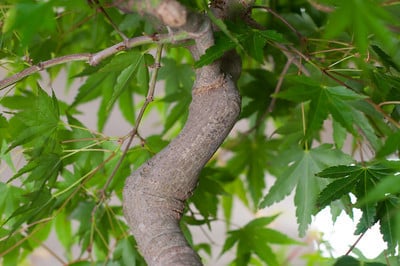
Section to be air-layered
The first step is selecting a location for the new roots and removing a ring of bark just below that spot.
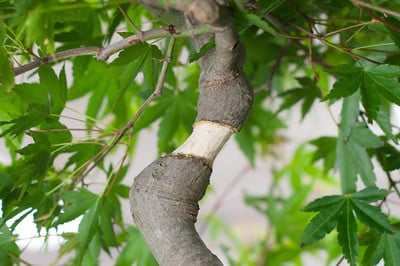
Bark removed
Why did I choose the narrow section of the trunk between two bulges that would have left me with a larger nebari? Short answer – this is actually the first of two layers. Once I remove the top of the tree, I plan to turn it on its side and layer it a second time to make a clump-style bonsai. For now, I simply need enough roots to allow me to separate the tree from the lower trunk. That’s the plan for now anyway.
After removing the bark, I applied a small amount of rooting hormone to the upper ring of exposed bark, wrapped the peeled area in moist white sphagnum moss, and covered the whole with plastic.
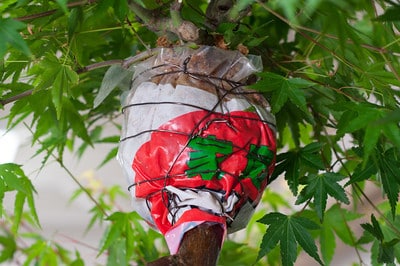
All wrapped up – layer complete
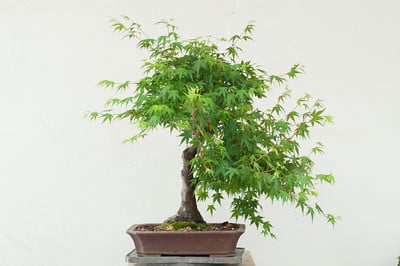
After preparing layer and minor cutback
I next turned my attention to a significant scar at the base of the trunk.
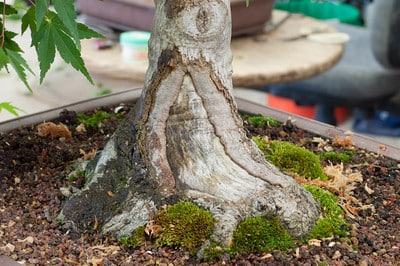
Large scar
Somehow the wound is actually closing from all sides as the roots below the scar are still alive. This gives me hope that the scar might someday close. To speed up the process, I opened up the edges of the scar and covered the entire area with cutpaste.
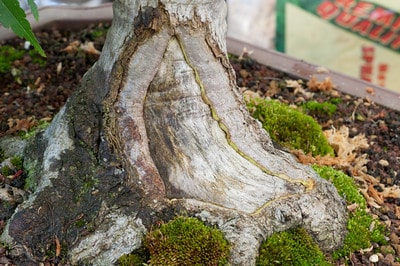
Re-opening the wound
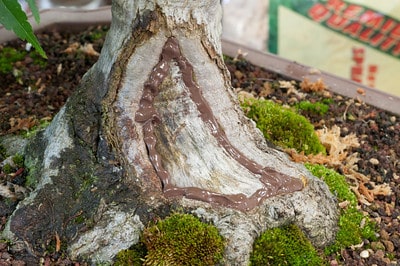
Covering the open wound with cutpaste
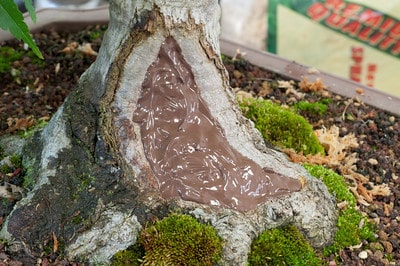
Covering the rest of the scar with cutpaste
You likely noticed that the “cutpaste” looks more like chocolate pudding than the typical bonsai cutpaste. I used “joint caulk,” a Japanese product whose intended use I don’t fully understand. Junichiro Tanaka has been using the compound for some time on bonsai and has seen great results so I bought a tube and have been using it on all of my trees.
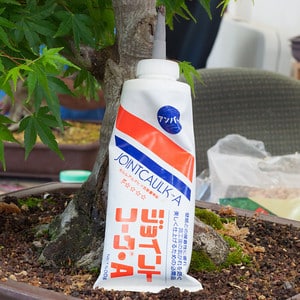
Joint Caulk-A (aka ジョイント コーク•A)
A few seats away from me, Carol was uncovering some scars that were treated one and two years ago. In the photo below, the upper scar was gouged out last year. The lower scar was treated two years ago and is now almost entirely healed over.
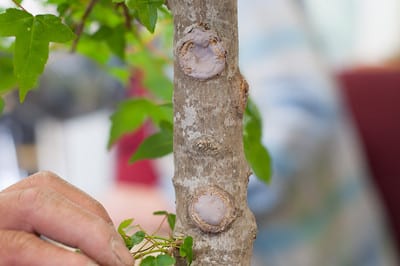
Scars on trident maple
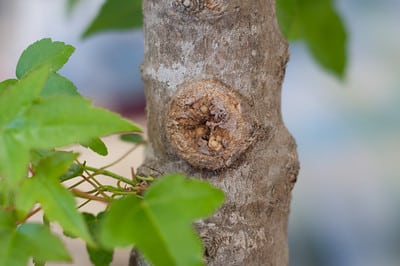
After removing the cutpaste on the lower scar
I don’t expect the huge scar on my Japanese maple to heal so quickly. Even if I planted the tree in the ground, I’d still expect at least 3 years to pass before it closed up completely. As the tree still needs plenty of work, I’m in no hurry.
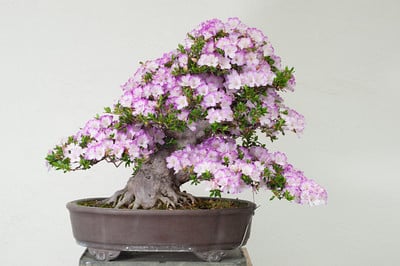
Jeff’s satsuki azalea
I couldn’t resist posting a photo of the azalea above. Jeff left it in the workshop so we could enjoy the flowers – I hope you enjoy them too. And thanks again for reading. Somehow this is my 300th post. Were it not for your readership and helpful comments, I’d have stopped long ago. Here’s to the next 300!
Best regards,
Jonas
Subscribe to Bonsai Tonight
New Posts Delivered Every Tuesday and Friday
Roald says
congratulations with your 300th post, keep up the good work.
Richard Franklin says
i have been doing my bonsai hobby for 3 years i have learned a lot from u saved the information for future use thanks
Daniel Dolan says
Jonas:
Congratulations on 300th Post.
How often will you water moss? When will you first check for roots? If all goes well when would you expect to separate layer? Lastly………thought plastic had to be black?
Regards,
D/D
Chicago
Jonas Dupuich says
Hi Daniel – I water the moss when I moss the tree to make sure it stays moist. I don’t usually check for roots. In fall or early winter I’ll see through the bag whether or not there are enough roots to warrant removing the layer. If there aren’t enough roots by early winter, I’ll likely wait until next fall. I’ve yet to use black plastic for layers. I can imagine dark plastic would generate more warmth than light-colored plastic, but too much heat might not be a good thing. As my layer is shaded by dense foliage, the difference may be moot.
leebates says
Jonas: Thank you so much for your posts. You are doing a great service to the bonsai community. your posts are not only educational but enjoyable too!
Zack Clayton says
Interesting, Is the Joint Caulk-A available in the US? Does it stay pudding-like for the time it is on or does it eventually harden? if it stays moist, how much residue does it leave when it’s removed? I don’t like the harder pastes in the tub and the green toothpaste tubes are a little bizarre.
Jonas Dupuich says
Hi Zack – I don’t know if Joint Caulk-A or anything like it is available in the US. It dries hard, not unlike the harder paste in the green tube, though I haven’t had a lot of trouble removing it when the time comes.
Roger A. Ayres says
Another great post. Im glad its your 300th post. And thanks. I always wait impatiently for each. bonsai has become important part of my life. I am a fine artist with art work all over the world so I can appreciate bonsai as its equal in living form, Its a stress release and joy bringer. So I am happy to thank you for spending your time to bring your hard earned experience to me via your blog. I’m just sayin’
Roger A.
Jason Gross says
Jonas,
Thanks for your posts. I read them regularly and find them very informative.
chuhin says
Jonas, Congratulations!!! you have done so much for bonsai community.
Jay Miller says
Congratulations on your 300th, and thoroughly educational posts! Will await the results of the air layer for the 2013 season.
Jay Miller
chris says
Opaque plastic whether black or not may promote better growth. After all, roots grow best in the dark below the soil, and chage their nature and abilities when exposed to light and air
Jonas Dupuich says
Thanks Chris, that makes sense. I may experiment next time with a variety of plastics to see if I can find any patterns.