Two years ago I found myself with a few dozen young Japanese beech. They were mostly the same size and age, and they weren’t very far in their development as bonsai. They were perfect, in other words, for a group planting.
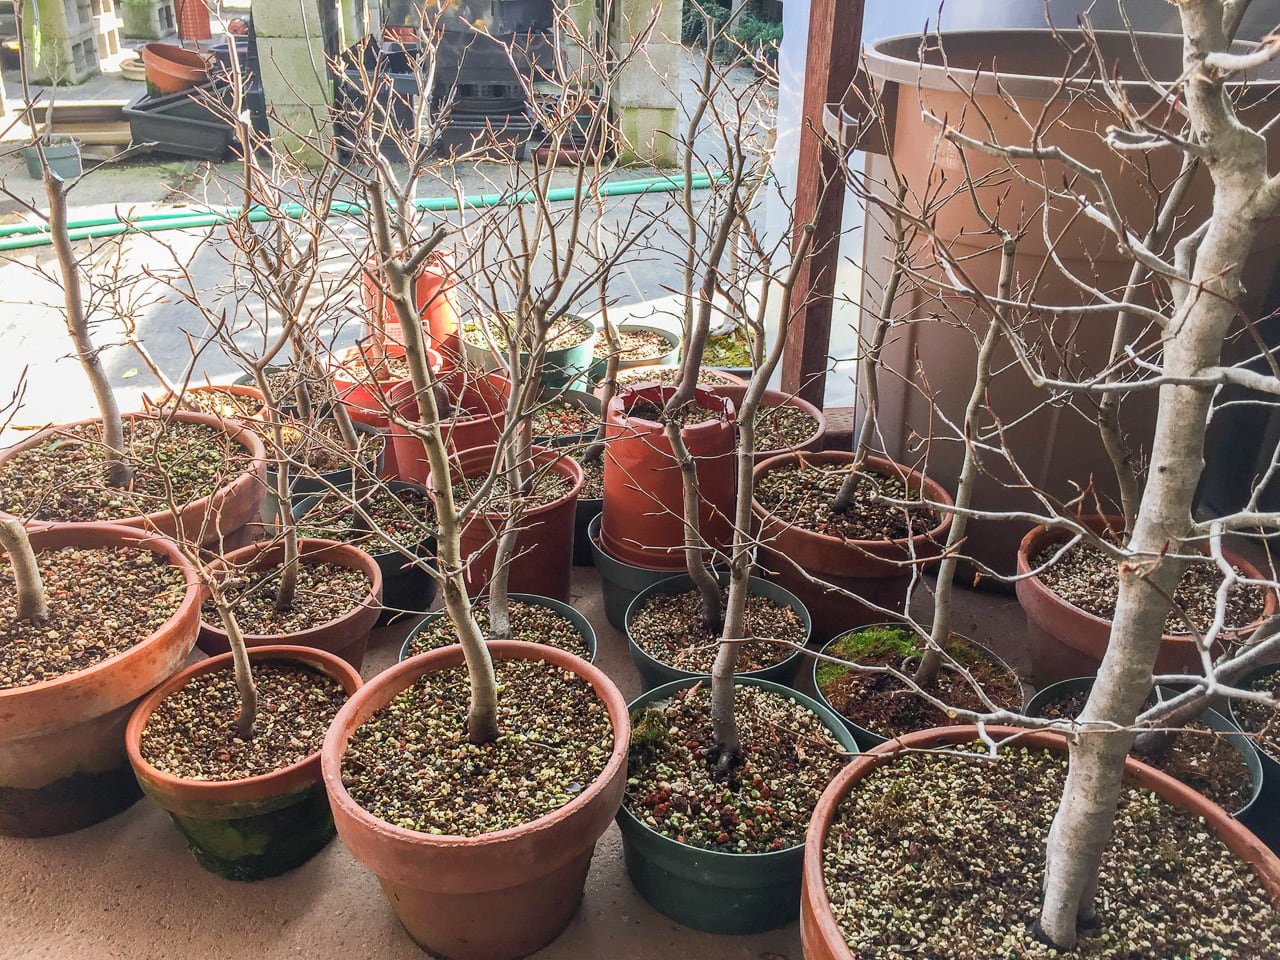
Young Japanese beech
Because the trees were so similar to each other, I started looking for larger specimens. Over the next year, I found two that could provide some variety to the mix. Last November, I bare-rooted all of the trees and began assembling the forest.
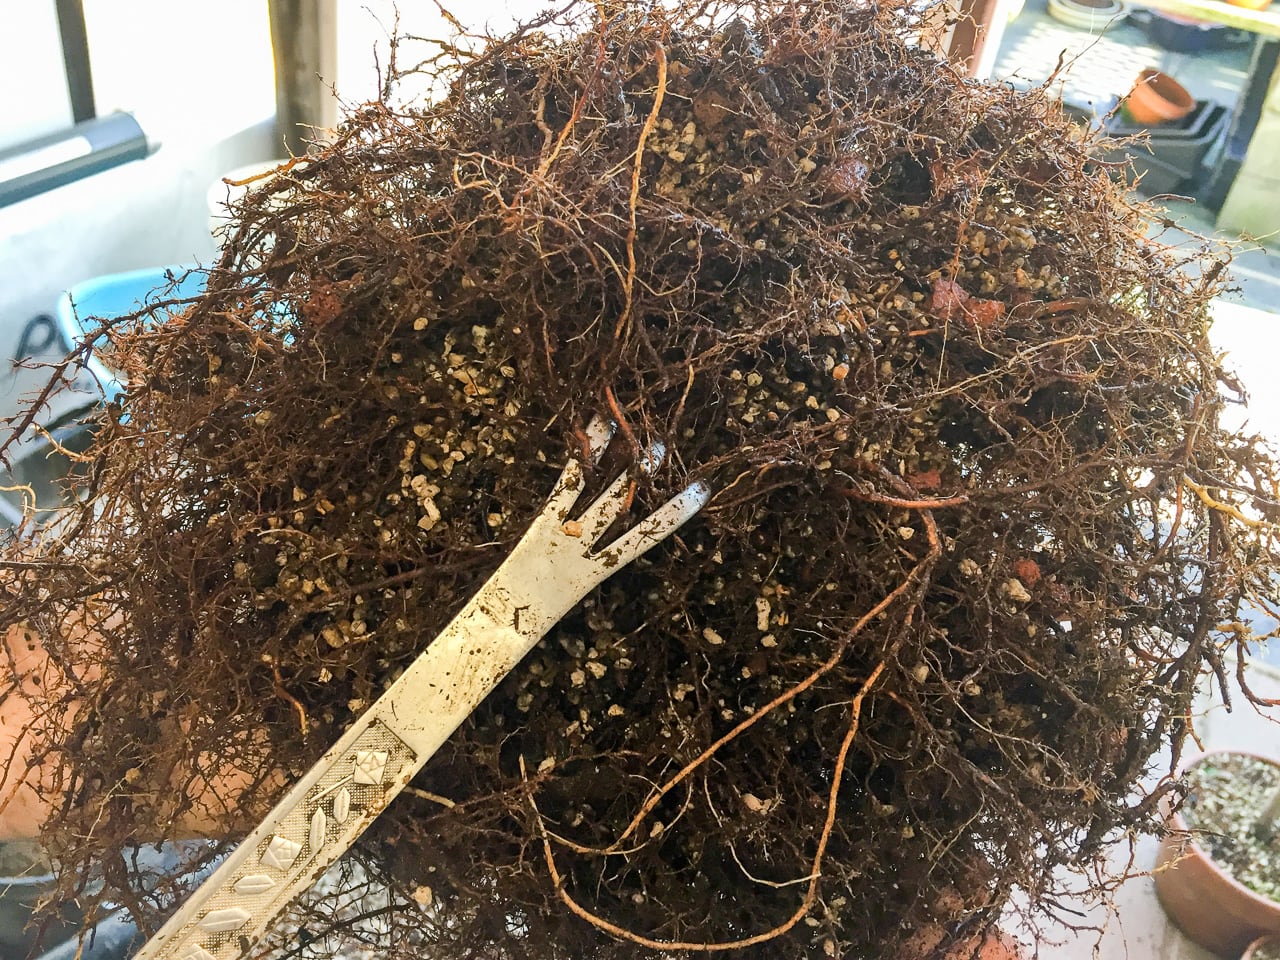
Combing out the roots
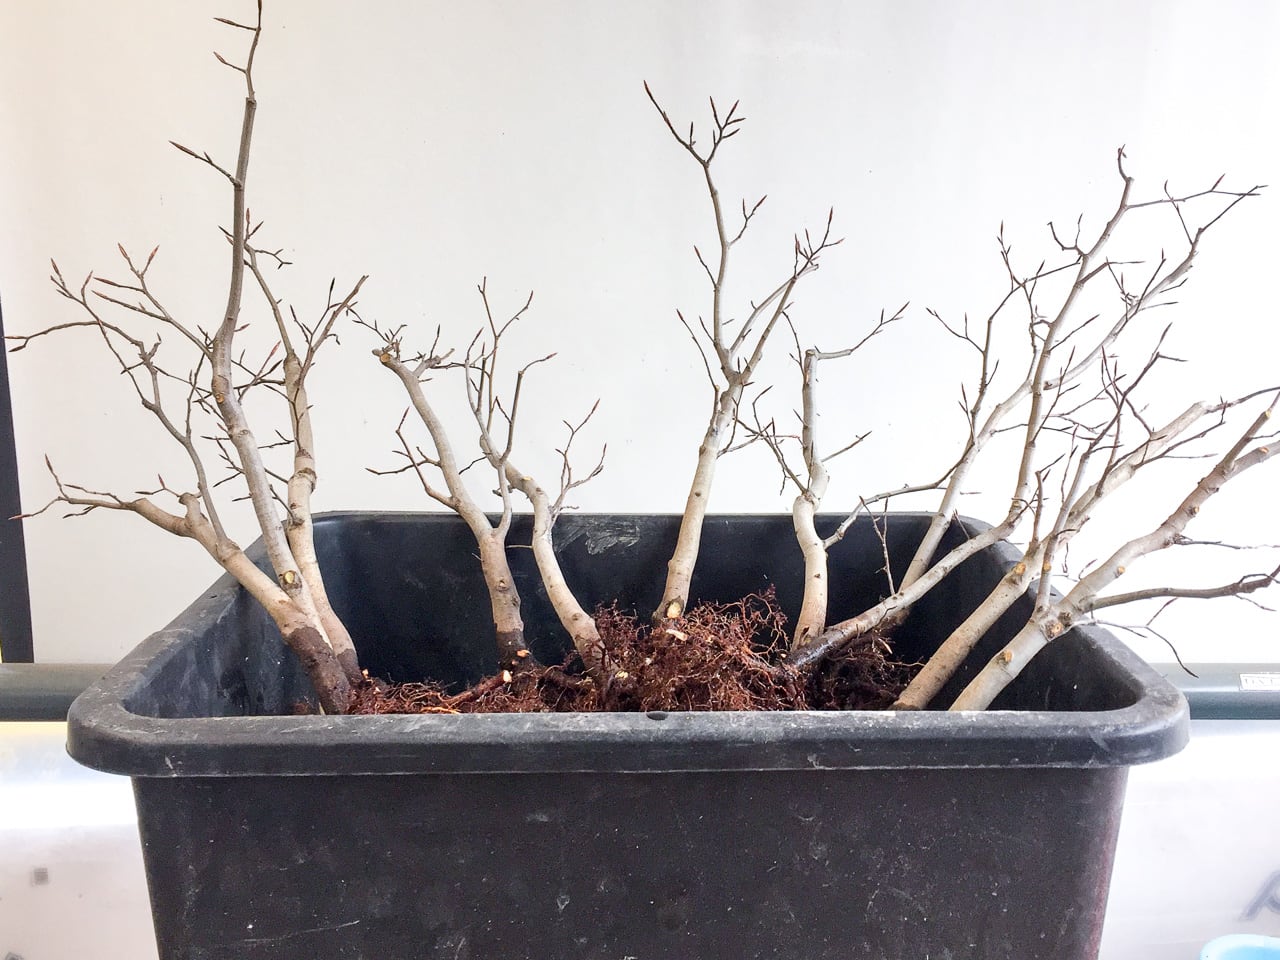
Bare-rooted trees ready to go
Before securing the trees in the pot I did a dry run by setting the trees into place. I was happy with the arrangement and got to work using wires and chopsticks to make sure the trees didn’t move around after planting.
After securing the first few trees, it became clear that they weren’t ending up exactly where I’d planned them to be. The key trees, however, are about where I intended. Here’s what they looked like after planting.
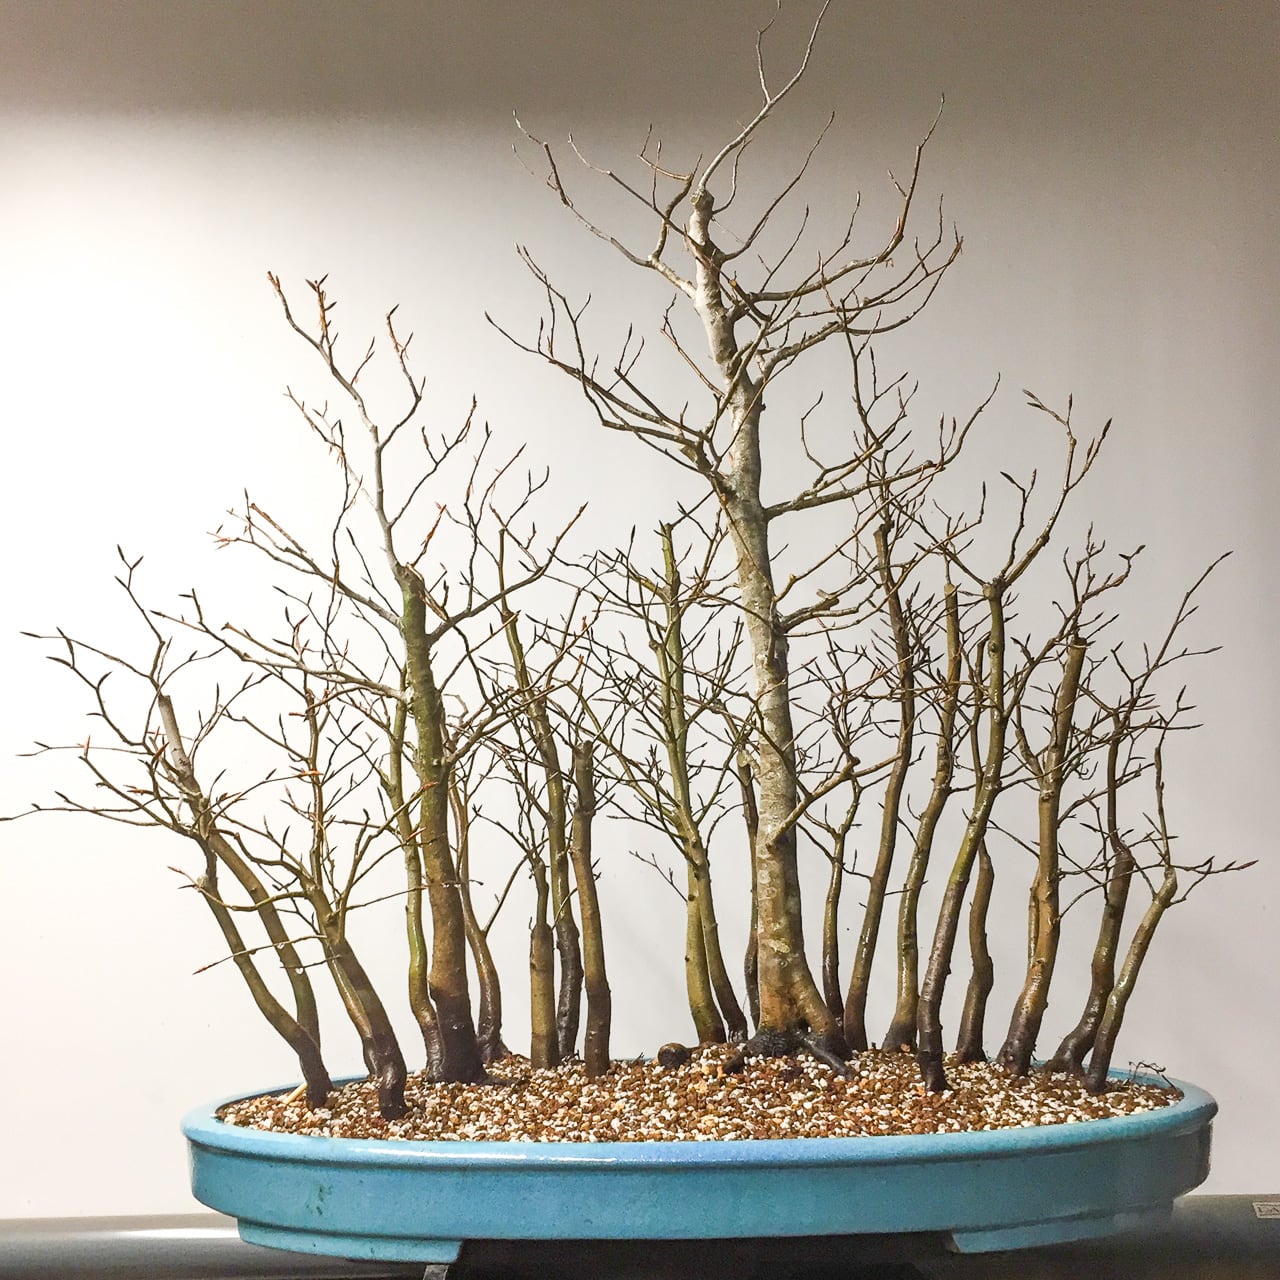
After planting – November 2016
The trees grew well this year – enough so that I cut back long shoots in summer and reduced the size of the largest leaves (see “Leaf pruning – stewartia” for details about the technique).
By fall, however, the leaves began to turn brown and fall off. Japanese beech grow at elevation in their natural environment and can handle very cold winters. It’s barely cold enough in the Bay Area for the leaves to turn brown, let alone fall off (see “Beech – on top of the mountain” for photos of mountain-top beech growing in Japan). To give the trees a break and to ensure that the interior buds receive adequate light in winter, all of the leaves were removed.
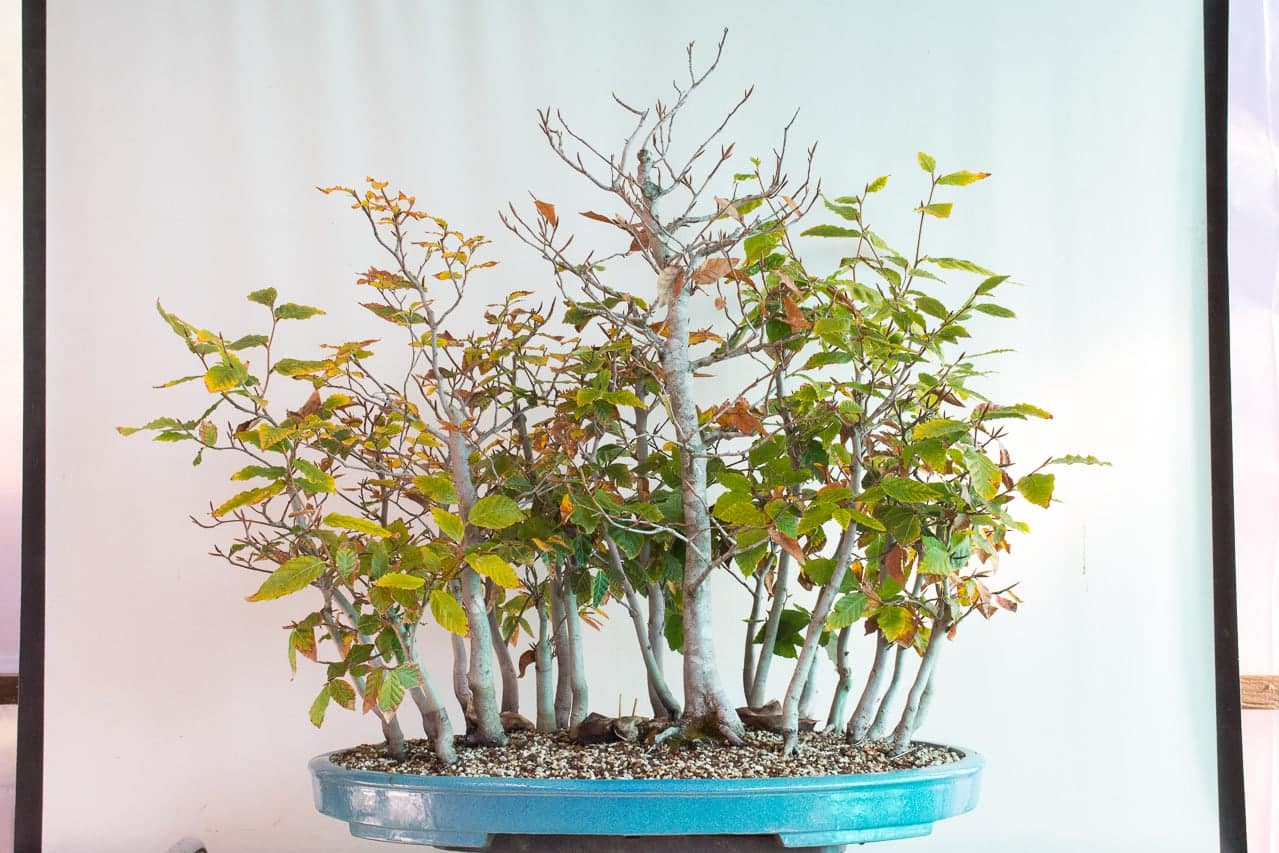
Japanese beech – one year after planting
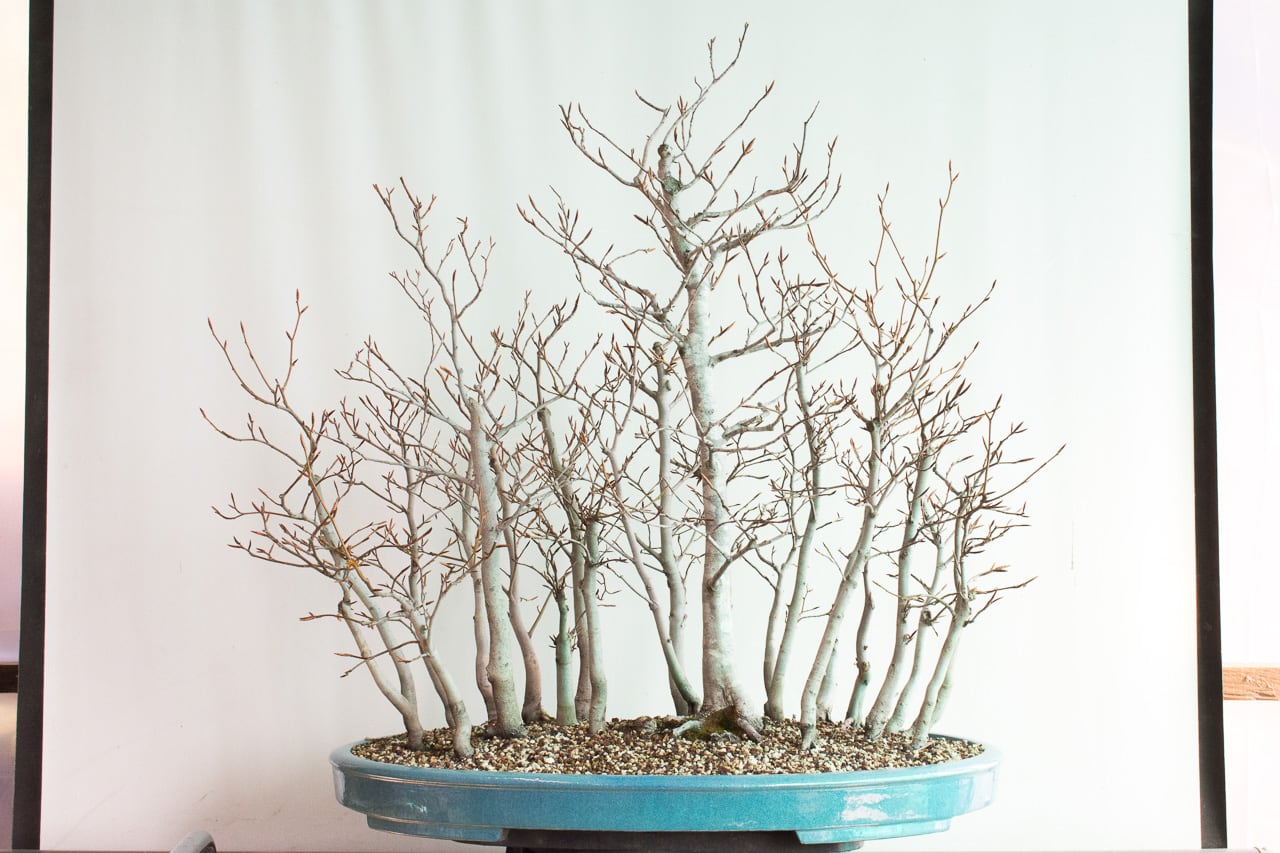
After removing the foliage
Seeing the trees without leaves made it easy to see which branches needed attention. I shortened long, straight shoots and branches that grew towards the center of the composition. Over time I’ll further reduce the branches, but I left extras for now to help the trees gain strength as they continue to root into the pot.
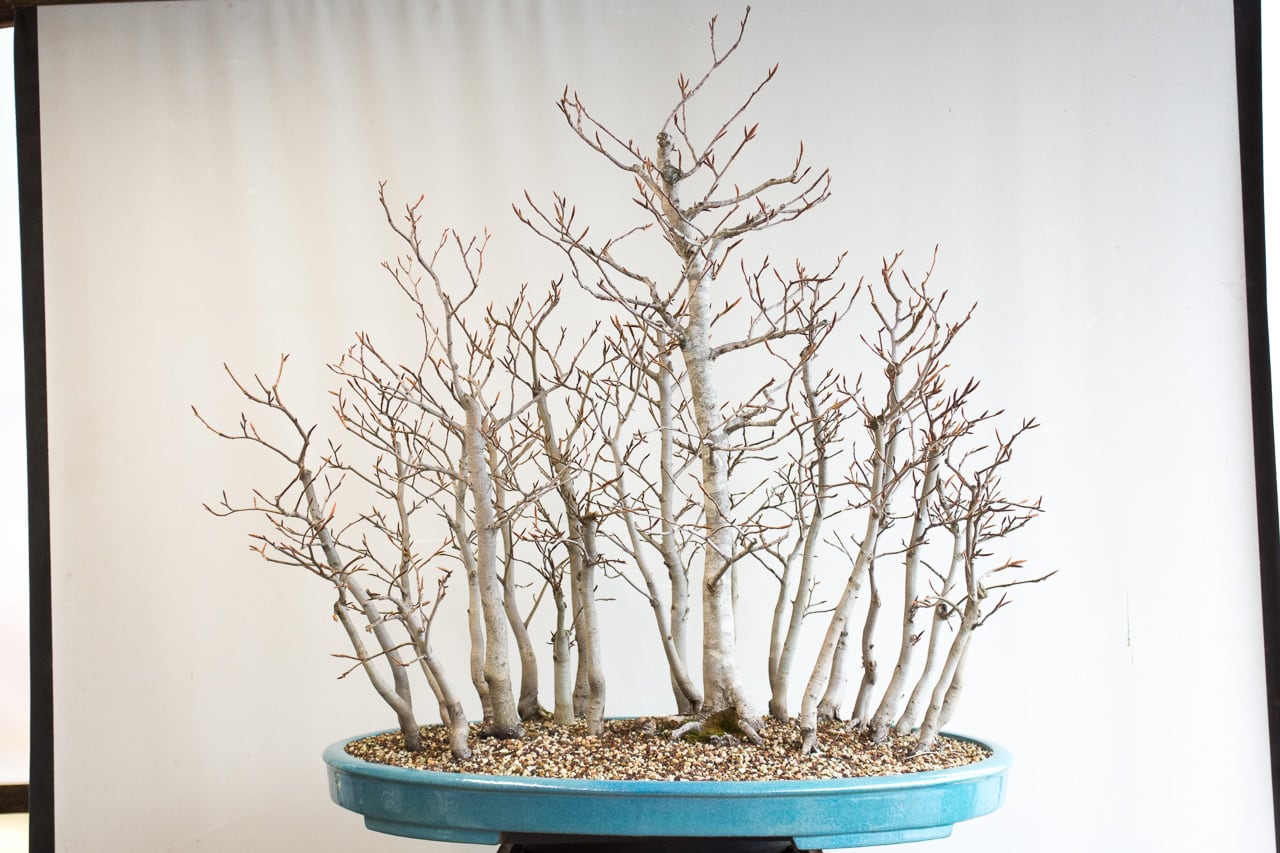
After cutback
I then wired a few branches that were useful but growing at awkward angles.

After wiring
Now begins the long process of refining the design by making similar adjustments every summer and fall.
Subscribe to Bonsai Tonight
New Posts Delivered Every Tuesday and Friday
John A Baugh says
Thanks. I will be interesting to watch the progress of this planting.
Richard Dorfman says
Nice work, Jonas. I’m always reminding myself “the last step depends upon the first”. Impressive beginning.
John says
Hi Jonas
Did you happen to have a picture of how you tied the trees into the pot?
Look’s nice and natural on the slight mound with the outer trees leaning out slightly,
JC
Zack Clayton says
Yes, I have done several forest plantings for myself and club demos. Tying the trees into place is crucial and probably the hardest step in the initial process, yet is usually the part glossed over the most often in an article. The next report on these would be a good time to “Show your work” as my math teachers used to say.
Jonas Dupuich says
Hi JC – I don’t have photos of the process but I can say a bit about it (I would have needed a third person to hold the camera). I started by drilling extra holes in the pot and putting 1-2 wires in each hole. The extra wires do most of the work, but occasionally I used chopsticks to pin down roots. Once the trees were all secured, the wires resembled an irregular mesh as they connected to each other as necessary to keep the trees in place.