There’s a lot to try to keep in mind when shopping for field grown material. It can be easy to focus on the lower part of the trunk and think, “This looks nice, I can fix the rest later.” The fix may not, however, always come easily.
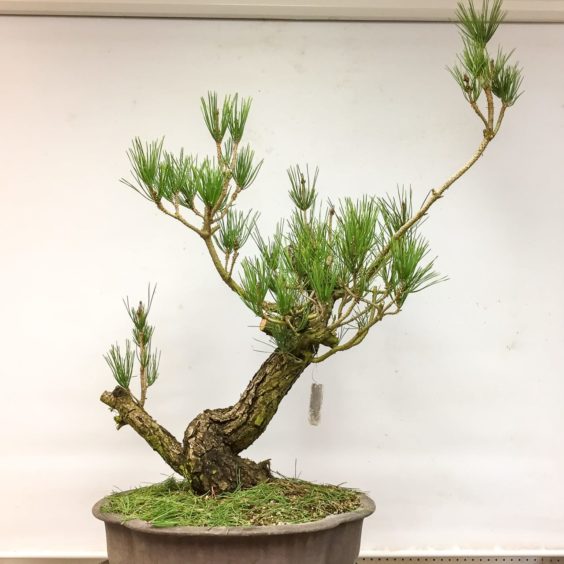
At a glance, the pine below has a nice lower trunk and is full and healthy. It merits a closer look.
Field grown black pine
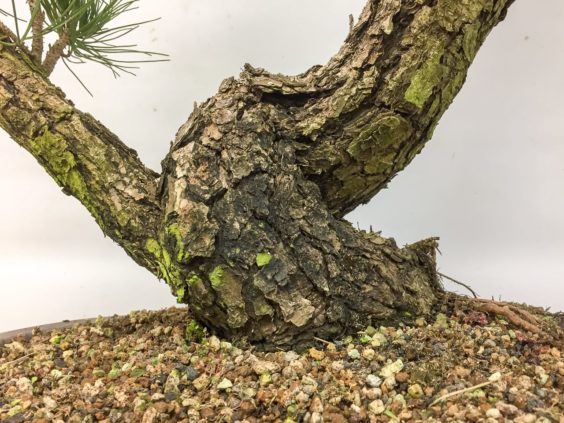
The trunk movement begins at the very base of the trunk – a good thing.
The lower trunk
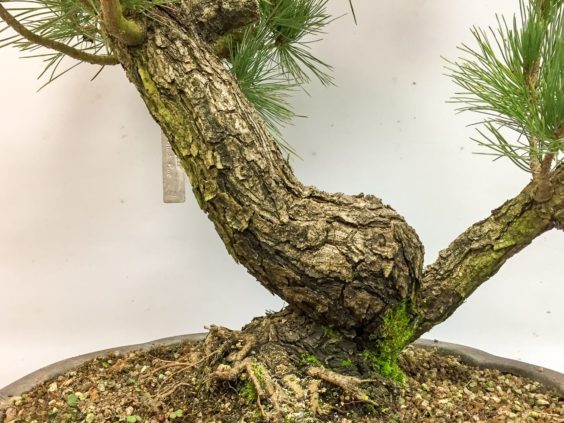
Just above the big turn, however, the trunk straightens out a bit.
The straight section above the low curve
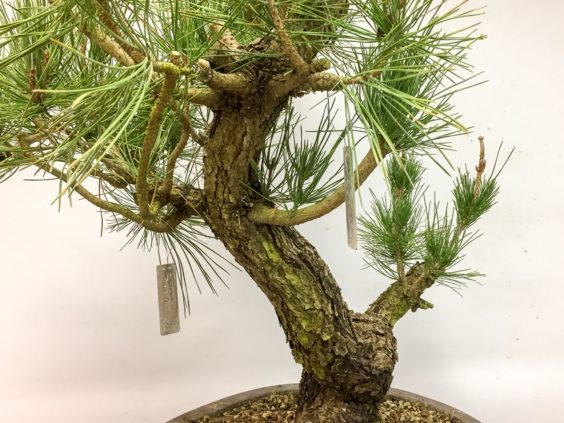
Looking even higher, it’s clear the trunk was allowed to thicken without being wired.
The straight sections of the upper trunk
Another important consideration is the quality of the branching. Looking from the side of the tree, it’s easy to see that the branches emerge from just two points along the trunk.
Branches emerging from two points along the trunk
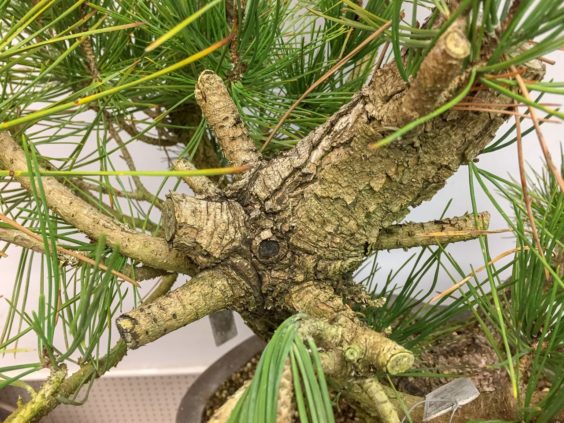
It’s also clear that there are more branches than we’d like to see emerging from any single point.
Many branches emerging from the same spot
I’ve called out these two points – uneven trunk movement and poor branching – as they are relatively common flaws in field grown material. They’re common because they reflect the way pines grow in nature – long straight shoots interrupted by whorls of multiple branches.
We can also see there is a lack of taper along the trunk. Using sacrifice branches near the top of the trunk prevents taper from developing.
How to avoid these issues when developing your own trees?
- Wire the trunk before letting sacrifice branches thicken straight sections
- Use sacrifice branches at different points along the trunk to create taper
- Thin areas where more than two or three branches emerge to avoid swelling
How to improve the present tree in light of these issues?
To improve the branching, I removed old the needles. This will let additional light into the tree’s interior in hopes of stimulating new buds.
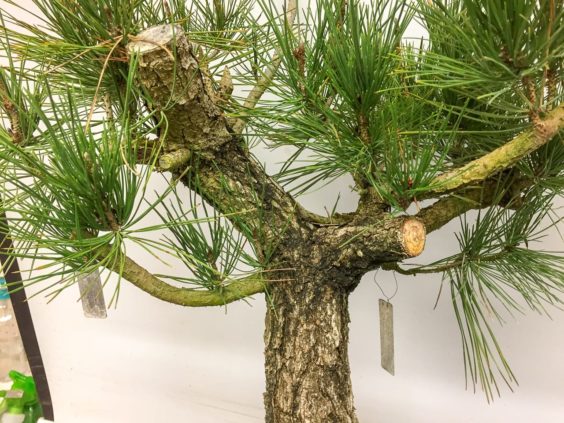
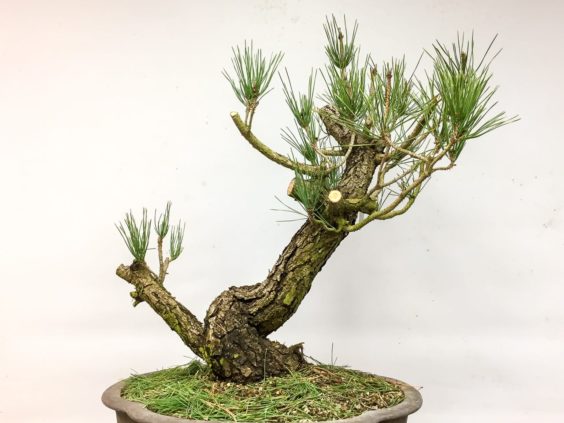
To improve the busy areas where so many branches emerge, I removed unnecessary branches and reduced the largest ones to stubs that will become relatively small jin.
After thinning old needles and reducing the largest branches
To further encourage more growth in the tree’s interior, I reduced some of the longer shoots.
After reducing the longest shoots
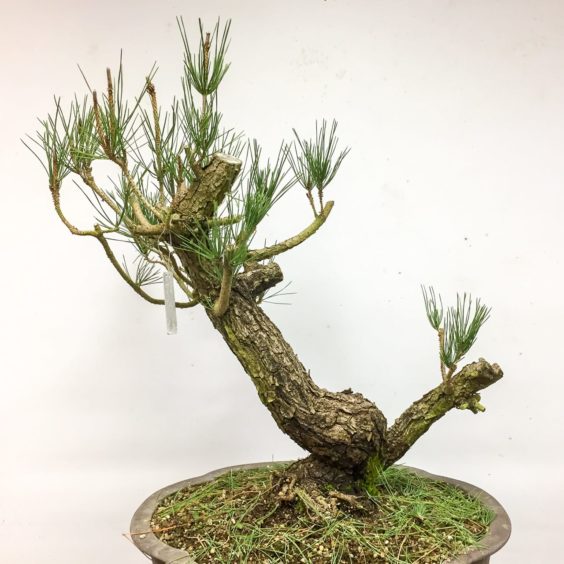
As seen from the other side
Because the trunk is as thick as it is, bending isn’t a great option. The best way to mitigate the straight sections on the upper half of the trunk is to select a front and planting angle that convey as much movement as possible.
The plan from here is to establish good primary branching. This will involve some wiring, some development of new shoots, and possibly some grafting. Once the primary branching is established, we can use basic pine development techniques to fill in the silhouette.
Subscribe to Bonsai Tonight
New Posts Delivered Every Tuesday and Friday

Robert Barnes says
Have you seen in differences in developing black pines in the ground vs colanders as far as time to develop? that is girth on young pine, etc.
Jonas Dupuich says
Hi Robert – in general most, if not all, varieties, develop faster in the ground than they do in containers like colanders. One of the main reasons I grow trees in containers is that it’s much easier to work on them when they’re portable.
Brian says
Hi Jonas,
Slightly different topic. Is the front of the tree somewhere around picture 5?
Jonas Dupuich says
Good question Brian. No final decisions about the front have been made yet. Although the trunk line looks nice in this photo, the trunk is coming quite a ways forward. For this front to work, the tree would have to be tilted up maybe 20-30 degrees and possible tilted to the side too.