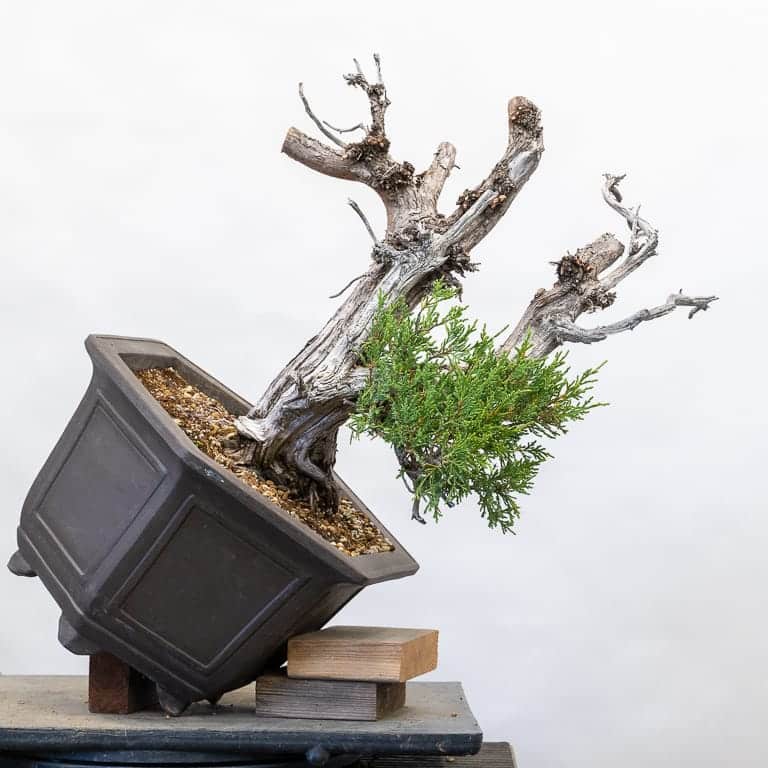
I’ve been looking at a Rocky Mountain juniper in my garden for the last three years. The trunk is fairly straight, but there is interesting deadwood on one side.
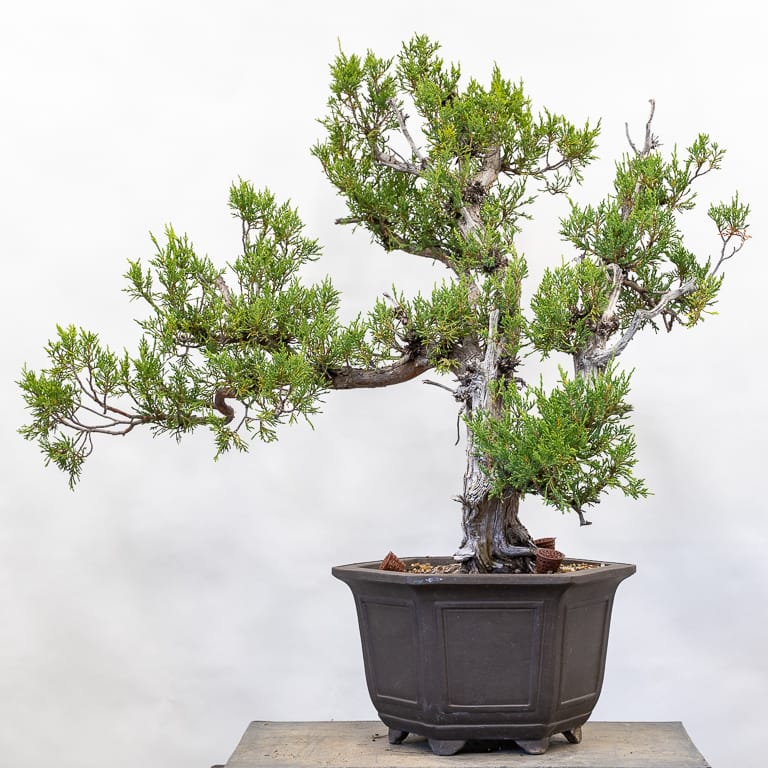
Rocky Mountain juniper – side A
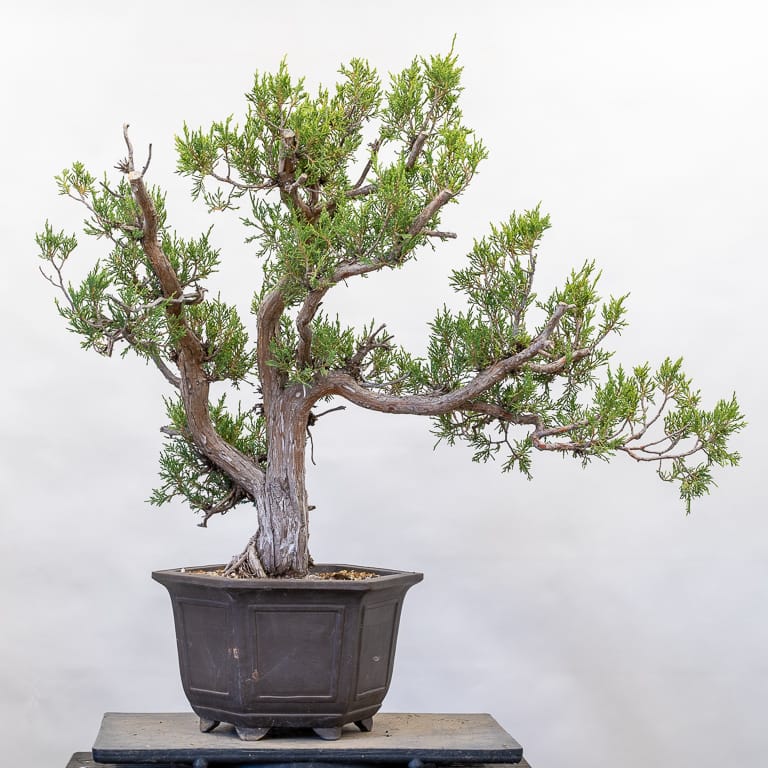
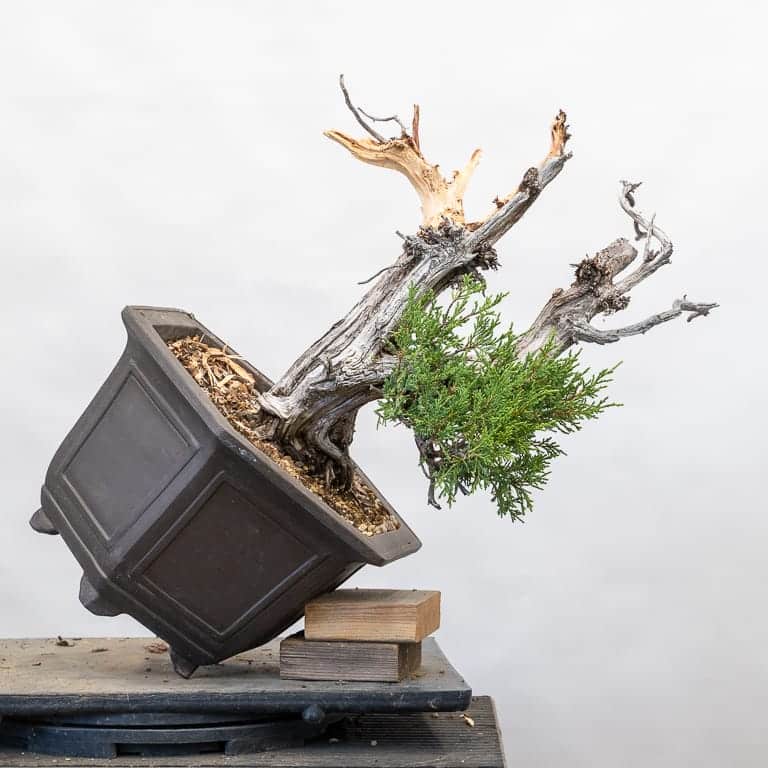
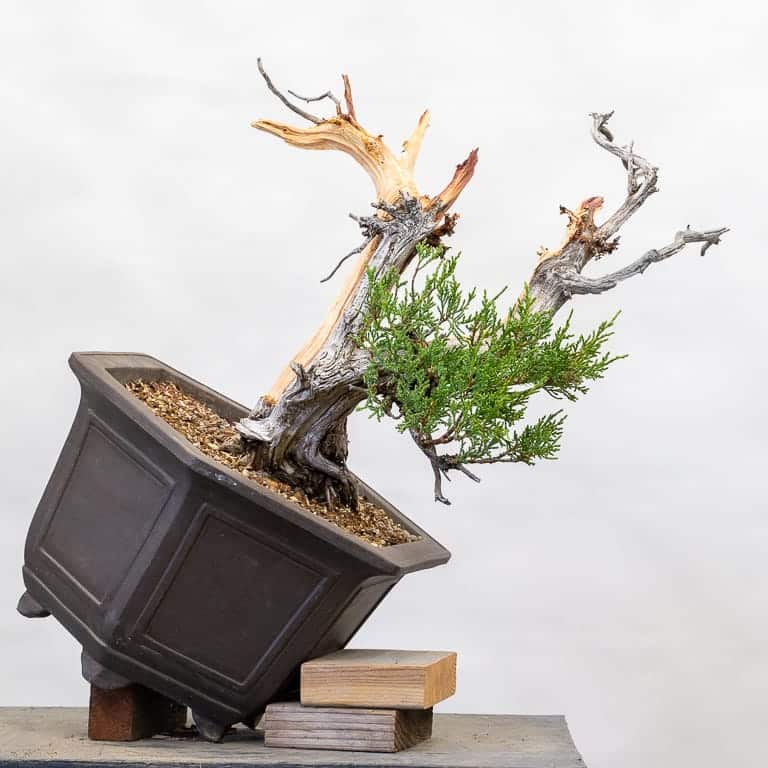
Side B
Although it was a while before I knew what I wanted to do with the tree, I’d set two goals right away: avoid vertical growth, and avoid long branches with poor taper or movement.
The first goal was easy to solve – select a new planting angle for the tree.
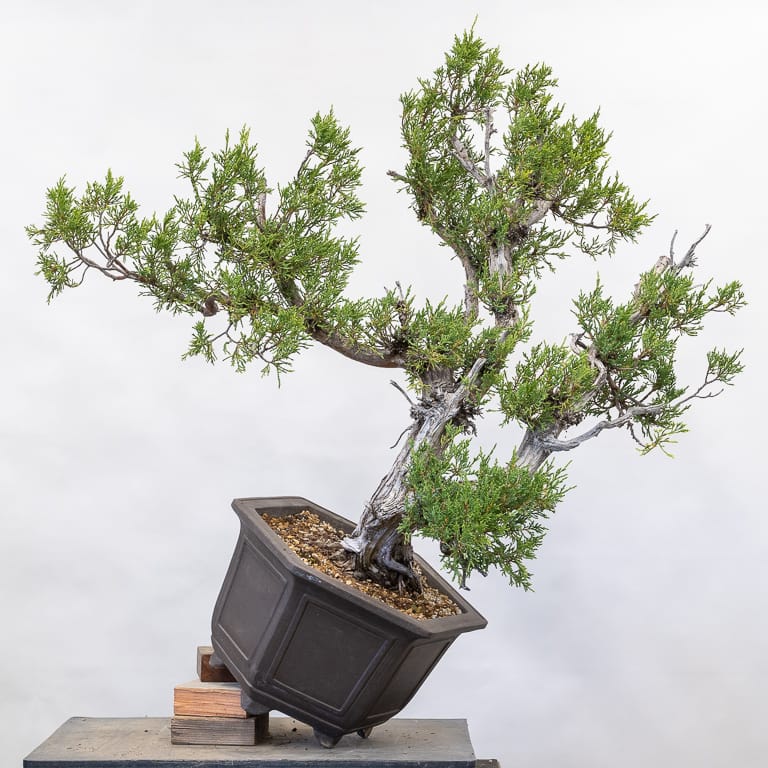
New planting angle
The second goal required a saw.
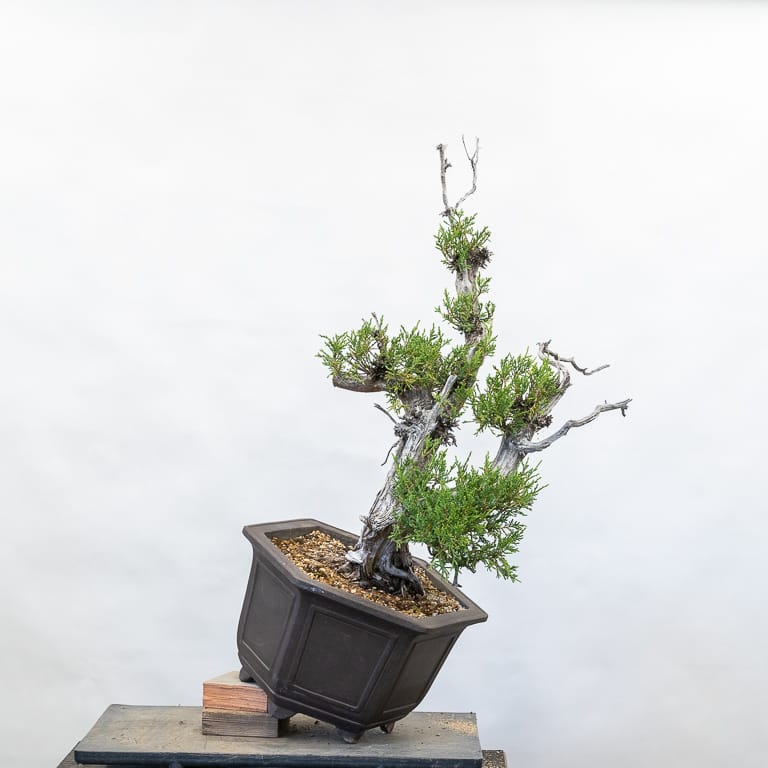
After reducing the branches
With my two main goals accomplished, the next question was to come up with a plan for the foliage. The many small shoots along the trunk would make it easy to develop new branches without the need to graft, but I wasn’t convinced that leaving the tree tall was the best way to show off the tree’s best feature – the deadwood along the trunk.
To keep the focus on the natural deadwood, I removed all of the foliage except for the lowest block on the right side.
After removing the foliage on the upper part of the trunk
Removing the small shoots really made the deadwood stand out. From here I started carving the upper branches.
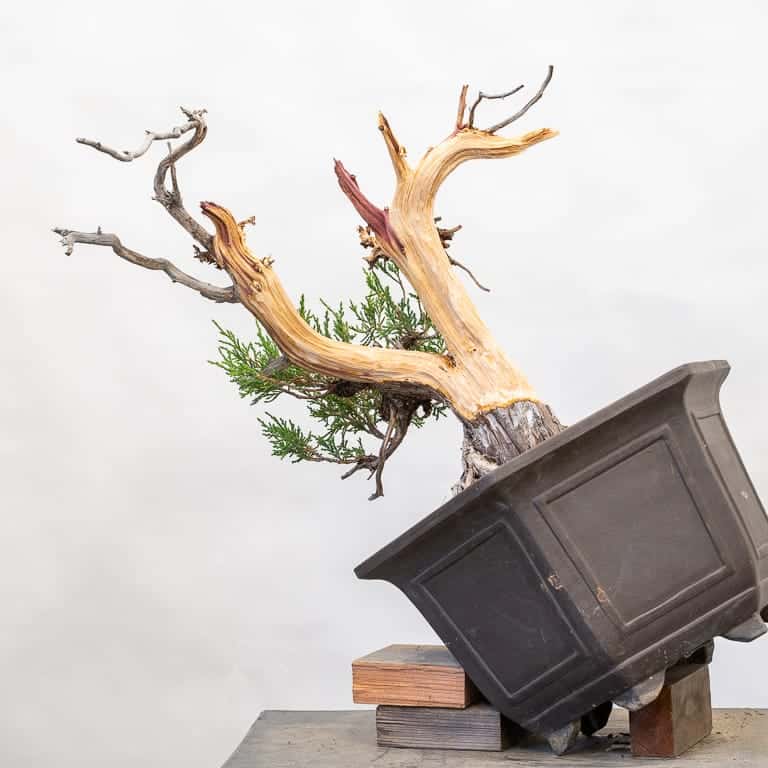
After carving the top-left branch
Once the top-left branch started to take shape, I found that the middle section of the trunk was too long and straight. I reduced it and finished carving the right hand section of the trunk.
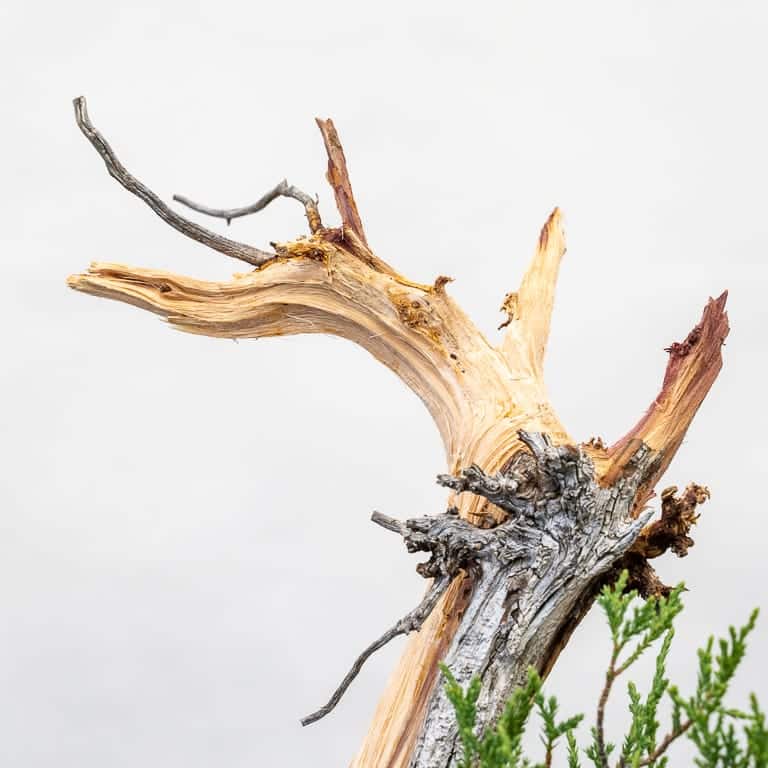
Deadwood on the top branch

View from the right side
View from the back
Carving complete – 15″ tall
I held off on wiring the tree as it’s already gone through a lot. I typically avoid removing so much foliage all at once, but I was curious how the tree would respond to the work. In the month since making the big cuts, the tree has grown well. I plan to repot it this winter into a smaller container suitable for a semi-cascade style tree. I’ll provide an update after the repotting.
Subscribe to Bonsai Tonight
New Posts Delivered Every Tuesday and Friday
José Alberto Domingues Pereira says
Well…what a difference!
Jonas, Don’t you think that is a lot of work at the same year?
Jonas Dupuich says
Thanks José! Yes, this is more work than I recommend for this or any other time of year. It’s best to do the big cuts incrementally.
I think of this as more of an experimental tree and I wanted to learn how the tree would respond if I did all of the work at once. I will provide an update if I learn anything about the effect of this work going forward.
Thanks for the question!