I received some good questions following the previous post about a Sierra juniper.
- Why aren’t you planning to keep foliage on the upper branches?
- Why did you decide to graft and where are the grafts?
- How did you decide which branches to cut?
- What’s the overall plan for developing this tree and how long will it take?
If I didn’t have answers to these questions it would have been hard to know what to do next. Here’s how I figured that out.
Why aren’t you planning to keep foliage on the upper branches?
The key question for styling this tree is what to do with the upper half of the trunk. The lower trunk has taper and great deadwood. The upper half has interesting movement but little deadwood.
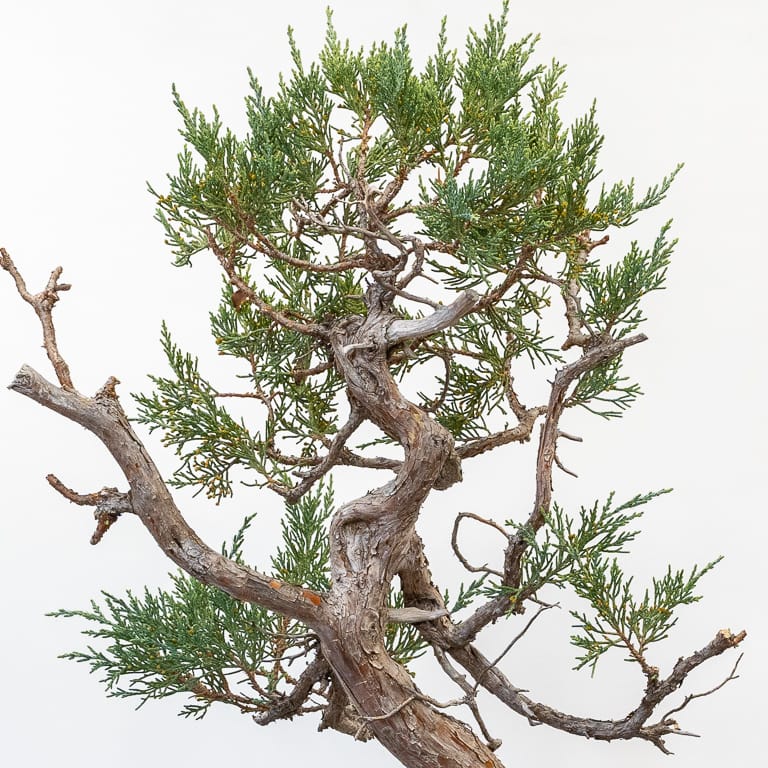
Upper trunk
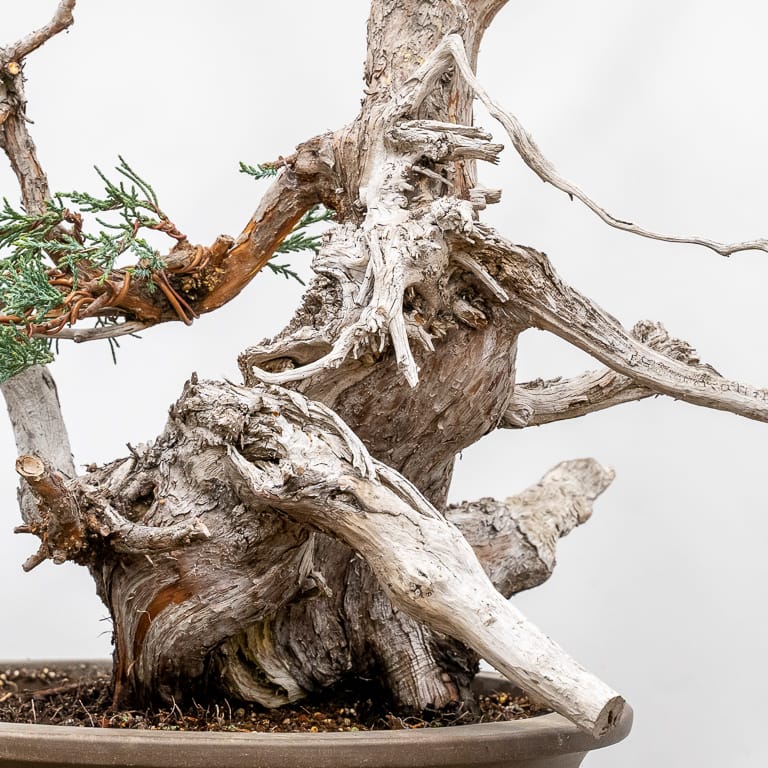
Lower trunk
For me, the most interesting aspects of the tree are the deadwood and shape of the lower trunk. To focus the viewer’s eye on these elements, I want most of the foliage to be near the deadwood and not one-to-two feet above it.
If I keep foliage on the upper half of the trunk, my favorite characteristics become a small percentage of the composition. By concentrating the foliage near the deadwood, I can ensure that the deadwood is the focus of the design.
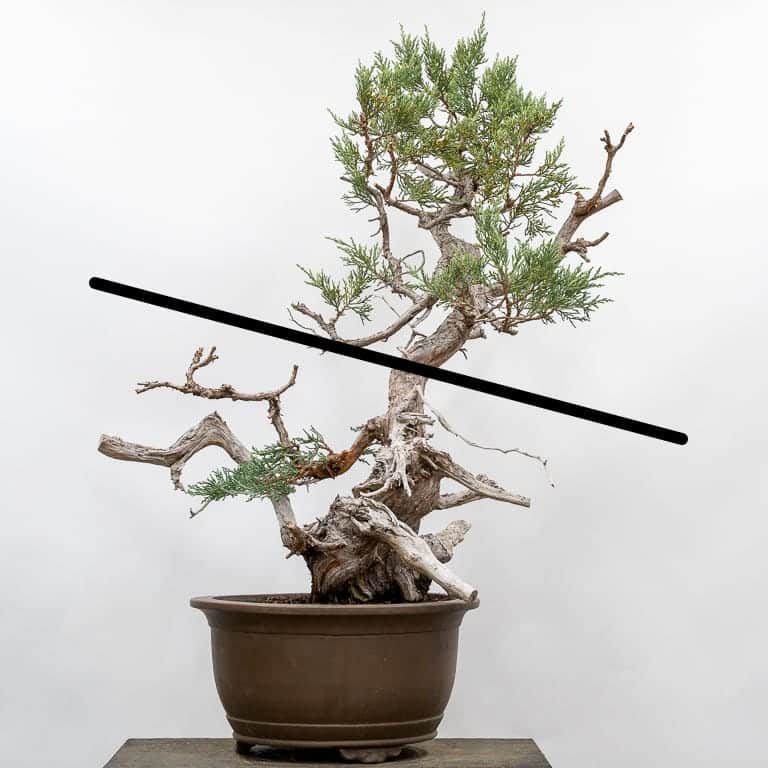
Most of the future foliage will be located below the line
Once I have enough foliage to support the design on the lower half of the trunk, I have two options for the top half of the tree: I can remove it or create additional deadwood features. My current plan is to create a deadwood feature that I can remove down the road if it doesn’t suit the tree.
Why did you decide to graft and where are the grafts?
As you can see from the photos, there’s only one branch on the lower half of the trunk. I can either use foliage from this branch to create the apex and fill in the right side of the silhouette or I can graft new branches.
Bending existing branches upwards would take less time than grafting but would result in awkward branch structure. By grafting branches near the top of the first branch and on the right side of the trunk, I can develop new branches and create a simple branch structure. As a bonus, grafting can help me maintain key sections of the tree’s lifeline on the front side of the trunk.
Here are the graft points.
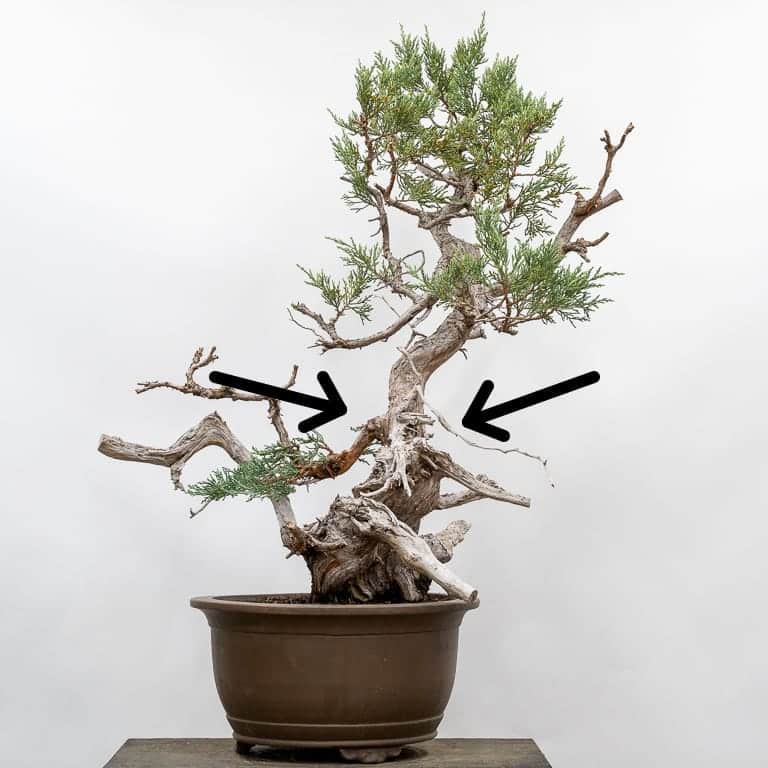
Locations of the two grafts
How did you decide which branches to cut?
In addition to thinning dense areas by removing the oldest foliage, I reduced three branches.
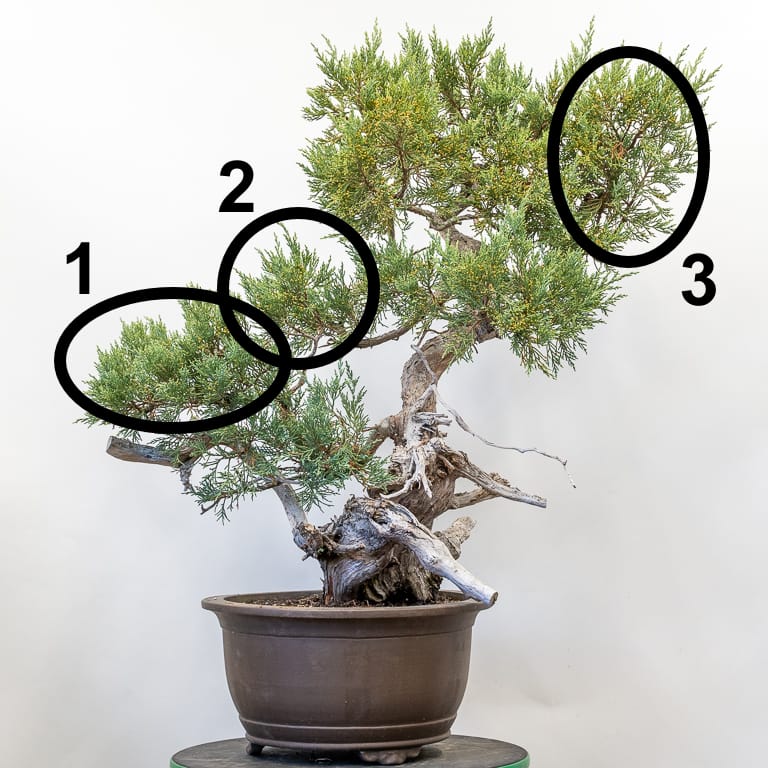
Branches that were pruned
The first branch could have been bent around to create an apex, but the resulting structure would be awkward (the apex would come from the base of the first branch). It’s also too large for use as a primary branch. By pruning it, I can encourage the inner shoots that will form the first branch on the left side of the tree to develop.
The second branch was shading out the graft and the lower branches I wanted to keep. By removing it, I can ensure these lower branches receive ample sunlight.
The third branch lacks the character of the main trunkline and brings the design too far to the right. By pruning it, I can reduce the amount of foliage on the top half of the tree without affecting the branches on the main trunkline.
What’s the overall plan for developing this tree and how long will it take?
Years 1-3 Establish roots after collecting the tree
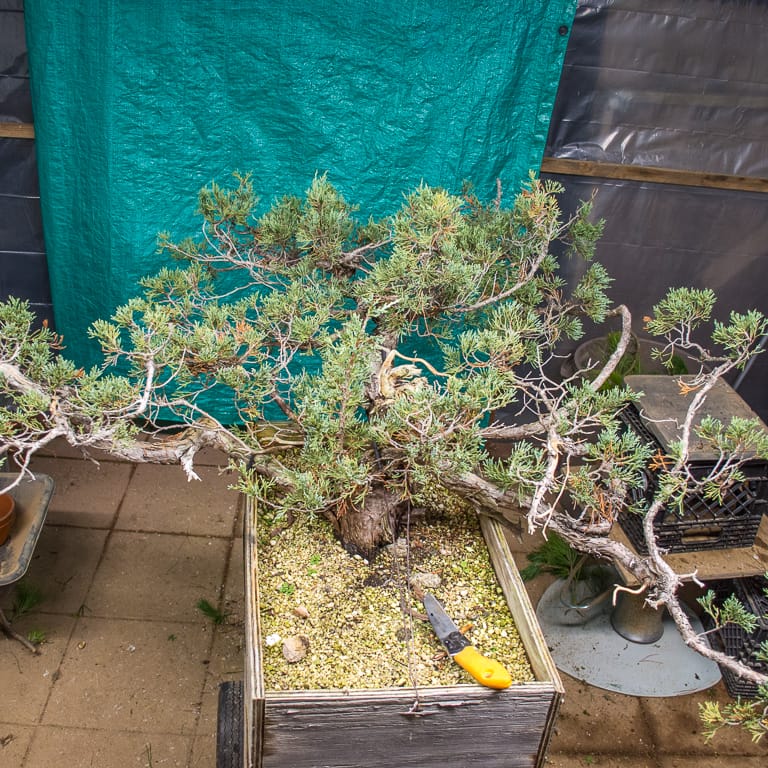
Sierra juniper before work began – January, 2017
Year 3 – Repot the tree to change the potting angle and establish roots in new soil
Year 4 – Limited pruning and grafting new branches
Year 5 – Reduce branches and thin remaining foliage (the work done this year)
Years 6-7 – Let grafts grow freely while reducing foliage on the upper half of the trunk
Years 8 – 10 Begin working with grafted foliage to create the future silhouette; create deadwood features on the upper portion of the trunk
Years 11-12 At this point the tree may resemble a bonsai! Continue to develop branch density and refine the silhouette
That covers the basic decisions that went into the plan for this tree. If you found this information helpful or if you have additional questions, let me know in the comments below!
Bonsai pots for sale from Daisaku Nomoto
Every year when Daisaku visits the garden, he brings pots along with him. Click the image below to see a selection of containers from his last visit.
Subscribe to Bonsai Tonight
New Posts Delivered Every Tuesday and Friday
Mark says
Which sierra juniper is it? Grandis or occidentalis?
Jonas Dupuich says
It’s grandis, which is the new name for occidentalis ssp. (or var.) australis: https://plants.usda.gov/core/profile?symbol=JUGR7
Sam H says
I found the rationale to be very enlightening. Thanks for posting.
Jonas Dupuich says
Thanks, Sam!
scott chadd says
is there an option to ‘air layer’ the upper portion of this gathered material?
Jonas Dupuich says
I haven’t tried air-layering Sierra juniper, but it might work. Grafting roots would be a good way to preserve the top.
Trudy Anderson says
I find everything you write about Sierra Juniper important. I have one that belonged to my late husband and have received very differing advice on care and future development. I have been letting it grow, figuring the more foliage the more roots. I would love to have the density and choice of foliage that you have achieved.
I think that a slow approach to removing the upper foliage on yours will allow you to develop a more united design. I don’t think you would be happy with just foliage around the lower deadwood and nothing to integrate the top.
Jonas Dupuich says
Hi Trudy – thanks for the note! Letting junipers grow until you see the growth you’re looking for is always a good idea. I like your idea about addressing the apex of this tree incrementally – it’s the track I’m planning to take for the next several years. Thanks!
TOBIN MITNICK says
Hey Jonas–
This is great, as this particular Juniper resembles in size/shape/density a collected Utah that I have from a few months ago. Also gives me a great timeline. Any huge differences with a Utah from a timeline perspective, you think?
Tobin
Jonas Dupuich says
Thanks, Tobin! I’d expect the timelines to be similar. The slowest part of the process is getting the trees to start growing vigorously. Once they get going it’s easier to maintain the vigor and they can develop quickly.
I can also mention that this timeline is conservative. The process can happen in half the time if grafting starts earlier or the design doesn’t depend as heavily on it.
Andrew Gutierrez says
Hey Jonas,
Thank you for posting the before pictures and updating us. I really like how have the next 5-7 years planned for this tree. As a beginner, this reminds me of the patience I must practice with my junipers.
Jonas Dupuich says
Thanks, Andrew! I definitely don’t have patience so I’ve filled my garden with more trees than I have time to work on. I don’t know that this is a good approach, but it ensures that a lack of patience doesn’t get in the way.
Mark Oren says
Jonas, thank you so much for this post. The manner in which you asked and answered questions about your goals for the tree and the steps you plan to follow to achieve them made the post one of the most effective teaching tools I’ve had the pleasure see. My only comment: More like this, please!
Thanks for all you do.
Jonas Dupuich says
Thanks, Mark – I’m happy to hear it! Will make sure to provide more context going forward, and don’t hesitate to ask questions like these whenever you think of them.