I recently worked on an atlas cedar that hadn’t been repotted in many years. The basic steps are the same as they are for recently repotted trees, but the extent of the work is different. In short, there are far more old roots to be removed.
Here’s the tree.
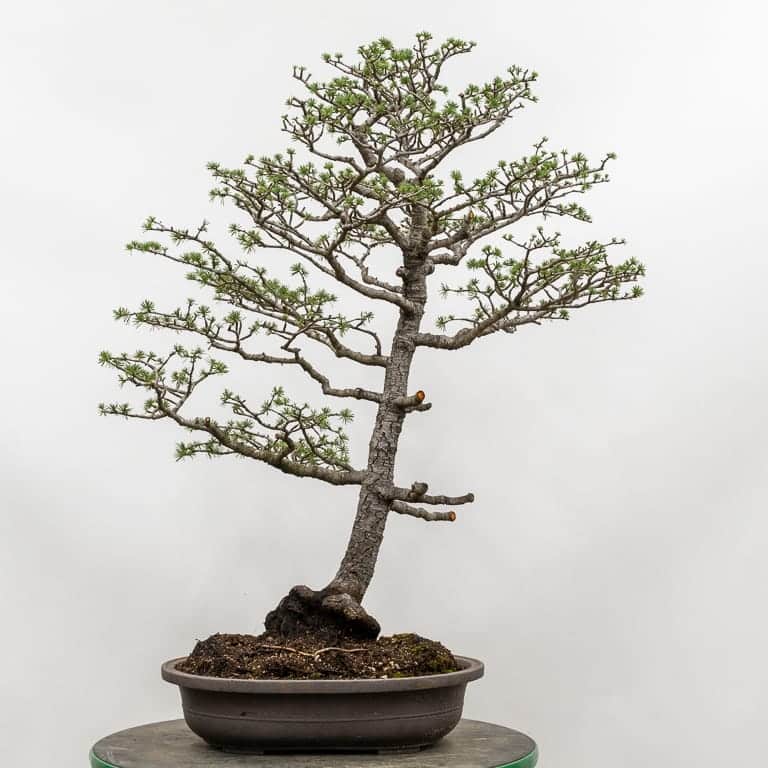
Atlas cedar
At a glance, the rootball looks as expected with just a few live root tips.
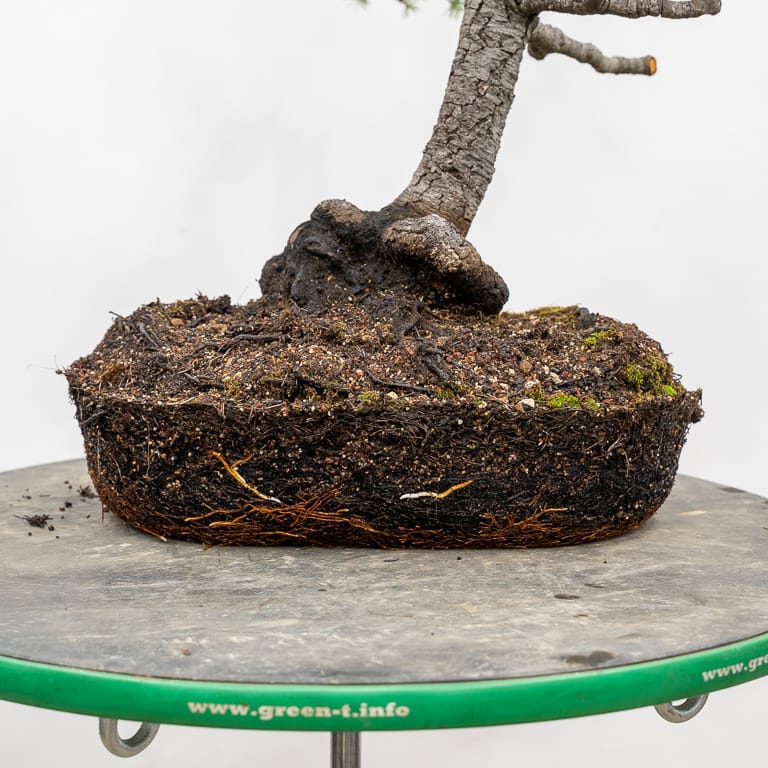
A few live root tips
The bottom of the rootball suggested a different story. The drainage screen appeared to be two inches above the bottom of the rootball.

Hole that lined up with the drainage screen
The first step was removing the old roots from the bottom of the rootball. It took a bit of work with a root rake before I finally found the old drainage screen.
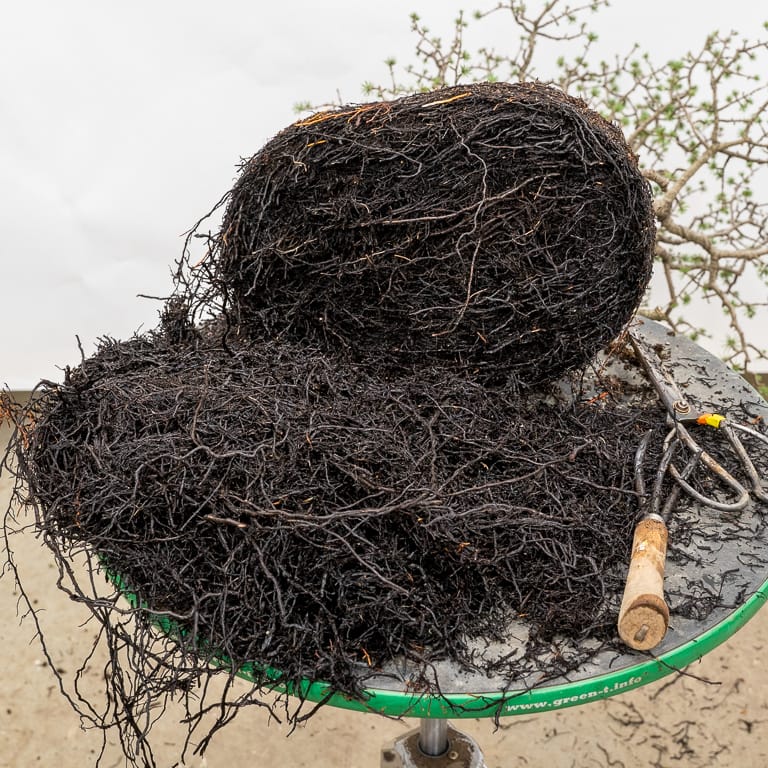
Old roots
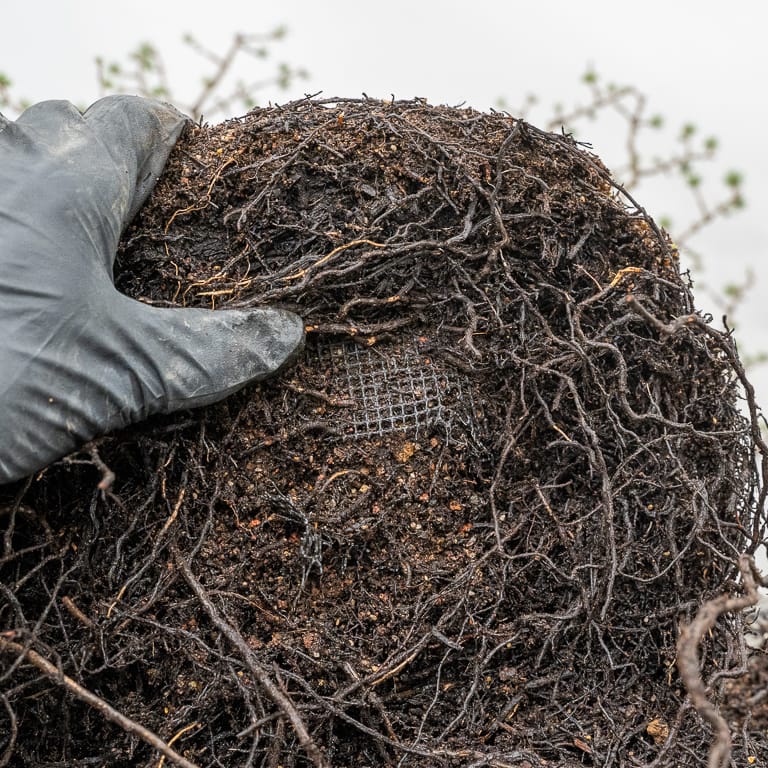
Old drainage screen
Once I found the screen, I knew I’d reached the previous bottom of the rootball. I removed the rest of the matted roots and switched focus to the top and side of the rootball.
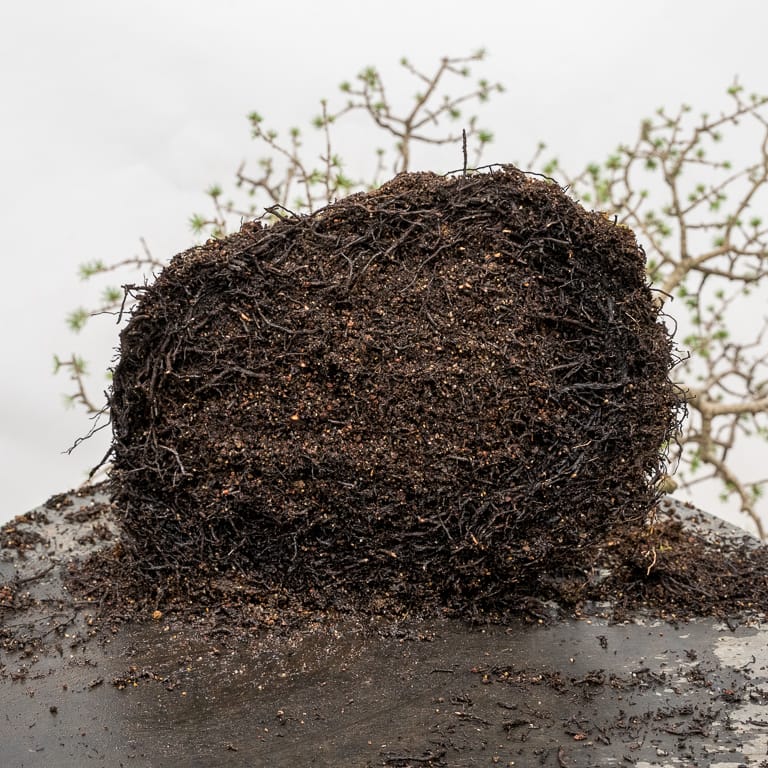
After removing the matted roots
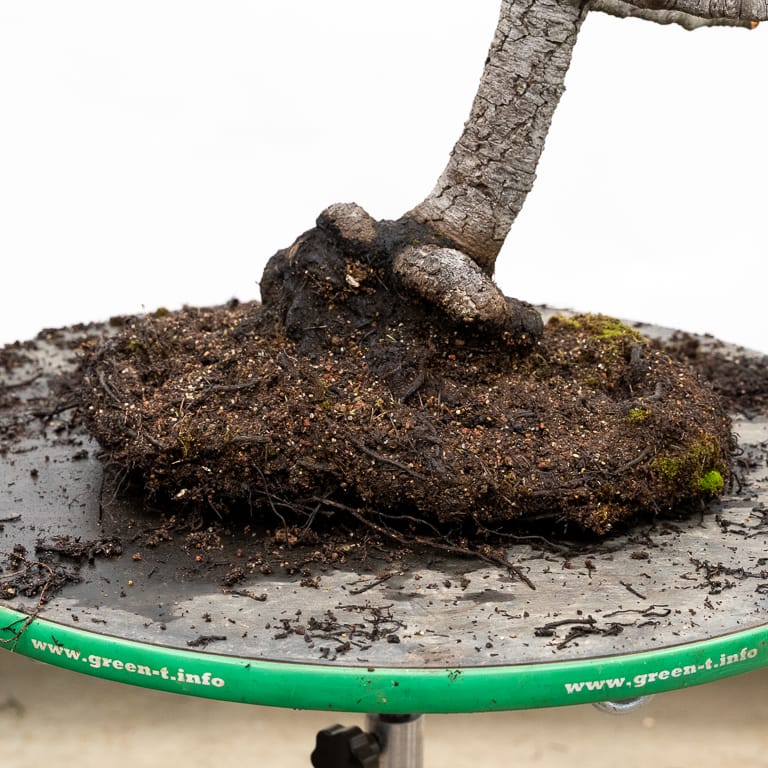
The rootball is now shallow
From here, I removed the upper layer of soil and loosened circling roots. Here’s the rootball before the final trim.
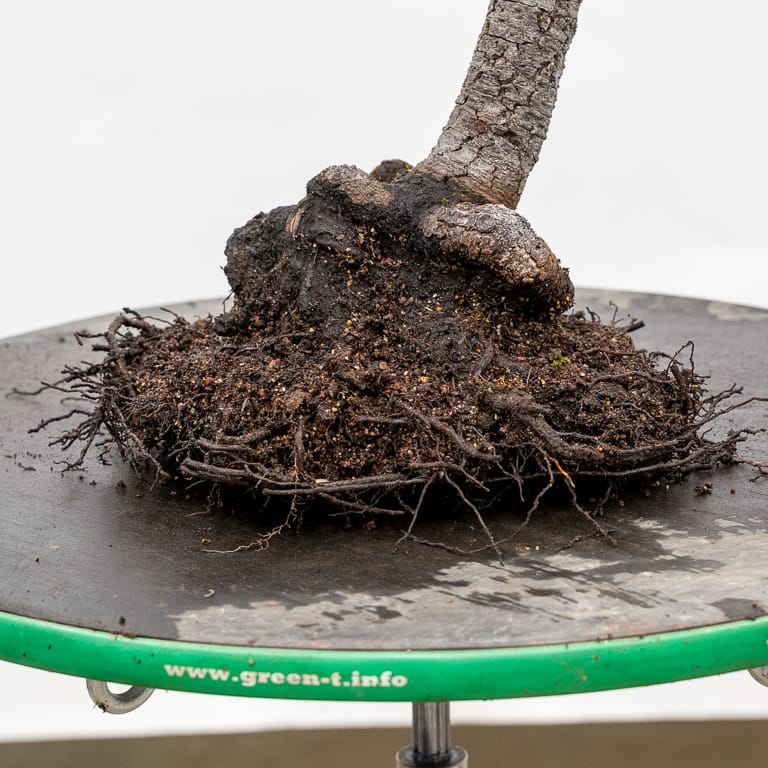
A much smaller rootball
There were enough heavy roots for me to secure the rootball in the pot but I added a few chopsticks to prevent any wobbling.
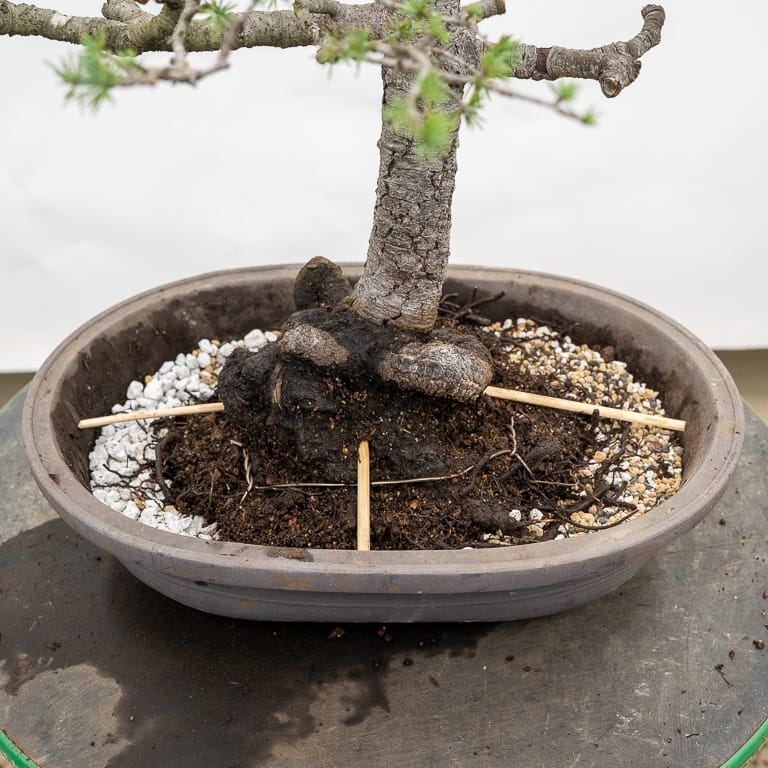
Tree secured in the pot
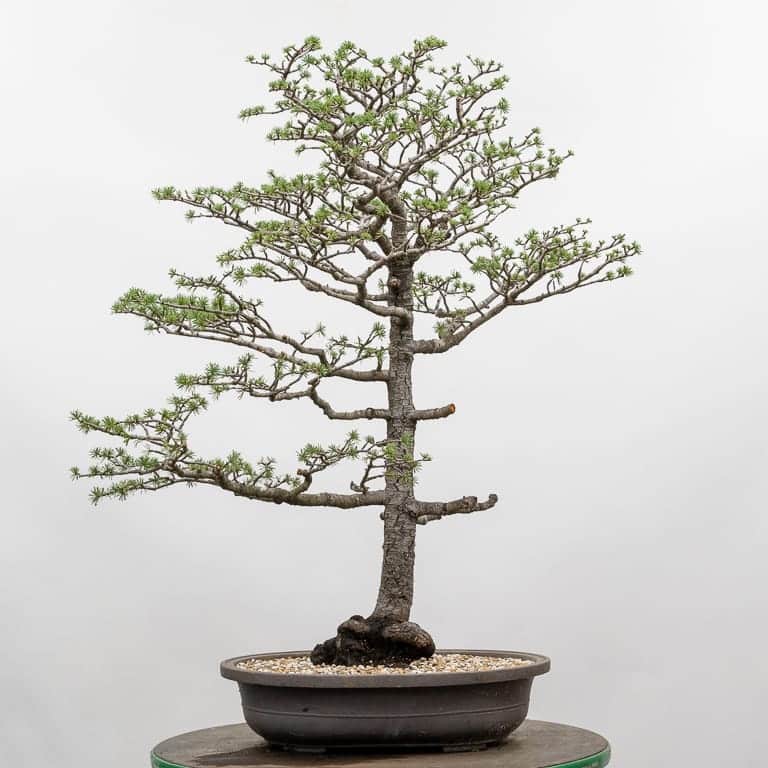
Repotting complete – 26″
Considering the extent of the rootwork, I’ll avoid any pruning or wiring for the remainder of the year. Once the tree has regained vigor, it’ll be time for cutback and wiring.
International Bonsai moves online!
After 42 years and an amazing 164 issues, William N. Valavanis has moved International Bonsai online.
The digital version will retain the same format as the printed version so readers will be familiar with the layout. For those who are new to the publication, you’ll find how-to articles from international contributors plus reports from the top bonsai exhibitions around the world.
I’ve been happy to contribute a number of articles over the years, and the current issue features an overview of how to repot bonsai.
Check out the first online-only issue for FREE – the magazine will be available for free going forward – at InternationalBonsaiOnline.com.
Subscribe to Bonsai Tonight
New Posts Delivered Every Tuesday and Friday
Grant Rauzi says
Jonas, thank you for a very much for a very deliberative, detailed, illustrated, and strategic reference on repotting your blue atlas cedar.
I focused on your post because I have a tree of similar dimensions, age, and repotting need. Perfect direction at a perfect time. I have every confidence your tree will become a beautiful specimen. Best of luck.
Jonas Dupuich says
Thanks, Grant – and good luck with your upcoming repotting!
Andy says
Why didn’t you pot the tree lower? Try to induce new roots higher up? Because there’s no nebari – just one gnarl over another.
Jonas Dupuich says
Good question Andy – the dark lumps just above the soil are all roots, and there are more large roots that could make nice surface roots just below the soil. It’ll take a while for these areas to dry out and lighten in color but I expect these areas to blend in better over time.
Andy says
Blend in, yes. But it wasn’t the color I was worried about. It was shape. The nebari.
Jonas Dupuich says
Hi Andy – Sorry I wasn’t clear, there is actually a good start to a nebari just below the surface that’s hard to see in the photo (which is why I’d mentioned the color). Planting the tree deeper would result in a deeper pot and I don’t know any good tricks for stimulating roots to grow higher along the trunk. Do let me know if you have suggestions for it!
Richard Dorfman says
Thanks for sharing a thoughtful step by step repotting process, Jonas. Two questions:
1. Will the branch structure (lower section of the trunk) always be imbalanced?
2. Other than aesthetics, is there a reason you repotted in an upright rather than slanted position?
Jonas Dupuich says
Thanks, Richard! Good question about the branch structure. One option is to remove the lowest branch on the left and bend all of the remaining branches down. If the branches remain somewhat horizontal The lowest branch could stay or go.
As for the angle, when the trunk is very straight it can look awkward when the tree grows off to the side. I think this tree could be styled either way and wanted to see how it worked vertically, plus the angle change allowed me to expose additional surface roots.
Suji Noran says
Jonas, Thank you for another informative and well illustrated article.
Do you have any concern about the wooden chopsticks you used to secured the tree in the pot, rotting, then causing Root Rot?
Jonas Dupuich says
Thanks, Suji! The chopsticks will break down but that will not cause the roots to rot. I’ll remove the chopsticks the next time the tree is repotted 2-4 years from now.
Maria says
Me gustan los bonsái es un arte maravilloso
Joel Otteman says
One if my favorite species of tree. Can’t wait to see more!
Jonas Dupuich says
I like them too – am always on the lookout for them. If you haven’t seen it, Michael Hagedorn recently published an article about a beautiful specimen: https://crataegus.com/2021/01/08/calling-jim-gremel-your-cedar-is-ready/
Brian says
When pruning conifer roots to this extent, are there any instances where you would prune an amount of the foliage/branches due to the amount of roots pruned?
Thank you so much for all the information you share here.
Jonas Dupuich says
Great question Brian – in general, no. Foliage can help stimulate root production so I want to leave the needles in this case to help the tree recover from the work. In this case I didn’t cut many live roots at all – the vast majority of the roots that came off died years ago.
Victor Taboada says
Hi Jonas, quick question. In cases like this, why not use a hose on the rootball to drain away old soil and untangle roots which can then be easily trimmed? This would be gentle on the roots and much easier than using rakes and chopsticks.
Excellent series. I always look forward to your blog entries!
Victor T.
Jonas Dupuich says
Thanks, Victor! I use water to wash away heavy clay soils but don’t use water as much when the soil falls away easily. I also don’t want to remove any more soil than I have to and it’s easy to wash away too much when using water.
Paul says
Nice photos Jonas. Thank you for sharing. When would you more aggressively remove some of the soil between the roots of the final rootball? Since that soil is likely the oldest, do you worry that it has broken down, will drain more poorly than the new soil, and potentially contribute to root rot?
Jonas Dupuich says
Hi Paul! Good question – if there were more healthy roots on the tree I would have removed some more soil from the tree’s interior. There were so few good roots anywhere I didn’t want to fully or half-bare root the tree. Instead, I perforated the remaining block of old soil – which actually wasn’t too bad – and will look to replace it with fresh soil over one or more repottings in the future.
JEAN DOUGAN says
I bought a bonsais tree in a glass vase much to my ignorance loved it’s look it now sits on my tables feel awful because l know nothing about them look after it but wouldn’t know if lm looking after it properly
Jonas Dupuich says
Hi Jean – if you’re interested, I just wrote a book for beginners about how to care for bonsai: https://store.bonsaitonight.com/products/the-little-book-of-bonsai
Mike Butler says
How well will this tree back bud or do you treat like other pines?
Jonas Dupuich says
Cedars can produce back buds, but I don’t count on it. Grafting is a good alternative.
Hussam says
Hey Jonas, thanks a lot for the informations about reporting the cedar tree but I have a question about air layering, is it possible to air layer a cedar tree…??
Jonas Dupuich says
Good question Hussam – I don’t know. From what I’ve seen it may be possible but isn’t easy so I’d suggest trying it on a tree you’re willing to experiment with.
Daniel says
Thank you for sharing your wisdom. The step by step walk through is presented very well. You mention that you repotted this recently, why during this time of the year? And second, maybe just the way the soil was put into the pot but any reason for having mostly just pumice on the left side of the pot as shown in one of the pics from your tutorial. Wondering if that’s a little trick in substrate placement that a new guy like myself hasn’t learned yet.
Jonas Dupuich says
Hi Daniel! I usually start repotting in January where I live, and sometimes I repot younger trees in November and December. Winter is mild in the Bay Area and many species start growing in January making it a good time to repot.
As for the soil, I’d mounded up soil on one side of the pot to change the planting angle. I used pumice below and used a mix of 30-40% akadama (plus pumice and lava) above that.
Guilard says
ne serai t’il pas possible de faire des greffes de racines !!!
Jonas Dupuich says
I know it’s possible to do foliage grafts, but I haven’t tried root grafts on cedar so I don’t know how it would work. If the tree didn’t have roots below the knobs I’d give it a try!
Guilard says
je pensais a des greffes par perçage avec des jeunes plants !!