Azaleas are well-known for having two repotting seasons – one at the end of winter before the spring growth emerges, and one after the flowers bloom in late spring.
I think of repotting in spring as a good option if there isn’t a chance to repot in winter and the tree doesn’t need significant root-work.
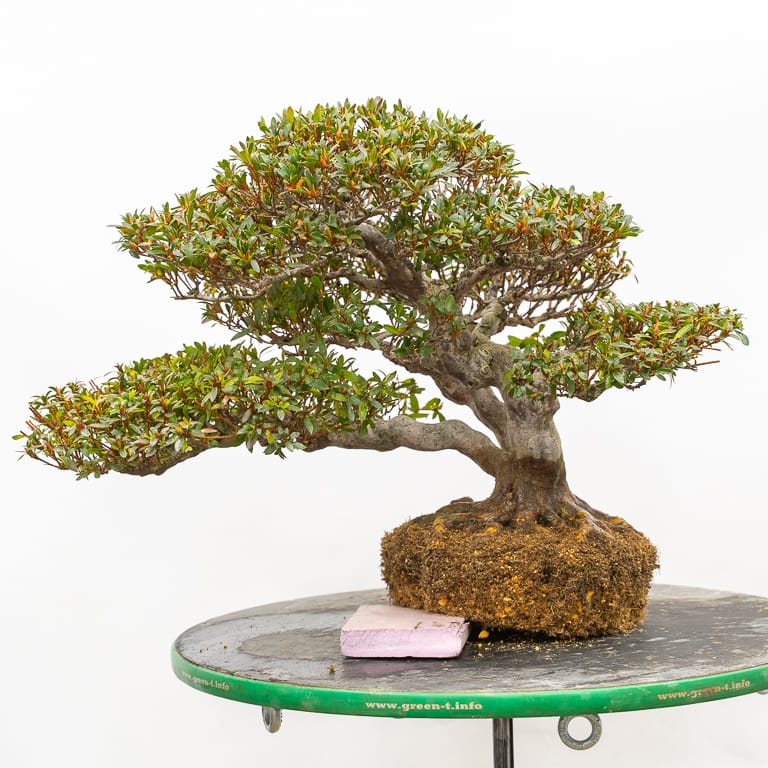
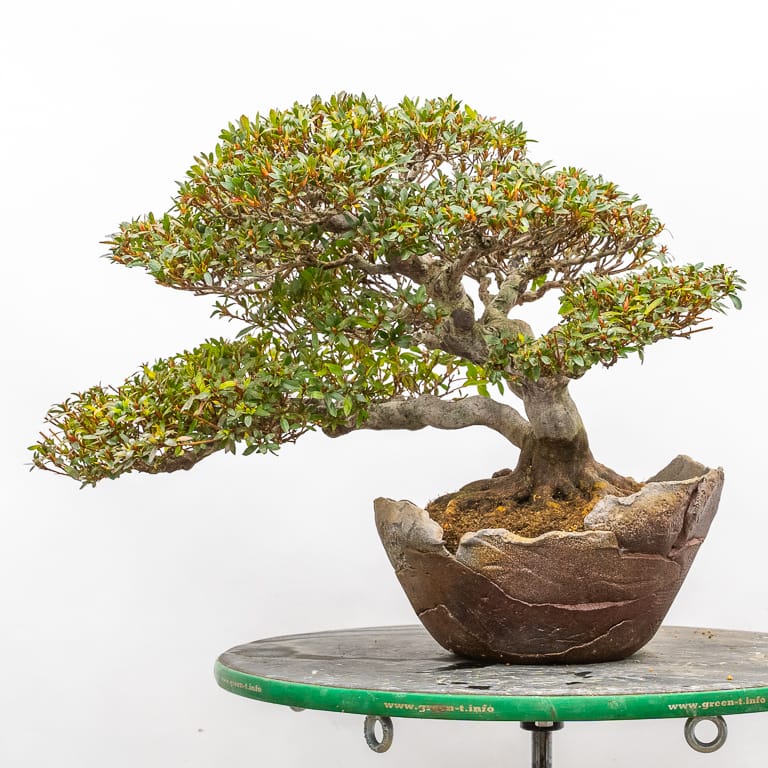
The satsuki azalea below was bare-rooted two years ago and has grown vigorously since then. My suspicion was that the tree could go another year but that the time was good for a repot if I could find the right container. I decided to go ahead with the repot.
Before getting started, I removed the long shoots and thinned to two branches in areas where three or more branches were growing.
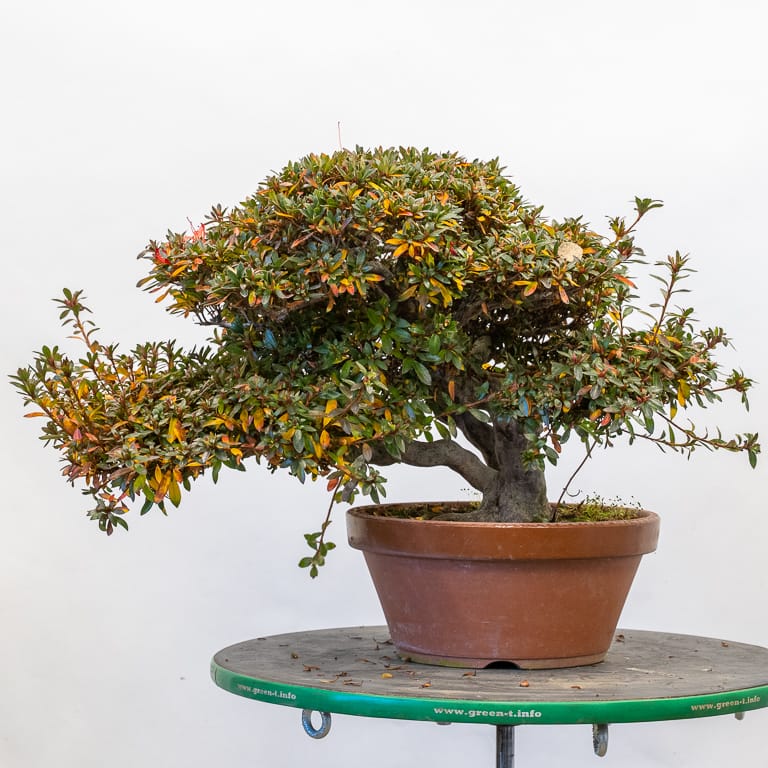
‘Kinsai’ satsuki azalea before thinning
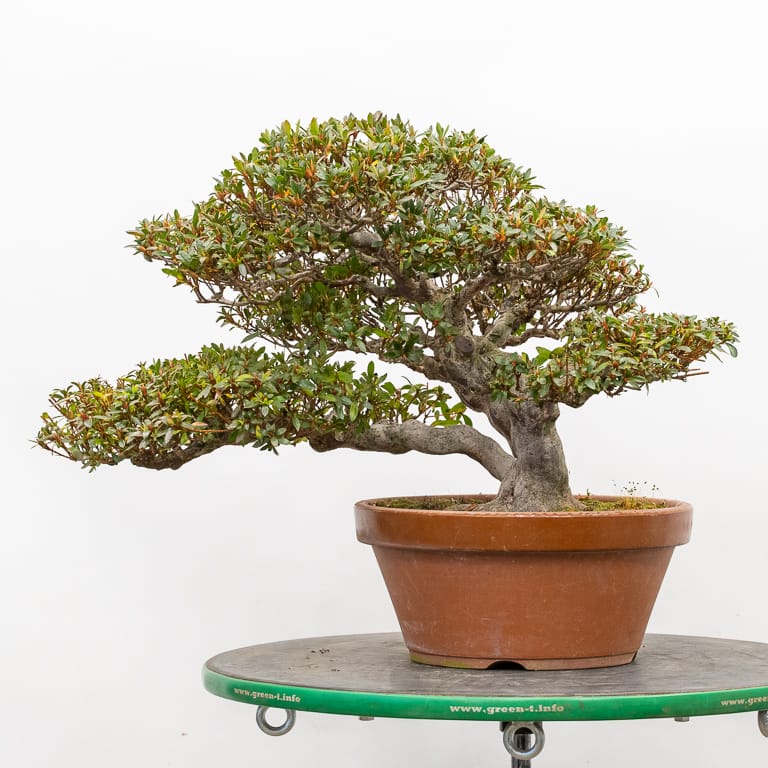
After thinning
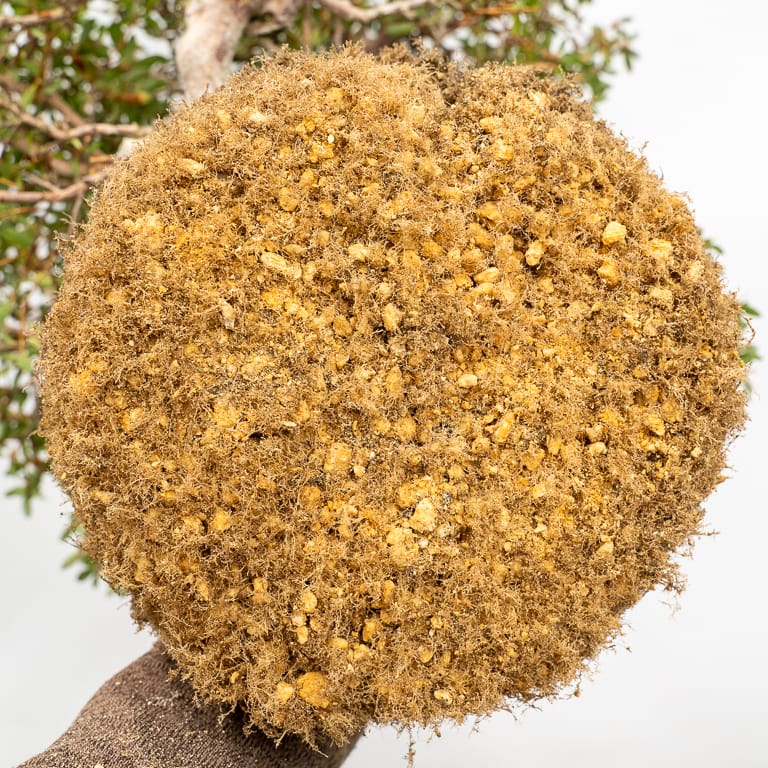
After cutting the tie-down wires I held the trunk in one hand and tapped the pot with a rubber mallet until the tree was free from the pot. Here’s what the root ball looked like.
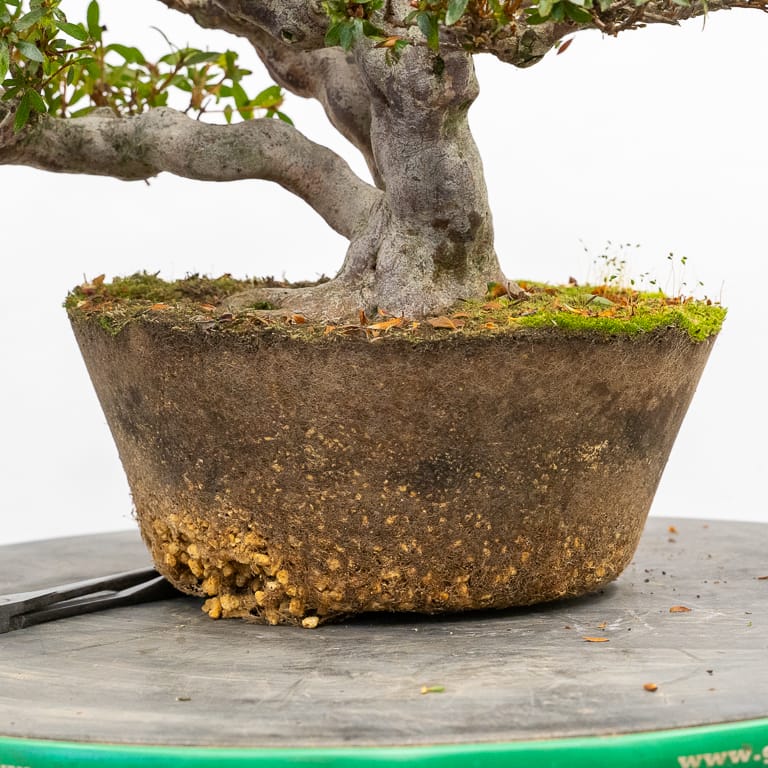
Root ball
As you can see, there are far more roots near the surface of the soil than there are near the bottom of the root ball. Unlike many species popularly grown as bonsai, azaleas favor the top of the soil for root development – a characteristic, paired with naturally fine roots, that makes them particularly susceptible to root damage when the surface of the soil dries out.
I typically bury the surface roots when I pot bare-rooted azaleas so I started removing the upper layer of soil in an effort to reveal the surface roots. Here’s what the root ball looked like after this work.
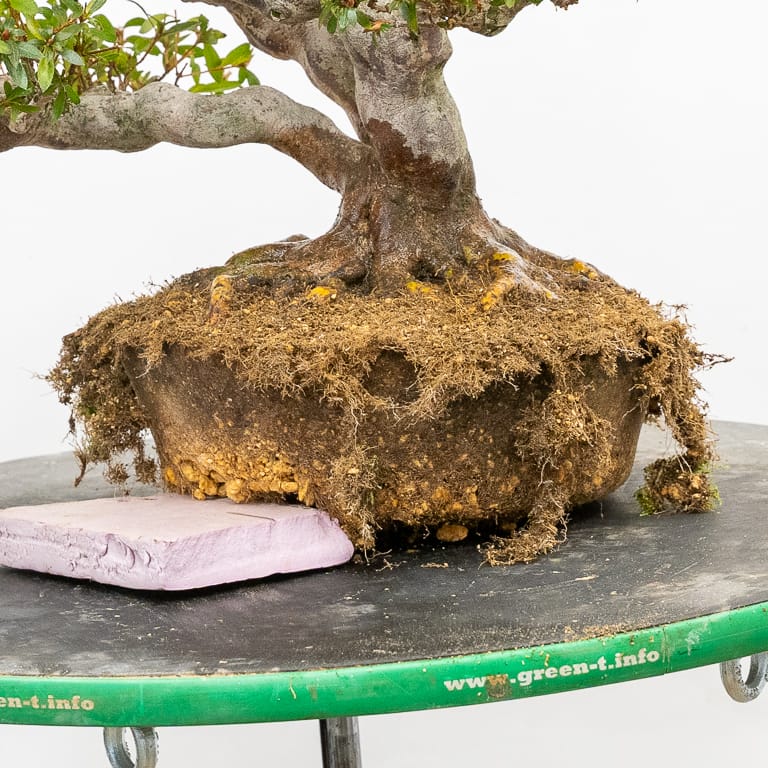
After revealing the surface roots
I worked on the bottom of the root ball next. There were far fewer roots there so the soil fell away quickly with the help of a root rake. Here’s what the bottom of the root ball looked like after removing the lowest layer of soil and trimming the roots.
Bottom of the root ball
I repeated the process on the sides of the root ball by combing out the roots that grew against the pot walls before trimming them.
Here’s what the tree looked like when the root-work was complete.
Root-work complete
Next, I had to find a suitable container for the tree. I’ve had trouble finding pots for cascade and semi-cascade bonsai recently so I knew I only had a few options to choose from. Here’s what I found.
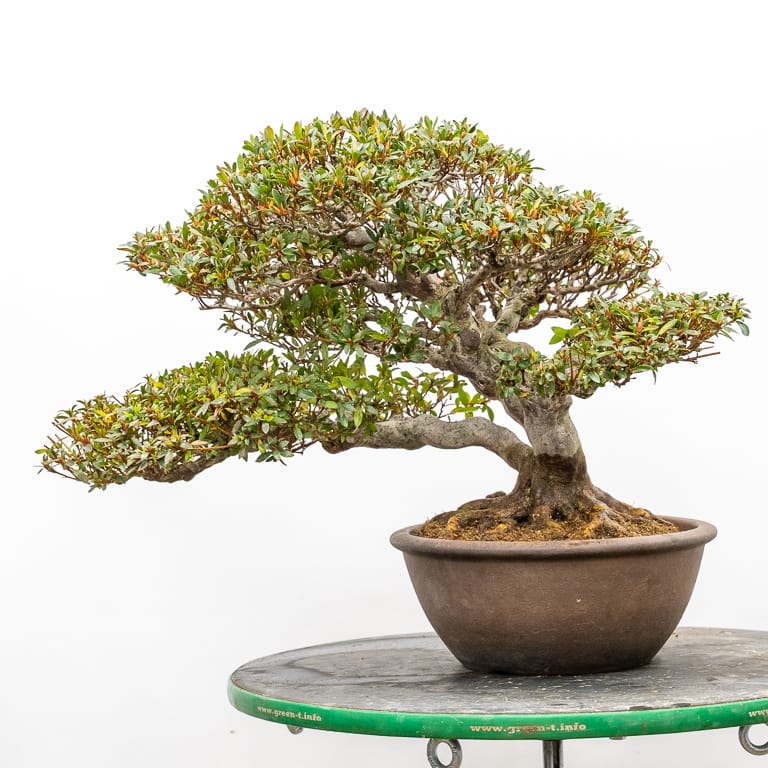
Antique Chinese pot
The antique Chinese pot was a good match for the tree, but it was on the small side. I think it would be a good choice for an exhibit, but I’m not planning to show the tree this winter so I wanted to go with something larger.
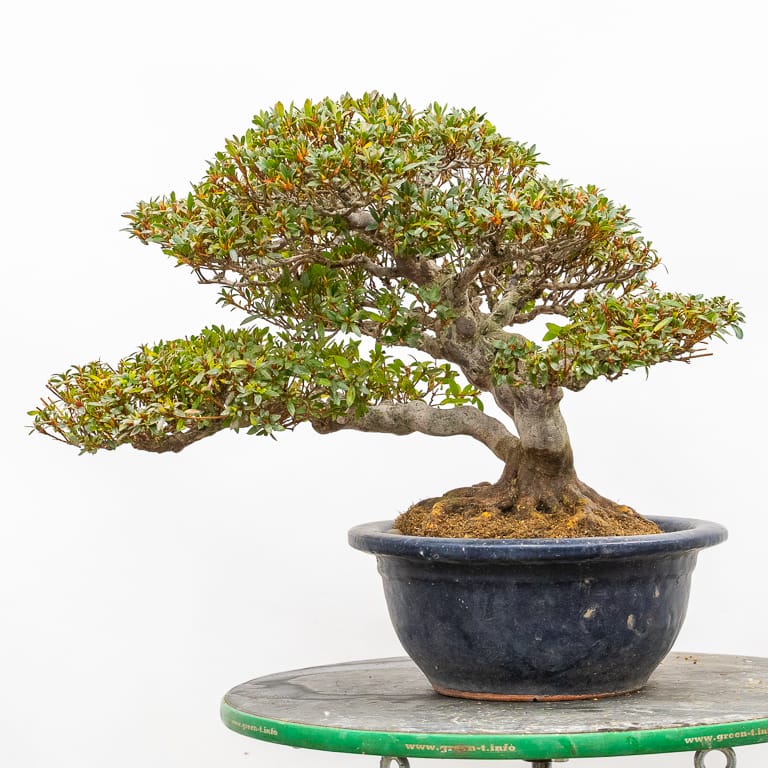
Blue glazed pot
The blue glazed pot is a more comfortable size for the tree, and the color would be a great complement to the red flowers in spring, but I wanted to see if I could find a better option.
Jan Rentenaar pot
The Rentenaar pot didn’t occur to me until I passed by it when I was checking for alternatives to the pots above. It turned out to be a good fit.
Before inserting drainage mesh and tie-down wires, I scrubbed the pot with a brush and water to remove algal build-up. What I found was that the drainage holes were made on insets that allowed water to pool up to 1/4″ deep in the bottom of the pot.
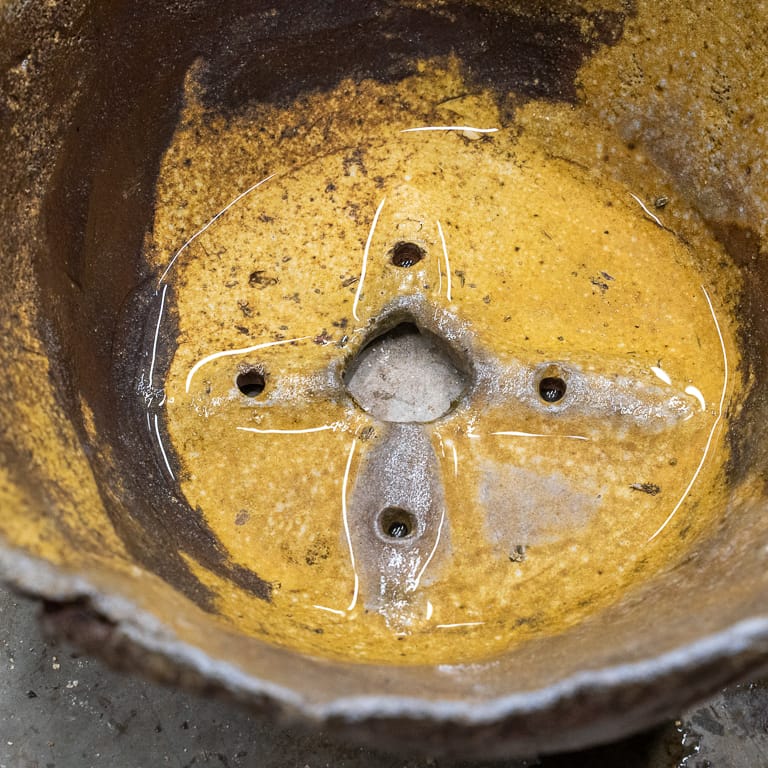
Standing water
I didn’t want so much water on the bottom of the pot so I added one additional drainage hole to each quadrant of the pot.
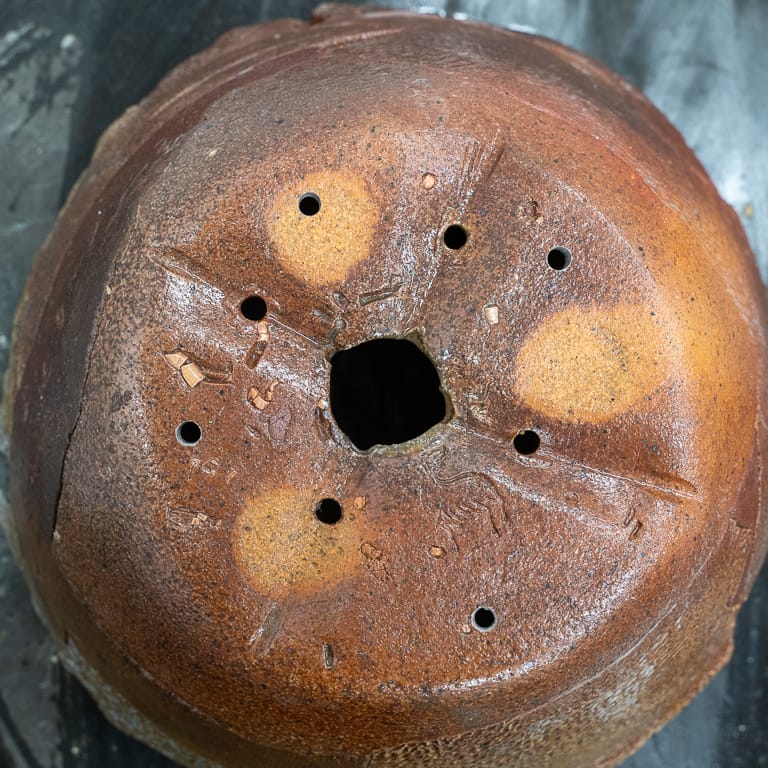
Drainage holes
The rest of the repotting was straightforward. After working fresh kanuma into the roots, I applied a layer of mountain moss to retain moisture near the surface of the soil. Here’s the tree in its new pot.
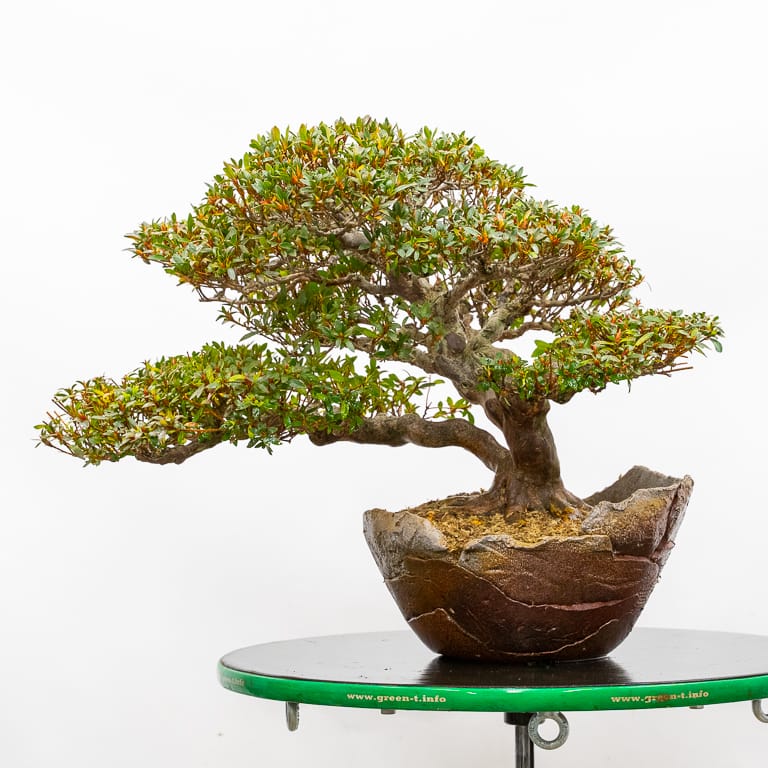
Repotting complete – 15″
The pot is still on the small side so I’ll be paying attention to how much water the tree needs this year. If it dries out quickly I’ll try to find a slightly larger pot for next year.
Subscribe to Bonsai Tonight
New Posts Delivered Every Tuesday and Friday
Bob Steig says
Curious why you would use such a relatively deep pot if the roots will remain near the surface.
I recognize the semi cascade (ish) aspect, however since wider shallower pots retain more moisture, might that not be the way to go?
Jonas Dupuich says
Great question – The main reason I went with a cascade pot is that I thought the style matched the semi-cascade design of the tree. Beyond that, it may be that the azaleas produce more roots near the surface because they like the way the soil there dries out more quickly, as long as they are watered frequently enough.
Sally Cotter says
Jonas,
Our neighborhood nursery got in some “everblooming” Satsuki Azaleas from California, and they are blooming. Is it safe to repot one after this bloom cycle? What do you think about the everblooming variety?
Love the Jan R. Pot, good choice.
Jonas Dupuich says
Thanks, Sally! I don’t know about these “everblooming” satsuki – they sound like fun. I’d still recommend repotting before they start growing in spring. Do you have a name for the cultivar?
Sally says
I just went to the nursery, they are not Satsuki, they are dwarf Encore. Rhododendron Roblex Autum Fire, PPAF. Encore Azalea.
Jonas Dupuich says
Nice flowers!
Penny Pawl says
I like the pot you picked best also. very nice plant
Jonas Dupuich says
Thanks, Penny!
Doug Zeeff says
I have many native azaleas that I have harvested locally here in North Carolina. With abundant sunlight I have been able to reduce the leaves and flowers to an acceptable size. My problem is that I have them planted in 100% inorganic soil and during the summer they require watering at least 2 times per day. A lot of times it’s 3 waterings. Would I mess things up if I go to 30% pine bark chips. My thinking is that this would prevent the leaf droop when I am late watering.
Jonas Dupuich says
Good question Doug. I think the soil would be fine for a year or two but I don’t know if it would be good for the tree after the organic matter breaks down. I also water several times a day in summer and find that the frequent waterings make satsuki happy as they appreciate the fresh air as much as the fresh water.
The main things that come to mind are the basics – a misting system, larger pots, lots of moss on the surface of the soil, more shade cloth, and possibly smaller sized kanuma.
I’d try the bark mix on younger or less refined trees for a few years to see if you notice a difference. I used a mix of 1-1 lava/fir bark and found the trees loved it. That said, the trees were relatively young and I didn’t keep them in the mix long enough to know what happens after 3-5 years.
Candace says
Terrific post Jonas, and very encouraging since I find Satsuki azaleas challenging. Headed for the the repotting bench, wish me luck.
Jonas Dupuich says
Thanks, Candace – good luck with the repotting!
Michael Jensen-Akula says
Great post as usual. BTW, what drill/technique do you use on your really nice pots—i have been loathe to drill my nicer pots. Thanks!
Jonas Dupuich says
Thanks! I use ceramic bits on pots. Both diamond dust hole-bits and paddle-bits can work. I’d suggest practicing on less precious pots before drilling the nice ones!
Michael Hylton says
Jonas,
I noticed that you didn’t remove much of the root base. I’ve seen YouTube videos where a larger portion of the lower roots are removed. What do you recommend? The Satsuki Azalea (from you) is root bound and hasn’t been repotted in two years. I plan to repot it in the same pot.
Thanks,
Michael
Jonas Dupuich says
Hi Michael! There were very few roots in the lower part of the root ball in this case so I wanted to preserve as many of them as possible. The main reason for this is that the tree was bare-rooted two years ago and has yet to develop more roots lower down. I’d strongly recommend against removing roots from any area of the root ball where there aren’t many roots.
If the tree came out of the pot with a solid block of roots the final shape of the root ball would likely be the same but far more roots would have been removed from the bottom inch or two of the root ball.
Now, btw, is a great time to repot your tree as some satsuki are already starting to grow around here.
Suji Noran says
Jonas, In hindsight after seeing the root ball, would you still have repotted your Kinsai or waited another year since you were not planning to exhibit the tree?
Jonas Dupuich says
Great question Suji – I think the tree would have been fine either way, but if I didn’t repot, I would have removed some of the soil near the surface to improve the drainage. If you ask me again in one year I’ll have a better idea about which course of action would have made the most sense!
Suji Noran says
Jonas, When you say you would have removed some of the soil near the surface (if you’d not repotted), would you have removed as much soil as in your photo: revealing the surface roots and (if so) would you have removed the extended roots that you had raked out?
I’d like to compliment you on the slight repositioning of the front, a nice yet subtle improvement.
Jonas Dupuich says
Yes, that’s exactly right – I’d remove the same amount of soil from the surface to reveal the roots and improve the drainage. I would have cut these fine roots instead of combing them out as I don’t need long roots near the surface.
And thanks about the angle change. I’d thought about a few different options and thought I’d go with the current angle for this year.
Tom Carcone says
Great post Jonas. Curious on the timing of the re-potting. I was under the impression this should be done closer to early spring when the trees start budding. Is it safe to say that if winter protection can be provided (ie. keeping temps above freezing), it is OK to repot in winter? I am on the east coast so maybe it is different for us here.
Jonas Dupuich says
Thanks, Tom! Many of the azaleas in my garden are starting to grow so it’s not particularly early where I live. Since your winters are typically (and currently) cold, I’d recommend waiting until spring when the trees are getting ready to grow.