Earlier this year I spent a week working on young pines with John Eads of Left Coast Bonsai. We pruned and/or wired almost every young pine in my garden to give us a chance to review the approach for trees at different stages of development.
For some of the younger trees, the work was simple.
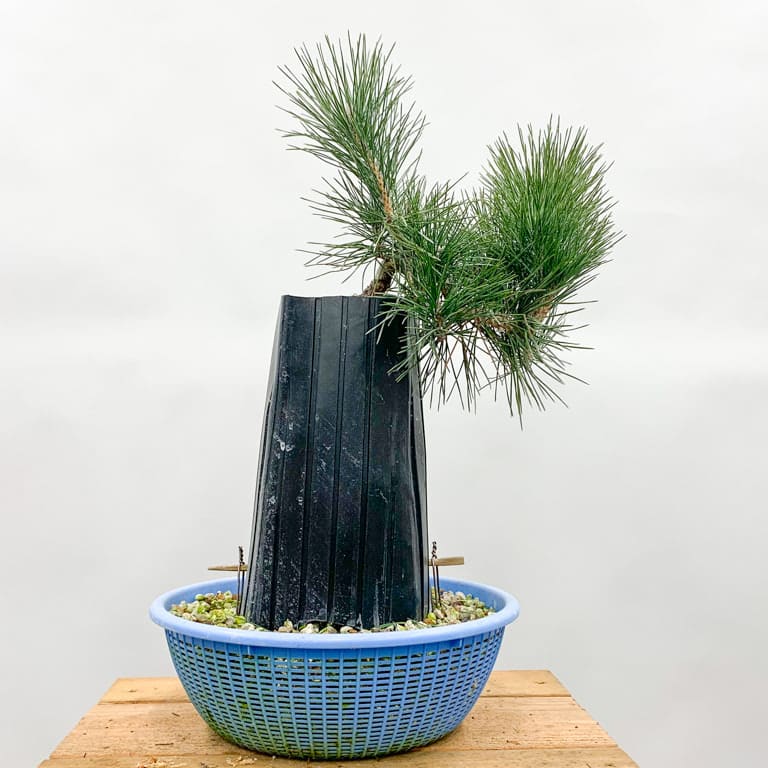
Exposed root pine in training
By removing some of the growth along the trunk on the tree above we can encourage small buds to appear that can be used to create the future primary branches.
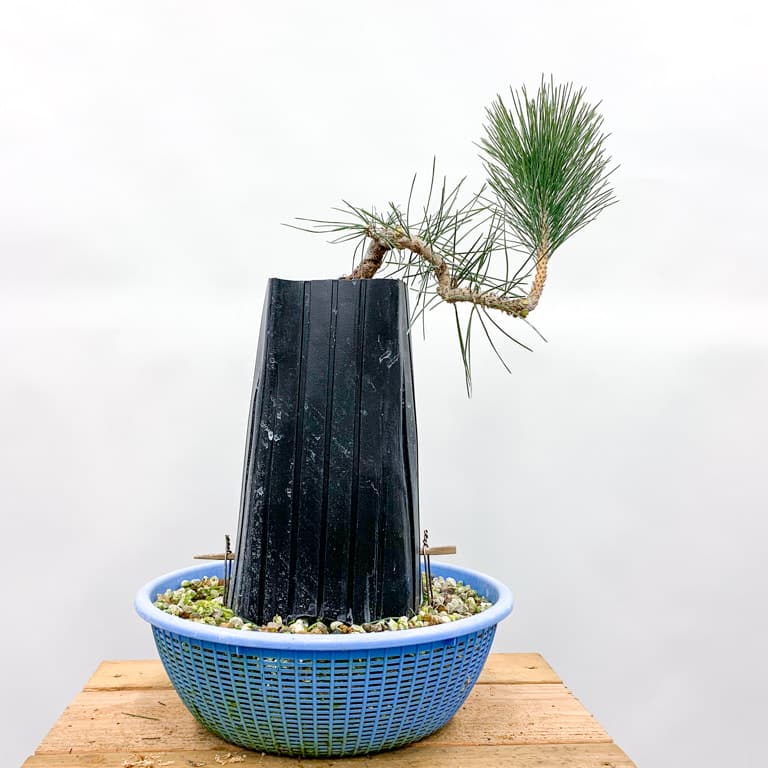
After pruning – 20″
An exposed root pine that was a few years older was showing signs that the roots were bumping into the sides of the container. To give the roots more space to develop we removed the plastic cylinder protecting the roots and repotted. We also removed a few of the larger branches that were low on the trunk as they were too big to use in the future design.
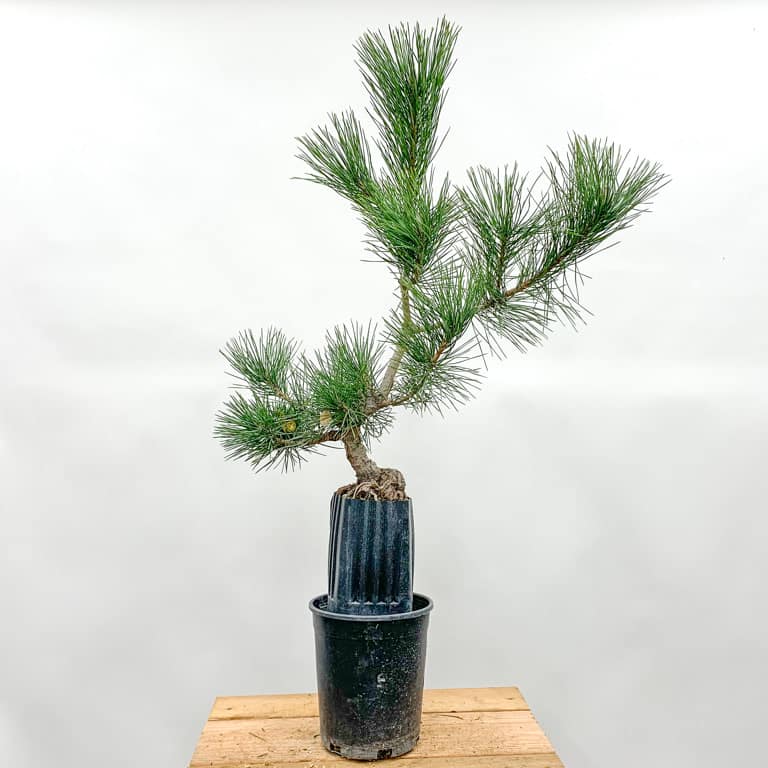
Exposed root pine before pruning
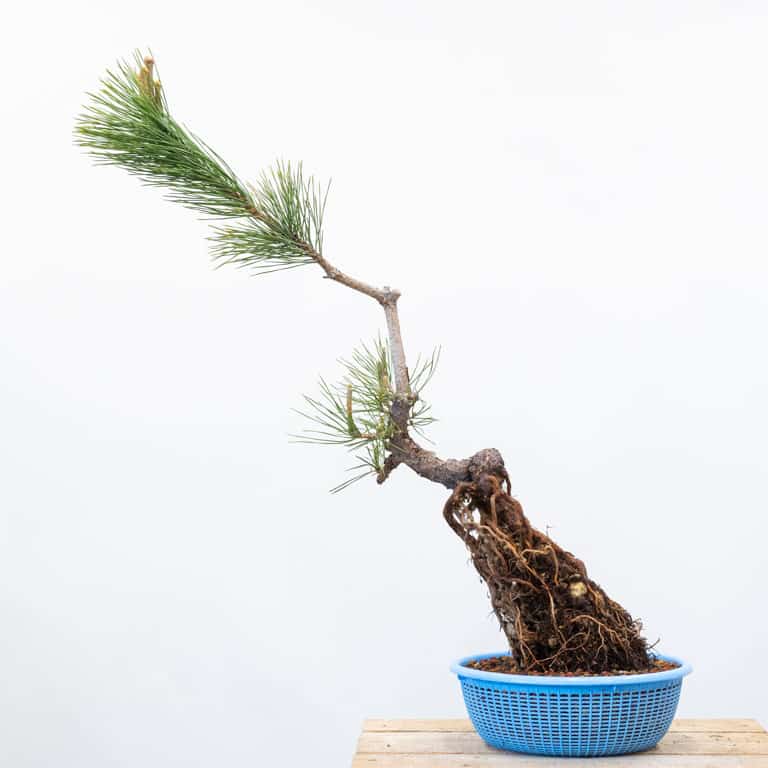
After pruning and repotting – 25″
Some of the older trees had thickened enough that it was time to remove the sacrifice branches.
The black pine below ended up becoming a mini bonsai to take advantage of the lowest branches on the trunk.
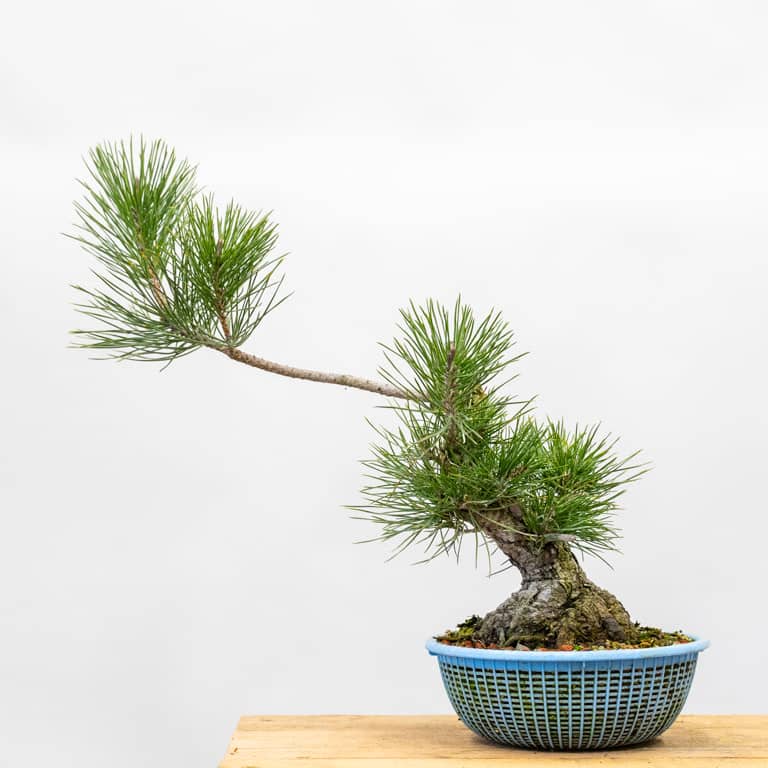
The trunk has reached the desired thickness
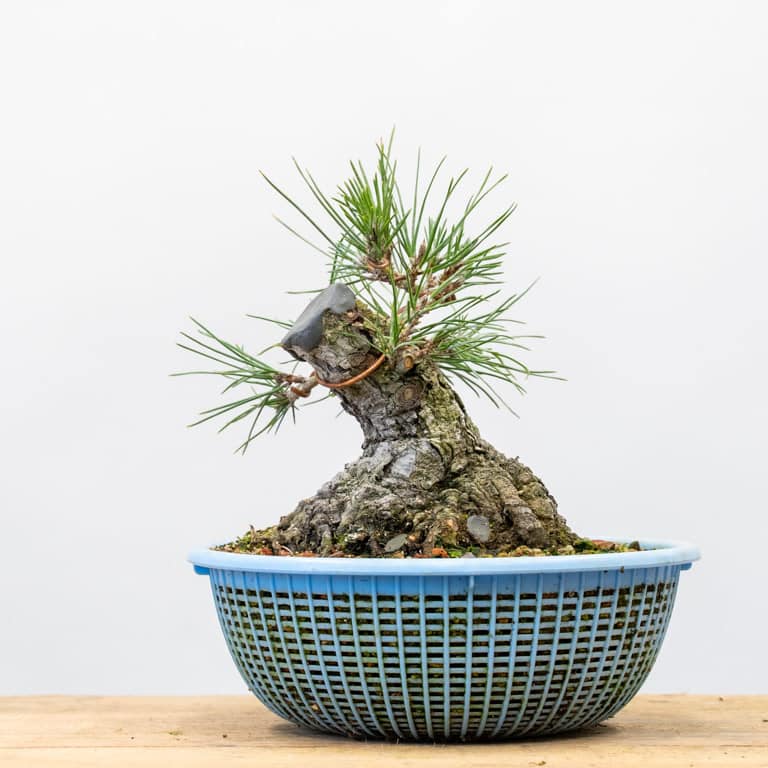
After removing the sacrifice branch – 5.5″
We also removed the sacrifice branch on a pine wired by Hiroharu Kobayashi in 2017. It’s about seven years old.
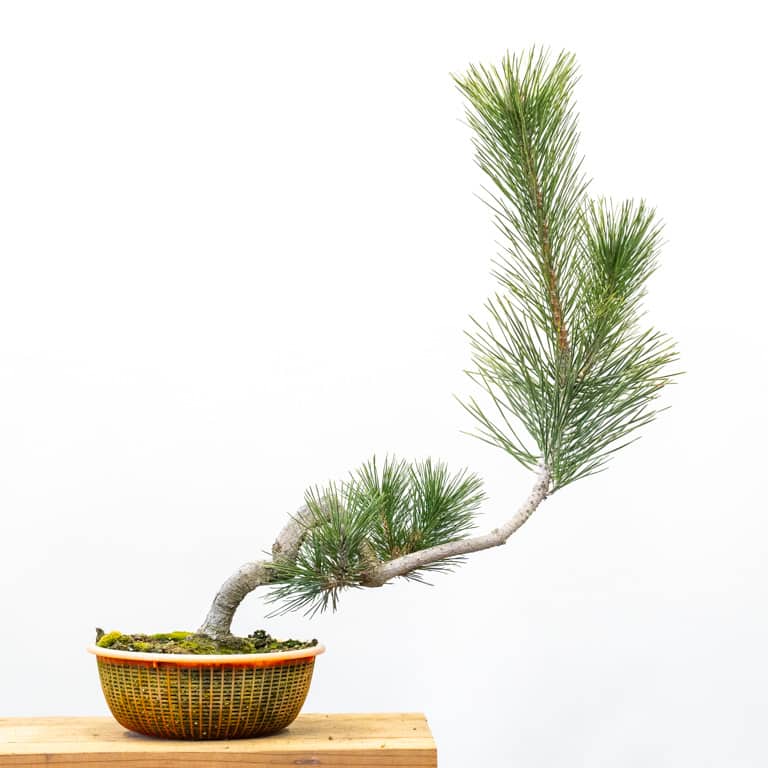
Before pruning
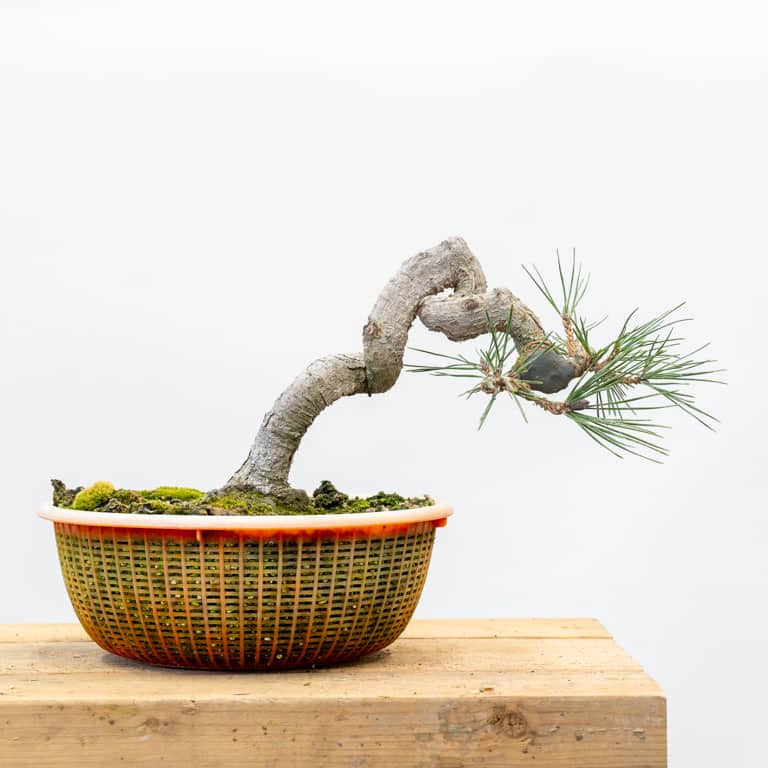
After pruning and wiring
I’d wanted the trunk to thicken for a few more years, but if it had continued to thicken, I’d lose the detail of the tight curves at the top of the trunk.
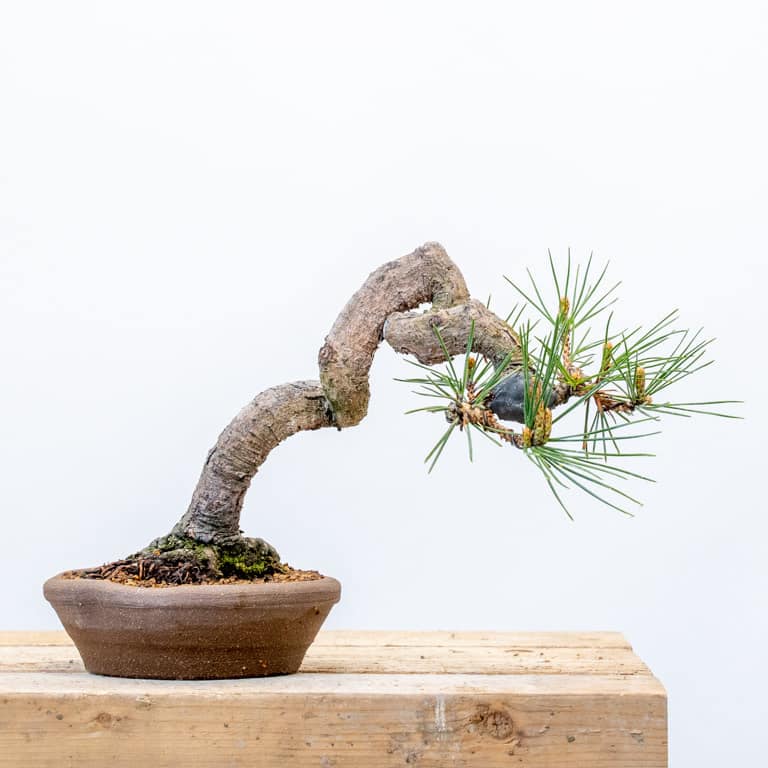
After repotting – 6.5″
Not all of the trees John and I looked at needed work. When we found a healthy tree with a good sacrifice branch and small branches near the base of the trunk we left the tree alone and moved on the the next one.
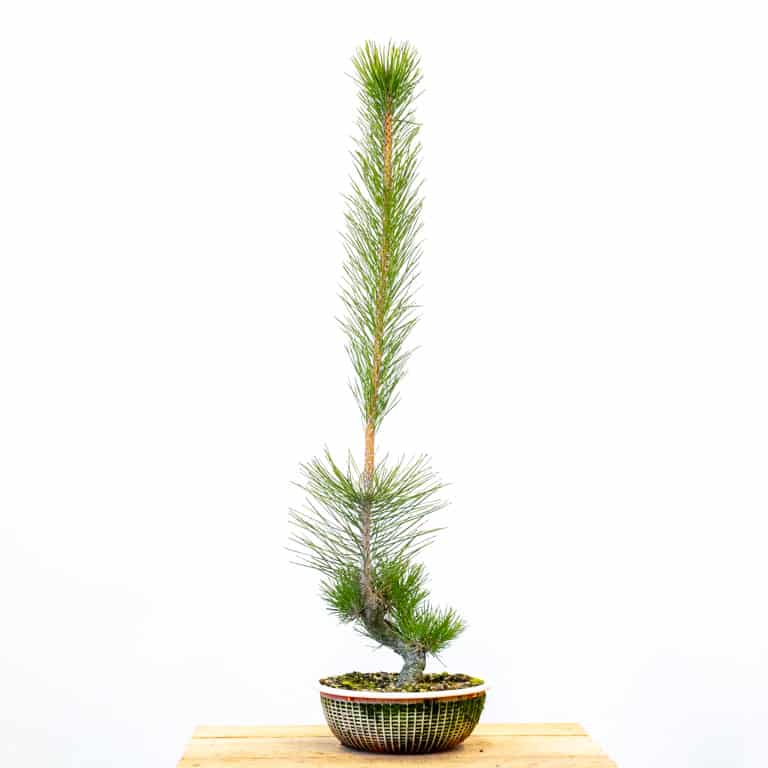
Four year-old pine – no work needed
I’d like to send a big thanks to John for his help with all of the pines! To learn more about John’s work – he grows pre-bonsai in Northwest Oregon – check out his website, Left Coast Bonsai.
Subscribe to Bonsai Tonight
New Posts Delivered Every Tuesday and Friday
Mike says
When repotting exposed root Pines. Do you leave some of the dirt in the center of the root mass? The above pine looks like it is still pretty full of soil.
Thanks !
Jonas Dupuich says
Hi Mike – I left a lot of soil between the roots as I didn’t want to bare everything all at once. Because I had to remove more soil than I wanted (to free the roots from the pot) I left more than normal above the soil line. I’ll incrementally remove the rest of the soil around the roots over the next few years.
Andrew says
That twisted pine is astonishing. I’m smitten with it.
Francis Shaner says
Jonas, love your site and the tons of very useful information and especially the photos that take refining our bonsais to the next level. I would also like to give a plug for Left Coast Bonsai. John Eads and company just shipped my first Black Pine order ( on time w/ extras). Thanks for the link.
Jonas Dupuich says
Thanks, Francis – and thanks for the kind words about Left Coast Bonsai too!
Matt says
When you removed the plastic to reveal the roots of the expose root pine, did you have to do anything special to help the roots transition gradually from the moist environment within the plastic cylinder to the drier environment of the air to prevent the roots from drying out too much and dying? Or it is a matter that, because it’s early spring, it’s still cool enough outside that the roots will stay moist long enough to put on some protective bark before we get into the heat of summer?
I’m following this project with keen interest, as I have recently planted several Japanese White Pine seedlings with the intent of growing them as exposed root bonsai.
Jonas Dupuich says
Hi Matt! That’s great about the white pines as exposed root is a popular approach for the species.
The main thing I did to protect the roots was to leave most of the soil that was tucked in between the roots. I also buried about two inches of roots below the surface of the soil.
I’ve found that roots thicken faster when they’re underground, but it’s fine to expose roots at anytime as long as there are enough fine roots under the soil below.
Does this help?
Matt says
Yes, that’s very helpful. Thanks! With that knowledge, I may also change my approach for some root-over-rock projects that I started a few years ago. I had initially planned to expose the roots and rock very gradually, over the course of several years. Maybe it won’t take as long as I had originally anticipated to fully expose the rocks and get them into their first bonsai pots, as long as I can leave some soil between roots as I remove the wrapping.
Zack Clayton says
Jonas, To thicken the trunk of the Kobayashi pine, would you consider grafting on the back of the lower trunk to thicken it so that the top tight curves were maintained? I don’t know if this is feasible as I’ve never heard of grafting on a sacrifice branch but it seems it should work to put one where it is needed.
Jonas Dupuich says
Good question – technically this could work. It would create a scar on the back of the trunk but it could help thicken the lowest section. What might not work is that the thickening would be more likely to happen in the back of the tree where we wouldn’t see it. If the sacrifice branch were on the side of the trunk that would increase the odds that we’d see the effect of the thickening from the front of the tree.
My plan for the tree was to have no taper to better appreciate the line of the trunk, but I’ll have to appreciate the line on a smaller scale given the way the trunk has thickened.
Martin says
Hi Jonas, have you ever explored using aluminum foil/tape to encourage the healing of big cuts? I’ve watched some videos on youtube showing some nice results for some species but I don’t know if they are to be trusted.
Btw, really nice work with those pines and all of your trees overall!
Jonas Dupuich says
Thanks, Martin! As for the foil technique, I haven’t tried it but I’ve seen the approach in gardens that do great work so I can’t think of a reason to not give it a try. The best results I’ve seen come when some kind of sealant is used underneath and the foil is placed on top of that. It’s worth some experimentation to see how it goes!
Stefanos Papavasileiou says
Hello Jonas!
Perhaps this is irrelevant with your post but can you do root grafting in black pines?
Thank you once more for all the knowledge you bring to us!
Jonas Dupuich says
Hi Stefanos! It might be possible but I haven’t seen this done before. I’ve successfully approach grafted black pine (using a branch to graft back onto the trunk) so it may work, but it’s not common practice for pines, likely because it’s tricky.
Brian says
Hello Jonas
on such drastic cutbacks, is there danger of losing sap draw with so few needles? Thanks
Jonas Dupuich says
Hi Brian – I’ve cut pines surprisingly far back and they can respond well to the work (the work here is conservative). The main thing is to leave at least a few needles so they can sprout new buds.