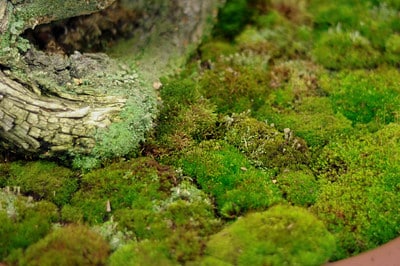
It’s common, when displaying bonsai at indoor exhibits, to cover the surface of the soil with moss. The alternative – dirt – doesn’t really compare. Scott decorated his Ponderosa Pine with a great arrangement of mosses and lichens at this year’s BIB exhibit.
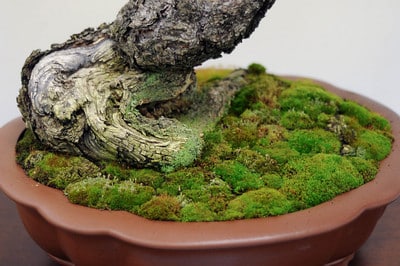

Moss on ponderosa pine
Depending on where you live, you may have found that moss doesn’t just show up the week before exhibit. Either that or you find it difficult to keep it under control, a problem I do not have in Northern California. For years now, I’ve taken note of all of the patches of attractive moss I run across that grow on public property. Come January, I go moss-collecting. If all goes well, I end up with a few trays like the one below.
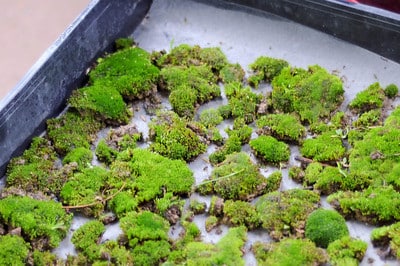
Collected moss
One other ingredient is necessary to make the process a succes – moss. White sphagnum moss, to be specific, the kind usually available from orchid growers. It typically comes in clumps`. Run it through the large screen you use when sifting bonsai soil to produce the fine particles shown below.
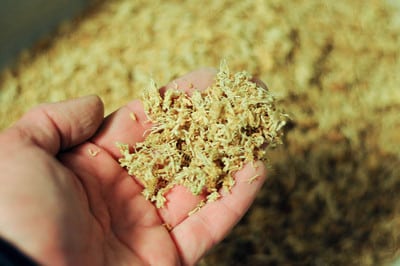
White sphagnum moss
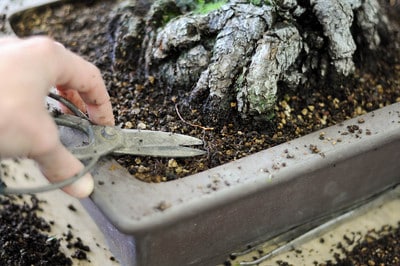
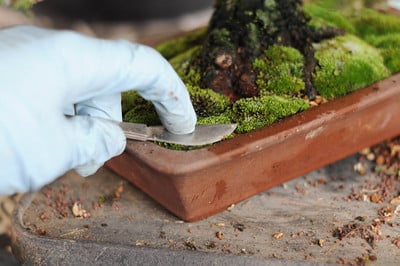
With these two special ingredients close by, it’s time to get started. The first step is soji – removing, or “cleaning” the top layer of soil. Depending on the quality of your soil, this step may not be necessary. Because I use organic fertilizers like cottonseed meal, I find that in January the decomposed fertilizer becomes gunky and impedes drainage. Now’s a good time to remove it. I do this with bent-nose tweezers – possibly the most used tool in my bag.
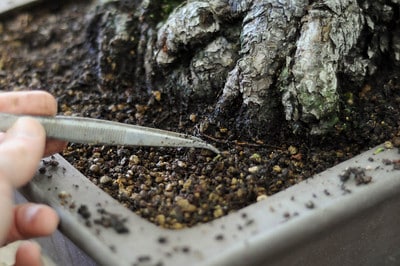
Removing the top layer of soil
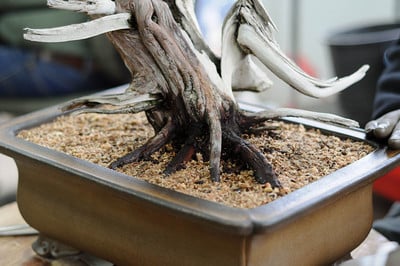
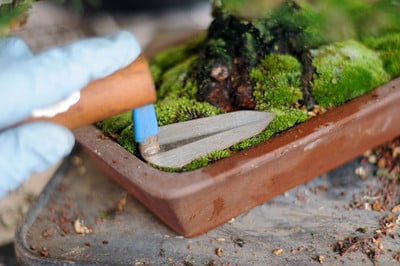
If any roots stick out, I clip them with root scissors.
Clipping an exposed root
I then fill the pot with bonsai soil but stop a quarter-inch below the lip. This is to make room for the moss. If your moss is thicker, leave a bigger gap.
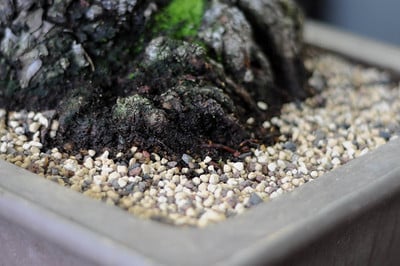
Fresh bonsai soil (akadama, lava, pumice and charcoal)
Here’s where the sphagnum moss comes in. Sprinkle a thin layer over the soil.
White sphagnum moss
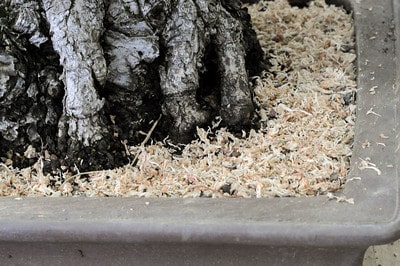
The sphagnum moss helps keep the dollups of fresh moss moist. Watering it down before placing the fresh moss makes the work easier – and keeps it from blowing away.
Sphagnum moss moistened – ready for fresh moss
This is where the moss work becomes technical. Clipping the base of a dollup of moss helps it fit into the pot.
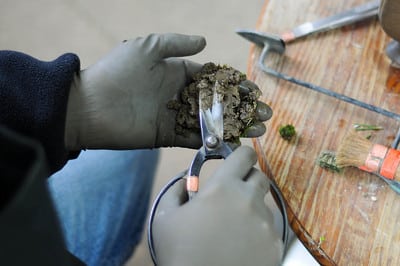
Preparing a clump of moss
Some folks start in corners – others begin around the base of the trunk.
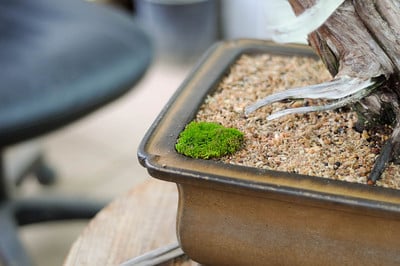
One down, more to go
It’s possible that somewhere, someone has written a treatise about moss-laying. I like to think so anyway. Turns out it’s much easier to do a bad job than it is to make the moss smooth and attractive. I’ve seen many workshop students shrug their shoulders and breeze through a tree only to find themselves reapplying the moss under Boon’s supervision.
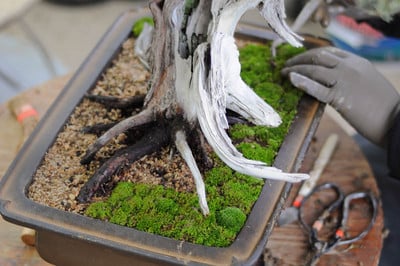
Half-way there – Jeff always does a good job
Where can moss-work go wrong? Some things to keep in mind. Like-sized clumps look good together. Placing large clumps on the left side of the pot and small clumps on the right side stands out something awful. The same rule applies to moss color, character, and direction. Yes, direction. Look closely and you’ll notice that most moss leaves that grow together point the same way.
Some of the most attractive work blends together different kinds of moss. It’s worth experimenting to see what effect you like. Bonus points for good use of lichen. We’ll save antenna-theory for another day.
Freshly applied moss
Tamping the moss with tweezers or trowel helps it stay put. As moss frequently grows in mucky soil, firmly pressing the moss into place really sets the clumps into the sphagnum and bonsai soil below.
Tamping the moss with tweezers
Tamping the moss with a trowel
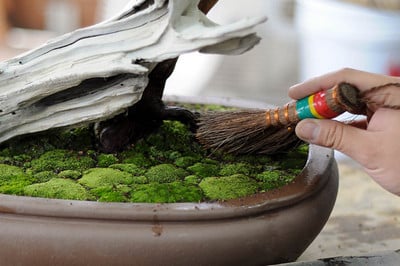
For a final touch, feel free to sprinkle tiny soil particles over the moss and sweep away the excess. By filling in the gaps, the edges of the clumps don’t dry out so quickly. A popular BIB top-dressing is black lava, or “pepper,” as you’ll hear folks refer to it in Boon’s workshops. The purple lava works well because it stays fairly dark when dry – pumice and akadama are lighter-colored when dry.

Sweeping away excess “pepper”
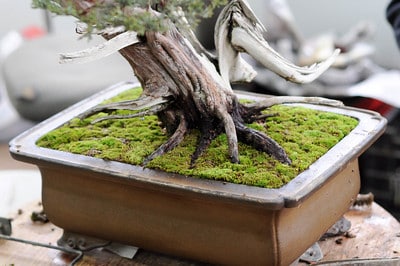
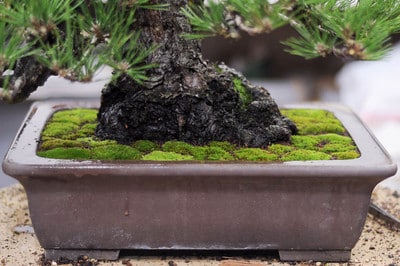
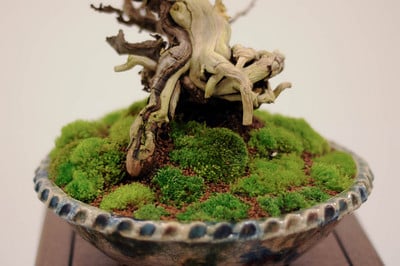
Moss-work complete
Once all’s set, water in the moss-work. Bonsai with freshly applied moss can be placed in full-sun, but care must be taken so it doesn’t dry out. The longer between the moss application and the exhibit, the more the clumps will fuse together and the taller the moss will sit in the pot. Some day I’ll lay moss early and let it grow for a month before exhibit. It makes for a somewhat rangy look that complements rough-hewn bonsai well.
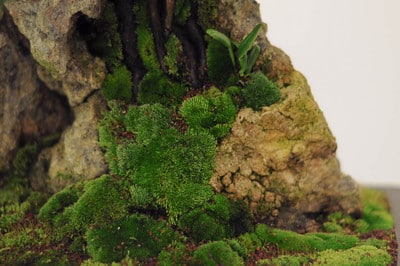
Here are a few more examples of moss-work from BIB’s 11th annual exhibit.
Black pine with green moss
Ponderosa pine with moss and lichen
Root over rock procumbens juniper with green moss and a small fern
Gooseberry with green mosses
Subscribe to Bonsai Tonight
New Posts Delivered Every Tuesday and Friday
John Kirby says
Nice job Jonas, and it looks so simple……
John Geanangel says
Nicely done…as is much of what you have been blogging lately. Thanks!!
justin says
where are you guys located? I just moved to CALIFORNIA from Brazil..
xwires says
We’re all over the place – for information about Bay Island Bonsai, see: http://bayislandbonsai.com/membership/
Steve says
Hi Jonas, I just tried this method after looking at this post. Too bad I didn’t have more moss. I used what I had, but I think my own project would have came out “better” if I had more. Thanks for posting this useful info.
btw: I attended the last BIB meeting on the 6th for my first meeting with you guys. I enjoyed that and meeting all you as well. thanks again.
xwires says
Hi Steve, thanks for the note – it was nice meeting you at the meeting. Moss this time of year is tricky – don’t be surprised if it doesn’t stay green as long as you’d like. If it fills in over the next month or two, consider it a big success!
Peter Richter says
Very informative article about laying moss. For my b’day this past Jan., I received 2 Japanese Quince bonsai. My question is about leaving the moss growing in the pot. Can this be a permanent feature or should the moss be removed after a period of time? Excellent pictures with the article.
xwires says
Hi Peter – good question. If moss doesn’t get in the way of watering or fertilizing, and it doesn’t disturb the tree or the tree’s bark, it’s ok to let it grow. Moss can help a tree preserve moisture, and it can make it hard to tell if the underlying soil is moist or dry. It’s also pretty! Because I fertilize with globs of organic fertilizer, I tend to keep my trees free from moss, with the exception of a single pine grove.