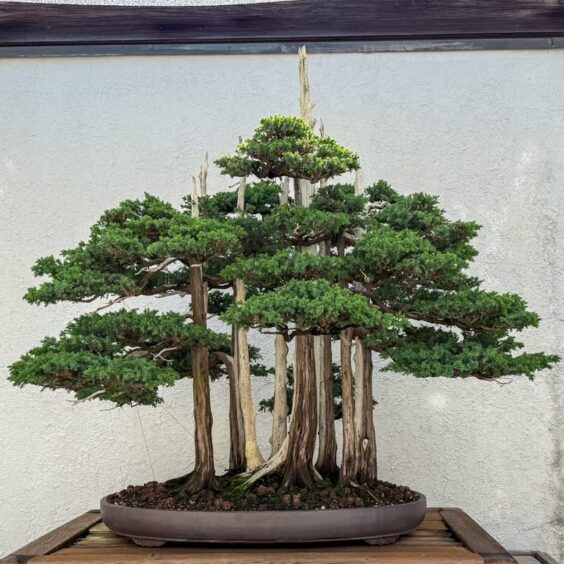
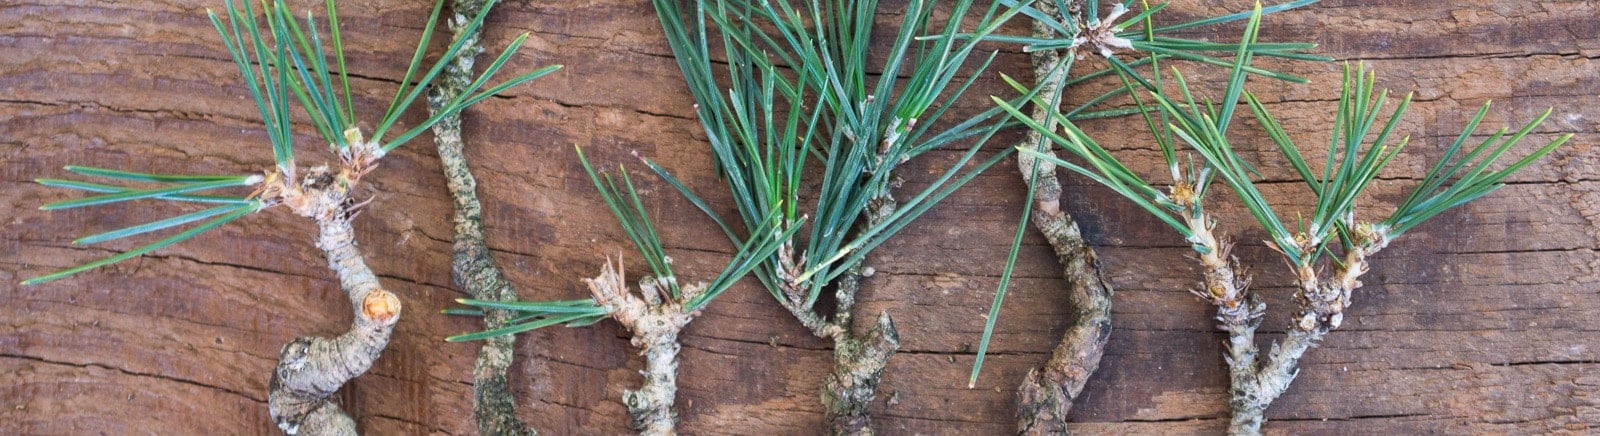
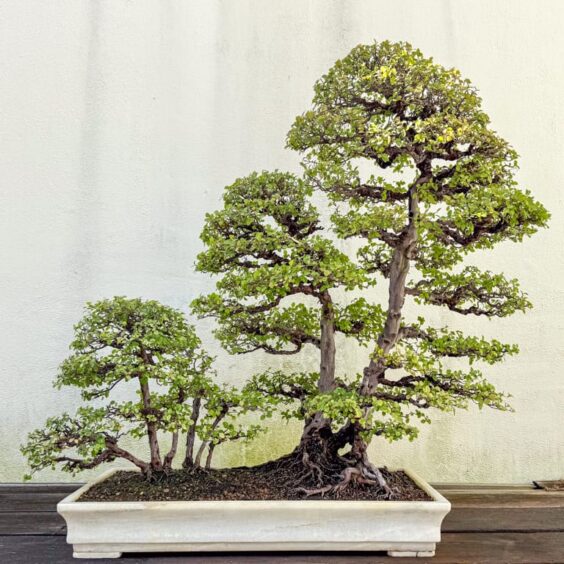
Bonsai Tonight

Pine seedlings

Posted in Bonsai Development by Jonas Dupuich on May 11, 2012

I planted pine seeds again this year – black and red. The seeds came from Shikoku, Japan. It’s legal to import pine seeds – permits are available from the USDA - and the process is surprisingly simple. Once I got them home, I waited impatiently for late winter to begin preparing them for spring planting.

In past years, I soaked the pine seeds in water for one to three days and then planted the seeds that sank to the bottom of the glass. This year, at the advice of a friend, I scarified and stratified the seeds before planting (thanks “Juan”!). Instead of dropping the seeds into tap water, I poured near-boiling water over the seeds and let them cool and soak for 24 hours. The hot water scarifies the seeds by softening up their hard coating – a necessary step for germination. I then placed the seeds in plastic bags filled with moist white sphagnum moss. I placed these bags in the refrigerator where they were intended to sit for one to two weeks. By stratifying the seeds – placing them in a cold, moist environment that simulates natural spring conditions – I help the seeds break their dormancy so they can sprout.

One thing seemed to lead to another and I didn’t get around to actually planting the seeds for over a month. No matter – the seeds sprouted just fine.

Young seedlings

Seedlings rising from the sand

To better gauge the effect of stratification, I planted a number of seeds directly after soaking them for 24 hours. In the photo below, you can see that the stratified seeds, on the left, have germinated much faster and with greater consistency than the un-stratified seeds to the right of the aluminium wire.

Young seedlings

Stratified seeds :: un-stratified seeds

Continued warm weather is bringing more seeds into the light each day. It’s been a fun process to watch.

Young seedlings

A seedling prepares to cast off its protective shell.

How are last year’s seeds doing? Pretty well. Most survived the seedling-cutting process and are now growing quickly. I’ve found that my pines take about two years to reach the height seedlings in Japan reach in their first year (see Bonsai Today #12 or #20 for comparison).

One year old seedlings

One-year old seedlings

Not all, however, are as healthy as this. The most vigorous 2-4″ tall – the stragglers, somewhat less. You can see the range of heights below.

One year old seedlings

One-year old seedlings

One year old seedlings

More vigorous seedlings

One year old seedlings

Less vigorous seedlings

For those who missed my posts about collecting and planting pine seeds, check out the following:


Tagged with: , , ,

Shimpaku cuttings

Posted in Bonsai Development by Jonas Dupuich on May 8, 2012

A few months back I grabbed an armful of juniper branches from the green recycling bin at a Bay Island Bonsai workshop. I’d found both kishu and itoigawa shimapku branches and figured I could use them to make cuttings for grafting roots or branches. Although I’d made cuttings many times before, I wasn’t sure about what soil worked best to facilitate rooting or how long to leave new cuttings in the greenhouse before bringing them outside. An experiment was in order.

I tested three different soil mixes outside and in a greenhouse. Despite poor experimental design and uneven care after the cuttings were made, I was surprised to find fairly consistent results. I planted the cuttings in “houseplant soil” (an all-purpose soil mix rich in organic ingredients), perlite, and a mix of perlite and sand. The perlite yielded better results than the houseplant mix, and the sand and perlite mixture yielded better results than perlite alone. Overall, the cuttings I left outside fared better than those left in the greenhouse, but I suspect that’s mostly because the cuttings I left in the greenhouse were watered erratically. Here are some photos of the cuttings after a few months.

Juniper cuttings

“Houseplant soil” (greenhouse) :: perlite (greenhouse)

Juniper cuttings

“Houseplant soil” (greenhouse) :: “Houseplant soil” (outside)

Juniper cuttings

Perlite and sand (greenhouse) :: “Houseplant soil” (outside)

The cuttings planted in perlite and sand fared equally well indoors and out. I wasn’t too surprised by this as Boon Manakitivipart and others recommended this mix and it offers a good balance of drainage and moisture retention. It’s also a sterile mix, unlike the “houseplant” mix I used. Why did I try the houseplant mix? Mostly out of curiosity. And why did I use cell packs instead of larger containers? Simply to save the time of wiring screens into more pots. I’ll repot all of the viable cuttings into bonsai soil this coming winter.

Juniper cuttings

Last year’s cuttings

I shared this story less to encourage the use of perlite and sand than to encourage any amount of research on the topic. Many people are experts at this – are you one of them? If anyone knows of good resources about making cuttings, feel free to share. I used rooting hormone for all of the cuttings and made clean, slanted cuts with a grafting knife. I also planted all of the cuttings at an angle. Are there better approaches to preparing and planting the cuttings? I  experimented with small, medium, and large sized cuttings and found that all lived, but there may be good reasons to start larger or smaller cuttings. Any suggestions?

Tagged with: , , , ,

Bonsai pests!

Posted in Bonsai Development by Jonas Dupuich on May 4, 2012

If you had asked me, two weeks ago, if my bonsai were healthy and insect free, I would have said yes. At a glance, they all looked great. Looking closer, however, I discovered that one of my pines looked dirty.

Aphids

Some dirt on the needles – this must mean…

Aphids! Aphids are most commonly found on bonsai with tender foliage, but they are not averse to feeding on pine. Fortunately, they’d only decided to inhabit one of my pines (and I can’t begin to guess why they chose the pine they did as it was surrounded by other pines that were completely free from aphids).

Aphids

Aphids hanging out between needles

Aphids

More aphids

Although they deserve swift attention, aphids are relatively easy to spot and eradicate – unlike the far more pernicious pine needle scale. I typically alternate between a variety of pesticides, oils, and soaps when I discover bonsai pests. After spraying, I watch affected trees closely to make sure the critters are truly dead and gone.

With the happy-go-lucky aphids under control, I took a closer look at selected trees in my garden only to find that my prime nemesis of late, the worm – master of camouflage and capable of munching every last variety in my backyard – has yet to vacate the premises. I plucked three from a hinoki that I’ve been spraying regularly for 6 months. I upped the dosage of systemic the tree has been receiving and promised myself I’d inspect the foliage more often. The worm’s camouflage makes it uncannily similar to the shoots it eats.

Juniper foliage and worm

Tiny, well-camouflaged worm and hinoki shoot

These demented creatures even ventured to munch on my pines last summer. I’d never seen worms eat pine shoots before, but I’m determined to keep this from becoming a habit. (I wrote about them eating juniper shoots in “Juniper Pests.”)

A far more common foe to the pine is the tiny spider mite. They aren’t much to look at, but signs of their presence are unmistakable. Compare the fresh green needles in the photo below with the longer, yellowish needles from last year.

Spider mite damage

Spider mite damage

Spider mites like hot and dry conditions. They prey on weak trees before healthy ones, but if the conditions are right, they can cause significant damage to any pine in a matter of days. A haunting tidbit from Wikipedia: “A single mature female can spawn a population of a million mites in a month or less.” Yuck!

A simple test utilizing low tech equipment – 1 sheet of white paper – is a good way to spot spider mites:

  1. Hold sheet of white paper below a branch
  2. Tap the branch
  3. Inspect the tiny specs that fall onto the paper
If the tiny specs move, odds are that’s spider mite. Spraying can rid the tree of mites in a straightforward fashion, but once needles are damaged, the tree looks unsightly until the following year’s needles mature and the old needles are removed.

Checking for spider mite

1. Tap the branch over white sheet of paper

Checking for spider mite

2. Check for mites

Before running out to check for bugs, I recommend you read Peter Tea’s account of Aichi-en’s battle against the bugs, “I love the smell of pesticides in the morning.”

Tagged with: , ,

Bonsai fertilizer – follow-up

Posted in Bonsai Development by Jonas Dupuich on May 1, 2012

Last month I began using tea bags filled with fertilizer to feed my bonsai. Unfortunately, it only took a few days for me to realize that this technique didn’t work well as implemented. The bags started disappearing immediately. Critters tore through some of the bags and carried others away completely, leaving behind the toothpicks that were meant to keep the bags in place. Somehow they removed all of the bags from my best trees and only a few of the bags on the developing trees – I won’t even try to solve that one. Instead, I’ll go back to my time-tested fertilizer method – clumps of cottonseed meal and fish emulsion.

Tea bags on a pine forest

Tea bags intact on a pine forest

Tea bags on an exposed root pine

Tea bags on an exposed root pine

Cottonseed meal on a pine

Cottonseed meal on a pine

Cottonseed meal on a pine

More cottonseed meal

I usually start feeding my trees at some point between late January and mid March depending on the weather and the variety. If I’ve repotted a tree, I wait about 4 weeks before feeding it. I start by placing one or two clumps of cottonseed meal and add additional clumps every 1-3 weeks later until the majority of the pot is filled with fertilizer.

Cottonseed meal on a cryptomeria

Cottonseed meal feeding a recently separated cryptomeria

I supplement the cottonseed meal with fish emulsion (see “Bonsai Fertilizer” for details). Fish emulsion is a great, if stinky, fertilizer that I’m comfortable using on all bonsai varieties. I usually apply fish emulsion weekly, though I might apply it more or less frequently at various times depending on the season, the weather and the variety.

Fish emulsion

Fish emulsion

Ebihara fed his trees with diluted liquid fertilizer every three days (I don’t know what type of fertilizer he used). Others primarily rely on dry fertilizer that releases food whenever the trees are watered. I haven’t noticed big differences between liquid, dry, or other categories of fertilizer, but I do find that consistent application leads to the best results. And the best results, of course, depend on the goal of the fertilizing program. If I’m trying to increase the size of the trunk, I fertilize a lot. If I’m trying to ramify delicate branches on deciduous varieties, I fertilize very lightly and only after new leaves have hardened off.

As for the tea bags, I haven’t completely given up. I may yet try chili powder or some other caustic agent that’s harmful to vermin but safe for trees. And if I can get this right, I will celebrate and then post the results.

Tagged with: , ,
Follow

Get every new post delivered to your Inbox.

Join 588 other followers