Part 4 of 5
Once the tree and pot are ready, it’s time to put them together. For starters, the pot gets a drainage layer of pumice. If the pot were much thinner or the climate warmer I might forego this step, but I’ve found my maples do well with it.

Pumice drainage layer
After spreading out the drainage layer, I add my deciduous bonsai mix – mostly akadama with pumice, lava and charcoal. I typically form a mound in the center of the pot when I pour in the mix to help prevent air pockets from forming when the tree is set. If the base of the rootball is concave, this becomes particularly important.
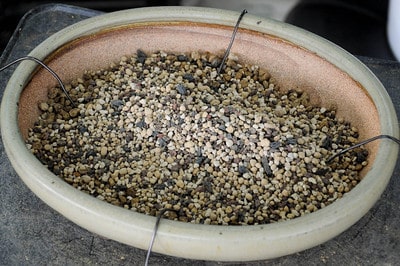
Mound of bonsai soil
Next comes one of the most important parts of the whole process – setting the tree. Although it’s not a very technical maneuver, it requires care to make sure the tree ends up in the right spot. This time Boon set the tree while I held the pot. We then checked the location of the tree, the height of the rootball, the tilt of the tree, and the front. After making a few minor adjustments, it was time to tie the tree into the pot.
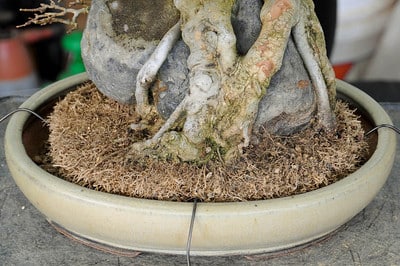
Setting the tree
There are many ways to secure a bonsai in a pot. The goal – to prevent the tree from moving to avoid damaging new roots. The photos below depict a basic technique that does a great job of holding trees in place.
Before I attach the first two wires to each other, I add a “tail” – an extra piece of wire that will help me make my final connection as I work my way around the rootball.
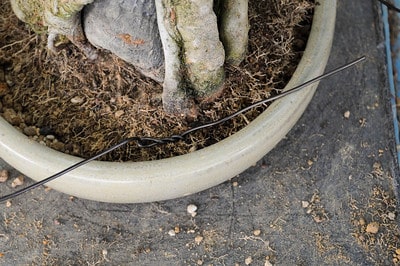
Adding a “tail”
I then pull the first wire to a location above the spot where the second wire comes through the drainage hole. I make a few twists by hand and continue around the tree until it’s time to connect the final wire with the “tail” I attached to the first wire. This final connection requires pliers.
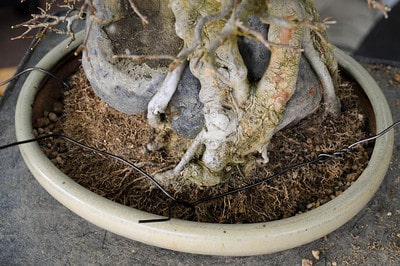
Securing the tree
A subtle but important trick to using pliers: pull, then twist. If you’ve repotted at Boon’s, you’ve heard the phrase before. The idea is to pull the wires taught, then slightly release the pressure as you make the twist. Doing this helps one avoid breaking the wire.
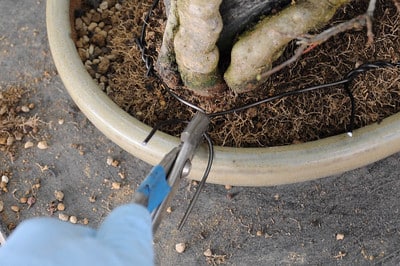
Proper plier technique: pull
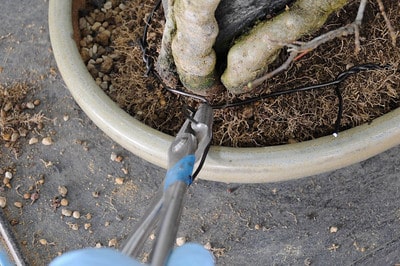
Then twist
When done well, using the pliers for this union tightens all of the other connections. It’s a fast and effective way to secure a tree.
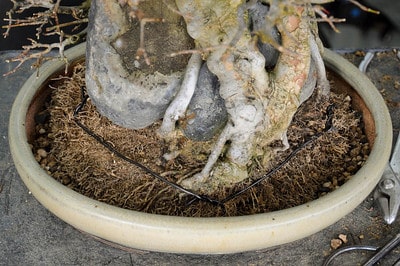
Tree secured
Before adding more soil, I trim any extraneous wire. Hopefully there’s not too much. If there is, you might hear Boon say “bimbo,” but not as in “air-head.” He’ll be happy to explain.
Next up: Part 5 – Finishing touches
Subscribe to Bonsai Tonight
New Posts Delivered Every Tuesday and Friday
Dannon says
That’s a great little tip with the “tail” wire trick. Thanks. 🙂 I’ve been getting inspired by your blog for my own blog, I have been looking to make some changes. Your blog is a direction i would like to see my own blog go in…
bonsaijapan says
Just writing to say that i have been following and enjoying you blog since it started. I wait eagerly every week for a new post. Thanks and keep up the great work!
Boon says
It was not funny when i heard my teacher said ‘bimbo’. I opened my dictionary real quick. Bimbo=1 going bankrupt or become poor.
It was a relieve!! Oh, no, it was not. I must do better next time.
Keep on your good work, Jonas,
Happy Holidays,
Boon
treelovers@live.com says
Very interesting discussion glad that I came across such informative post.
Keep up the good work friend. Glad to be part of your net community. Thanks.