The basics of decandling Japanese black pine are straightforward. The application of the basics is more of a long-term pursuit.
At its most rudimentary, decandling is the practice of replacing vigorous spring growth with moderately-vigorous summer growth – a technique for removing one shoot and replacing it with two. It’s a powerful tool for balancing black pine growth.
The technique has been practiced for roughly half a century. Saichi Suzuki, father of the famous Daiju En bonsai garden in Okazaki, Japan, stumbled upon the technique after awaking to find the new shoots of a Japanese black pine munched away by some critter. Over the course of the summer, new shoots replaced the spring growth. Curiously, the summer growth was more refined than the spring growth – the shoots were shorter, and more importantly, the new needles were shorter. Black pine had long been a challenge for its long needles. What Suzuki realized, upon witnessing a black pine bonsai produce shorter needles, was that there might be a way to produce the effect with predictable results.
Many years of experimentation led to today’s decandling techniques. Daiju En has since become known as the world’s premier bonsai garden for black pine.
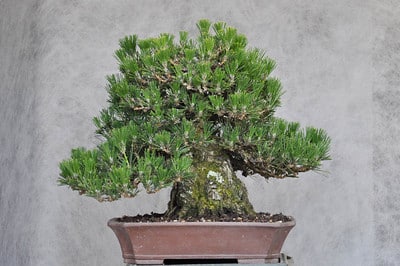
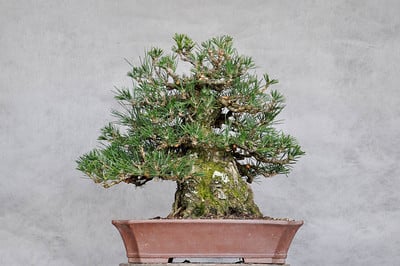
Below is a photo of a black pine in January. Most of the needles are short from the previous year’s decandling, though you’ll notice a few longer ones if you look closely. These are from weaker shoots that weren’t decandled last year to help them recover their vigor.

Japanese black pine – January, 2009
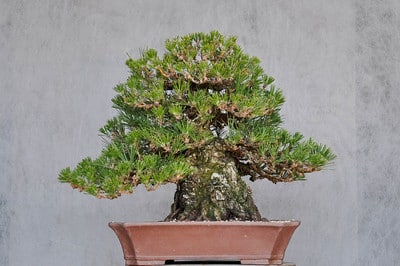
Several months later, pines lose their tidy appearance. Spring shoots appear all over, usually more vigorous toward the apex. Several years of this unbalanced growth can quickly produce an ungainly effect. Here’s the same tree pictured in June.
Black pine with spring shoots – June, 2009
This is the time to decandle – when the spring shoots have matured. The precise date depends on many factors – I’ll cover these in another post. I’ll also outline some of the many approaches to decandling.
Note that decandling only works well for healthy, vigorous trees. Weak trees, or trees that didn’t receive a lot of fertilizer in spring aren’t good candidates for decandling. Because the technique significantly decreases a tree’s vigor, I always think carefully before clipping away.
Step one is dividing the tree’s growth into several zones. A popular approach entails identifying four. Here they are from least vigorous to most vigorous.
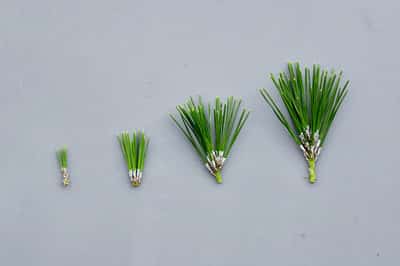
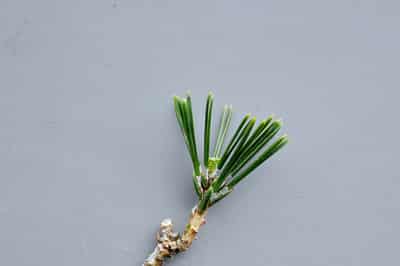
Spring growth
The weakest shoots are left alone – the more vigorous shoots are removed.
It’s important to be precise in the cutting of the new shoots. Little details like the angle and location of the cut can have a big effect on the result. Here is a prime candidate for decandling.
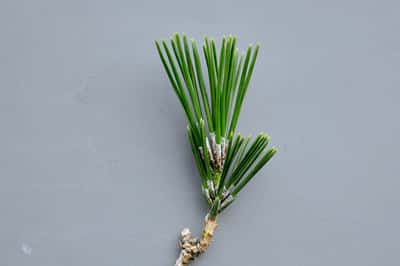
Japanese black pine – two years’ growth
The cut must be made perpendicular to the shoot – sharp scissors are a must.
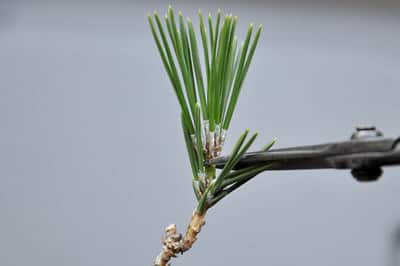
Keeping scissors perpendicular to the shoot.
Spring growth removed
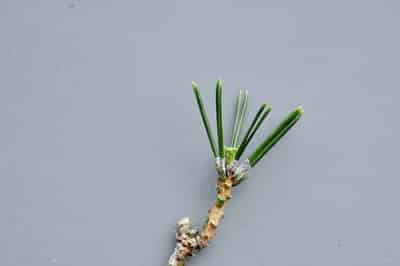
Optional technique – thinning last year’s needles after decandling
That’s it – the basics anyway. Decandled pines look bare at first, but fill in well between June and October.
Decandled pine
How well a pine fills in depends on a number of factors, some in our control – water, fertilizer – and others far from our control – like the weather. Fertilizer is typically removed at decandling time and slowly re-introduced over the course of the summer. Watering, as always, must be monitored closely. Although decandled pines drink less than trees with rapidly growing shoots, decandled trees do appreciate humidity and are good candidates for frequent mistings in dry areas.
One of the best ways to get started with decandling is to find someone local who has demonstrated success with the practice. Look carefully – they can be hard to find!
Subscribe to Bonsai Tonight
New Posts Delivered Every Tuesday and Friday
Hans says
Great images – thanks for sharing.
Hans
Fr. Tom Davis says
Thanks for this wonderfully informative lesson.
Showing close-ups of what you have done are very helpful to me, as other articles hardly ever show anything of how or where these cuts should be made.
With Fall just beginning, would you also be doing a fall decandling and pruning follow-up segment?
~ Tom
xwires says
Thanks Tom – I’m planning to write about fall pine work at some point, and there may even be another decandling piece before long.
Linh says
If you wrote a book, I’d buy it. I’m sure others would too. A lot of people are visual learners and this helped out a lot. Thanks for your time and efforts.
xwires says
Thanks Linh!