When the time came to air layer two large grafted hinoki, Michael Hagedorn happened to be in town for a visit – a perfect opportunity to learn how he approaches layering. He’d last visited my garden about four years ago (see “The joys of professional work“) so it was nice to catch up.
Before cutting into the tree, Michael and I scrounged around for a pot we could fashion into a temporary home for new hinoki roots. We found a three gallon container that would do the trick. Michael cut the container down to size and then perforated the ends so we could tie it up once it was in place.
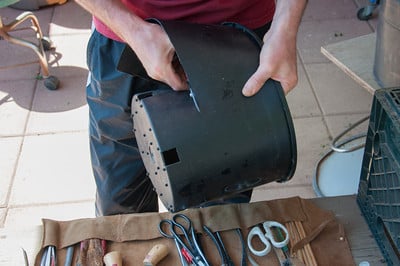
Michael cutting down a three gallon container
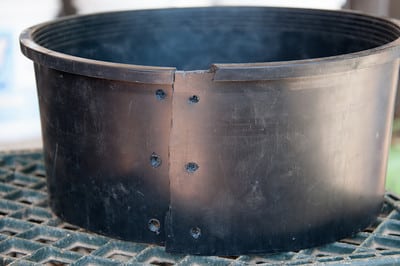
Ready to go
After setting the new pot in place, Michael found some of the dead branch stubs were too long for the pot to fit so he cut them down to size.
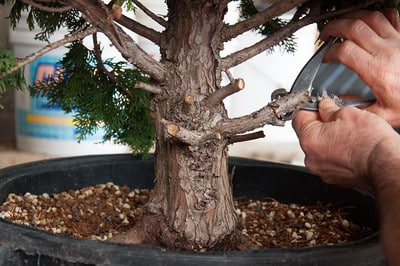
Shortening a dead branch stub
The next step was to determine the level of the layer. Michael selected the lowest point above the graft line and drew a line.
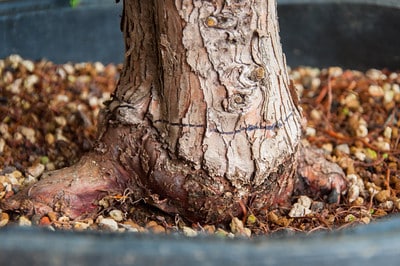
Marking where to cut
Michael used a knife to define the top and bottom edges of the layer and then a chisel to remove the bark between these lines.
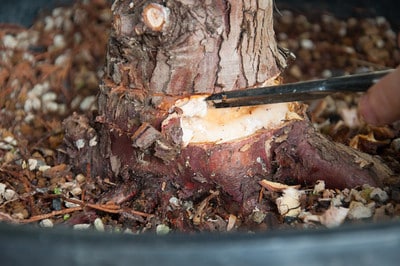
Removing the bark
The important detail at this stage is to remove all of the soft bark to force the tree to grow new roots.
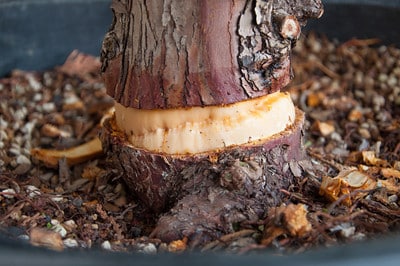
Bark removed – note the graft line
Michael then poked holes on the lowest part of the bark just above the layer line as an additional technique to stimulate new roots.
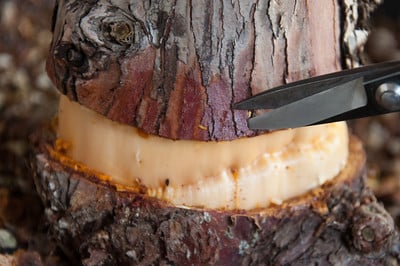
Poking the bark with scissors
Next, he painted the area above the layer line with Dip ‘N Grow root hormone.
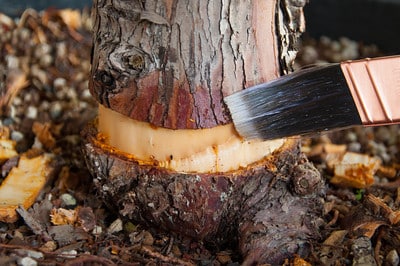
Painting root hormone
That was the final step before the layer could be covered. Michael next placed a sheet of landscape fabric above the soil to prevent the new roots from growing into the soil below. This will make things easier when it’s time to remove the layer.
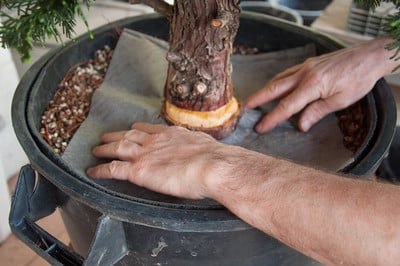
Landscape fabric
Michael placed moist sphagnum moss around the area to be layered and held it in place with raffia. It’s very important, he noted, to keep the moss tight around the layer for new roots to develop as roots are far less likely to venture into dry air pockets – a good tip!
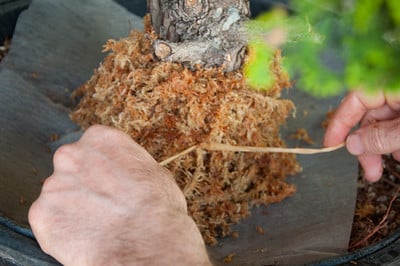
Tying the moss into place
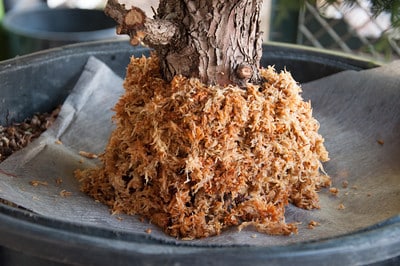
Moss tied and ready
Next came the custom pot.
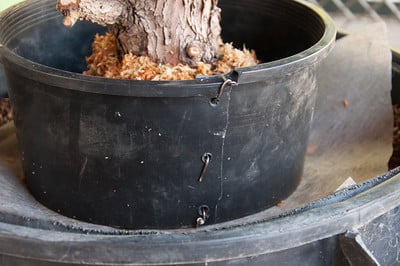
Custom pot
And then standard bonsai soil.
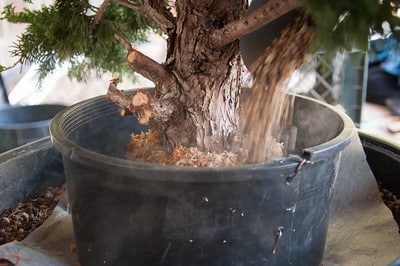
Adding bonsai soil
After which we watered.
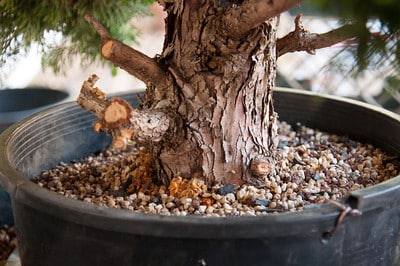
Layer complete
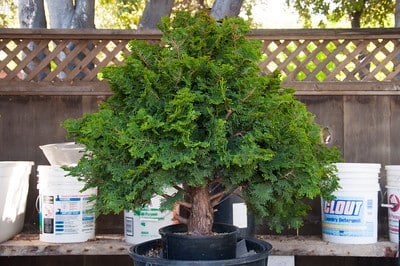
Future hinoki bonsai?
That was great for the first tree, but I still had one more hinoki to go. A few days later I repeated the exact process with the exception of using a different root hormone – Olivia’s Cloning Gel – to see if there was a difference between the two.
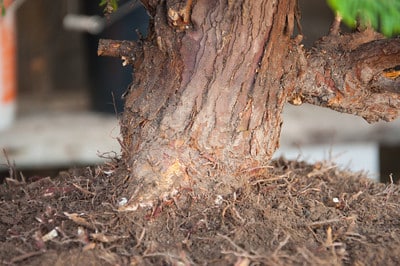
Newly exposed graft line
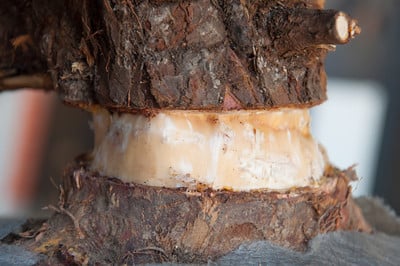
Bark removed
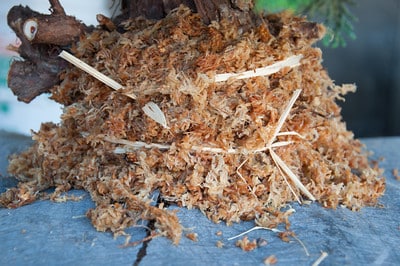
Moss tied into place
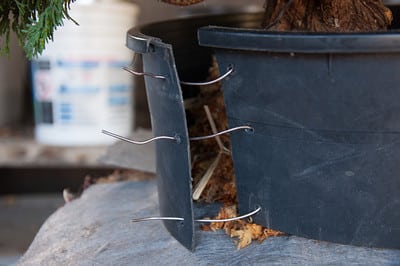
Sewing up the custom pot
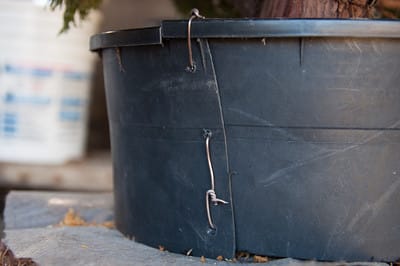
All sewn up
Of course, the larger question of whether or not hinoki respond well to layering remains unknown. Will report back when I know more!
Subscribe to Bonsai Tonight
New Posts Delivered Every Tuesday and Friday
bonsai eejit says
I await your result with interest. I’ll let you try it first 🙂 Great post.
Daniel Dolan says
Jonas:
Great photography and Michael Hagedorn is a a very skilled artist……………just have one question which I have asked 10 Bonsai Professionals to date:
What prevents the watering process at the end of the operation from washing off the rooting hormone?
Please advise when you have a chance.
Thank you as always.
Best regards,
D/D
Chicago
Jeremiah Lee says
Great Post as usual, thank you very much for posting! Excited to see the results
Jonas Dupuich says
Hi Daniel, that’s a good question – what have you learned from the 10 you’ve asked so far?
Daniel Dolan says
Jonas:
To a man they have all said that…….yes, that is probably what happens but some likely does remain.
Its just that I have difficulty visualizing how any remains especially after just a couple of waterings.
[Just like I have a hard time visualizing how tilting a pot to improve drainage does not create a pool of water at the inside corner of the pot below any drainage hole]
One professional recommended tying a strip of some sort of paper? around the top of the area where hormone mixture is applied. Not sure what sort of paper would prevent water from penetrating and dissolving mixture. The purpose is to deflect water for some period of time.
Though I have been doing this for just 5 years…..it was 4 years before I discovered that a paste or liquified mixture of hormone was better than placing hormone powder directly on the area to be treated.The explanation being that the mixture likely penetrates the area more so than the powder.
[Michael’s technique of applying to the area above the exposed wood is new to me as well.]
One of your best yet. Looking to see your approach to thinning and foliage pad treatment for Hinokis.
Best regards,
D/D Chicago
Bruce Winter says
I have better results using a pumice/ milled spagnum moss mix if the tree is close enough to water often. The roots grow out into the mix rather than bunching up in the moss. Everything I’ve read about hormone is that it’s work is done in about 2 minutes so watering is not a problem although I don’t water and the layers always seem to take. I also use dip-n-gro.
And Daniel, I share your question about tilting the pot. It’s never made sense to me. If it’s going to rain for days I tie a plastic bag over the soil.
Daniel Dolan says
Bruce:
Thanks for your input….very informative about the time element of rooting hormone . I must admit when it comes to Bonsai I am humbled on an hourly basis. What in the ——— is “milled sphagnum moss?” Does that mean it is chopped up? Only asking because I would like to try it. And while were at it…….I was advised that only white New Zealand sphagnum moss should be used. Do you have success with something else?
Please advise when convenient.
Best regards,
D/D
Chicago
Bruce Winter says
Hi Daniel..interesting questions. Milled sphagnum is simply finely chopped, but really milled, like grain. It can be bought but I use a food processor, and I wear a mask. Also useful as a top dressing toned down with india ink. I think Michael wrote about this too.
Rather than going on too much feel free to contact me at akamatsu1@yahoo.com
Brian says
Hi Jonas ts been my practice that the width of the strip of bark you remove is to be the diameter of the truck.
Your strip seems a bit narrow. Plus I usually use a piece of copper wire and strangle the top end of the cut. Works for me.
Qualicum Brian
biervenskus says
Since the tree was grafted, what was the reason to air-layer. I’m assuming the graft was done to improve the strength of the tree. I always appreciate your blog, as well as Michael’s.
Jonas Dupuich says
The main reason for the layer is to remove the unsightly graft line. I also assume that the tree was grafted to improve its vigor, but the transition between the different colored trunks makes the tree unsuitable for bonsai. Layering can also improve surface rooting.
Candace Key says
Hi Jonas, Great post and I was relieved to see I had done my hinoki air layer this winter in pretty much the same way. How long will it be before you can remove the moss and safely repot?
Jonas Dupuich says
Thanks Candace – No idea when I’ll be able to remove the layer. I’ll likely check this fall and either make the cut or wait another year.