If you have a lot of bonsai, you might feel like you’re doing assembly line work at certain times of the year. Summer, for those with a number of black pines, is one of those times.
When I have a lot of repetitive work, I often line up a group of trees against the workshop wall, start at one end, and work through to the end of the line.
More developed trees require the most time, but they look great cleaned up. The youngest trees go quickly, but lack character. And then there are the tweens – trees that are just starting to take on the shape of the bonsai they will become.
I worked on these trees after finishing the older and younger ones. At this stage they are still trying to grow vigorously and I’m trying to slow them down. By cutting later, I give the trees less time to develop summer shoots which effectively puts on the brakes a bit.
After cutting, the future for these trees starts to become clear. Some primary branches have their starts, the front is set, and escape branches are reduced or removed.
Each of the trees below are 12-and-a-half years old. They are at various stages of development, roughly arranged from least developed to most developed. The larger trees, particularly the one at the end, look a bit older, but that’s what’s so fun about using different development techniques for the same batch of trees. By using larger containers along the way and feeding more, trees of the same age can take on very different qualities.
Here’s the first one out of the gates.

Black pine – 12-1/2 years old
For this tree I planned an experiment. For the shoots on the right side of the tree, no stubs were left during decandling (see Decandling Techniques for more about “stubs”). Here’s the tree after removing the shoots on the right side.
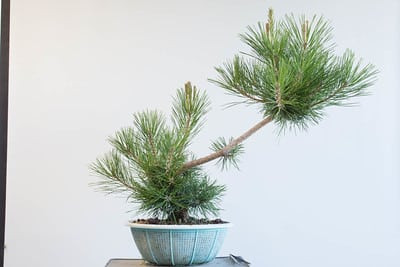
After decandling the right side – no stubs left behind
I should point out that Eric Schrader did the cutting here as I have a lot of trees to get through this year. The shot below shows the tree after removing the shoots on the left side – stubs intact.
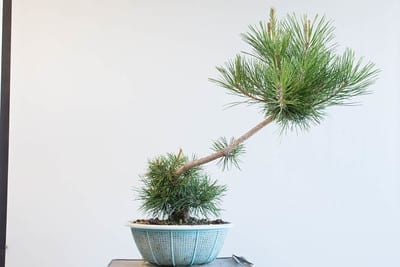
After decandling the left side of the tree and leaving stubs
Branch thinning and needle-pulling followed, and the sacrifice branch was cut back and decandled. It was at this point that I could start to get a sense of the tree this is to become.
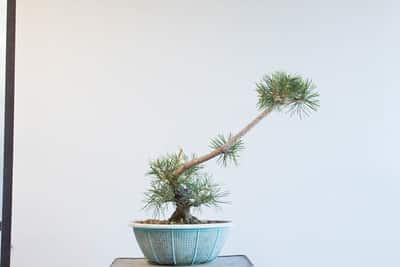
After cutback, decandling and needle-pulling
Although the trunk has reached the desired thickness, I decided to keep the escape branch to heal a wound left by a previous escape branch. I expect to remove it at some point within the next year.
Here are before and after shots of several more trees going through the same process.
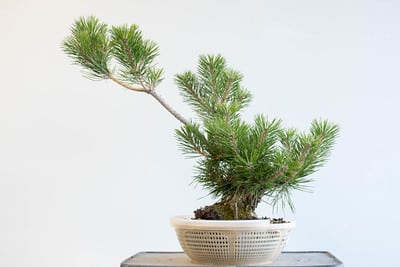
Black pine before decandling and cutback
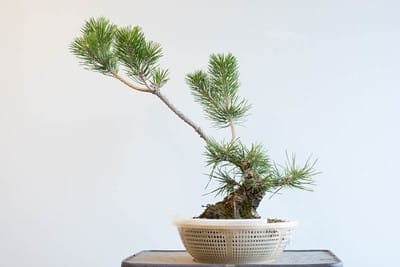
After thinning and decandling the lower branches – the escape branch will stay in place for now
The trunk on the pine below has reached the desired thickness and the major wounds are mostly healed. I removed most of the sacrifice branch and will remove the rest in fall.
Why not remove it all at once? Because the branch is vigorous, I expect a lot of new shoots will appear where I cut. These will be too vigorous to use in the final design. By letting these shoots emerge lower on the sacrifice branch, I can divert excess energy away from the branches I want to keep.
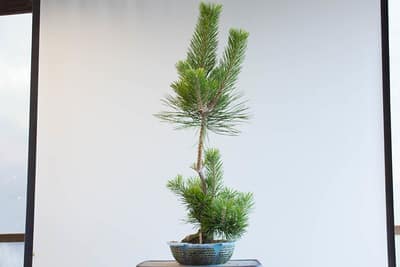
Black pine before decandling

After decandling and cutback
As is often the case with decandling, I find it easy to go in and remove all spring shoots. What I find tricky is determining which branches not to decandle.
The small pine below is starting to look like a shohin bonsai. It’s easy to see after decandling that the top of the trunk needs to thicken before final branch development can begin, but it’s not clear at all from the before photo.
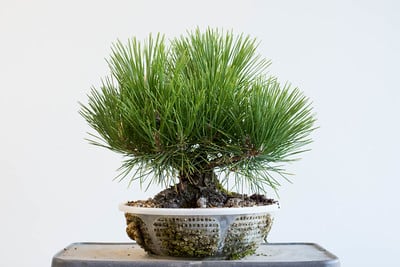
Before decandling
By decandling the side branches and leaving the apical shoot alone, I can speed up the development of the upper part of the trunk while slowing down the branches I want to keep small.
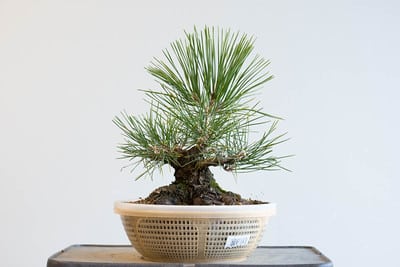
After decandling all but the apical shoots
The last tree in this group was trained in the exposed root style. The rebar is being used to raise the top of the trunk. The goal for the tree at this stage is to increase branch density so I decandled the spring growth on every branch.
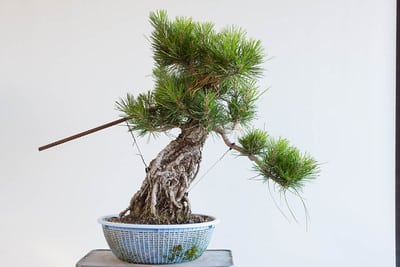
Black pine before decandling
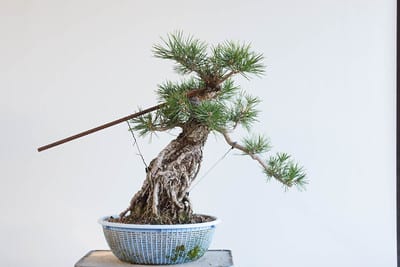
After decandling
And just like that, another row of pines is ready for the rest of summer.
Subscribe to Bonsai Tonight
New Posts Delivered Every Tuesday and Friday
Matt Cox says
Hey Jonas- It’s well into the hottest times of the year in NC, and my black pines are starting to throw summer shoots. Most are very, very young, and still a little “whippy” in their development. I’m going to be reducing size, and perhaps moving some them into being shohin. That said, when is the best time to prune back sacrifice/escape branches in my zone?
Jonas Dupuich says
Hi Matt – fall through winter and into early spring works for removing sacrifice branches where you are and in most places. Don’t be afraid to let the sacrifice branches grow for a while if you want a shohin with a large trunk – “whippy” makes it sound like the trees are still on the young side.
Admin says
I’m learning the art of patience with the JBPs I have, for sure.
On another BP note: I’ve started playing with some Austrian Black Pines from the local nursery. I’m a fan of their willingness to thicken up quickly, as well as the bark they have developed. The main issue- long internodes, and single flush makes them a bit of a trick to develop. I’ll post some pics in the forum soon.
Tony says
Hi Jonas…thank you for posting the pics and the great comments….what is the average diameter of the trunks at ground level for these pines?…Thanks Tony
Chris says
Jonas, what is the range of trunk sizes you were able to get in the 12 1/2 years of growing these? Thanks.
Chris
Chris says
Sorry, just noticed that question was already asked!
Jonas Dupuich says
The sizes range from 2-3″ to 6-8″ for the last tree depending on how they’re measured. The sizes are less a reflection of how old they are than a reflection of how large I planned them to be. Bigger sizes can be obtained easily with larger containers and/or ground growing.
Chris says
Any chance you have progression photos of any of these? I’m particularly interested in the tree shown in photos 5 and 6, that’s got a great looking base.
Jonas Dupuich says
Thanks Chris! I don’t have ready-made progressions of these trees but I do have some photos from the past. If I can put together a good collection I’ll share it down the road.