When I first heard that bonsai are commonly wired into the pot I thought, “That sounds crazy – you must be kidding me!”
Over the years I’d planted hundreds, if not thousands, of plants in containers without wire for a retail nursery. The practice sounded extraneous and made me think that bonsai people were overly concerned with such details.
I quickly learned, however, that my thinking was misguided.
One reason for this is that garden plants tend to stay put after they are planted. Bonsai, on the other hand, are frequently moved around.
We move them throughout the year so all sides of the tree can get equal sunshine. We move them into a workspace when it’s time to prune or wire. If we join a bonsai club, we may take our trees to workshops or exhibits. All of this movement provides ample opportunity for bonsai to jostle around in the pot.
Because bonsai are often planted in course soil mixes, it takes little pressure to knock an unsecured bonsai out of the pot. Large trees with undeveloped roots can even blow over in the wind when not properly secured.
Even when our trees don’t move or blow around much, subtle movement of the tree in the pot can break fine roots and stress or weaken bonsai. Before we can wire bonsai or carve deadwood, we need to make sure our trees are securely held in their containers.
How to secure bonsai in the pot
Bonsai pots come in many shapes and sizes. Almost all of them, however, have drainage holes so excess water can easily drain out. (If your bonsai pot doesn’t have drainage holes, drilling one or two will make it much easier to care for your trees.)
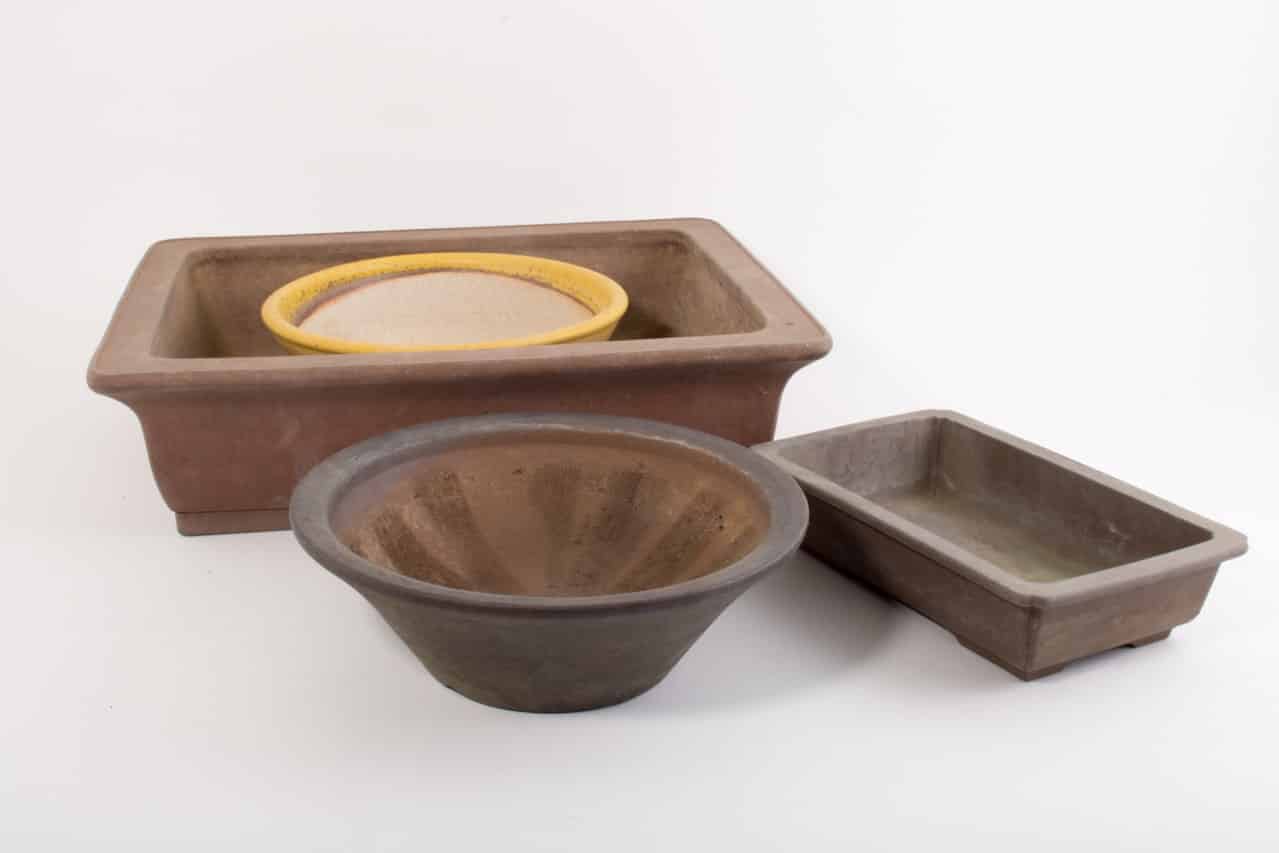
A variety of bonsai pots
Despite the great variety of bonsai pots, we can generally group pots into four categories based on the arrangement of drainage or tie-down holes present.
Below are step-by-step instructions for wiring trees into their pots to keep them securely in place.
One-hole pots
As the name suggests, one-hole pots have a single hole for drainage.

One-hole pot
Because there is only one hole, all tie-down wires will pass through it. As the pot in this example is round, measure the circumference of the pot to determine the length of the tie-down wires. Prepare two wires at this length.
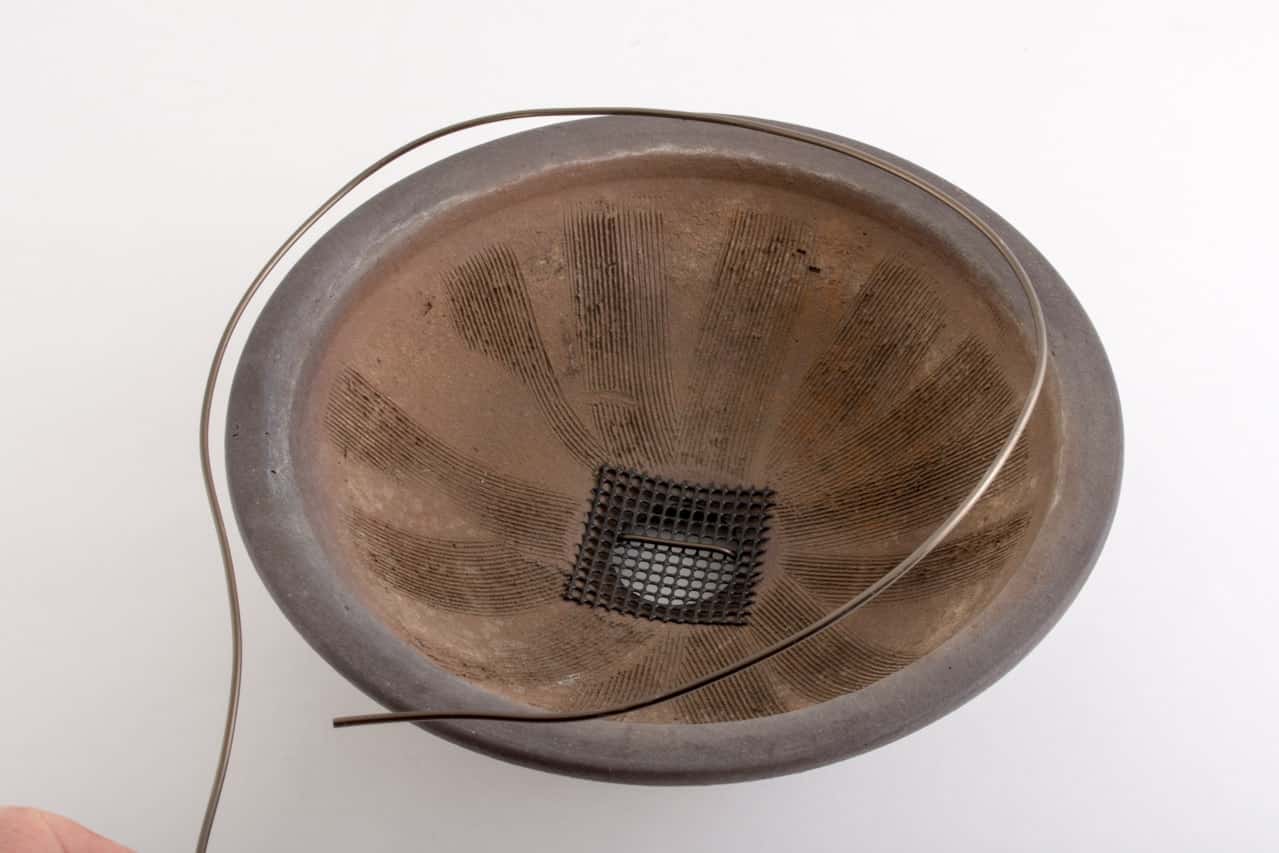
Measuring the tie-down wire
Measuring tie-down wires depends more on the shape of the pot than the number of holes in it, so, for future reference, cut tie-down wires for rounds pots that measure one circumference of the pot.
The next step only apples to one-hole pots. Use a larger gauge wire to create what looks like a cotter pin.
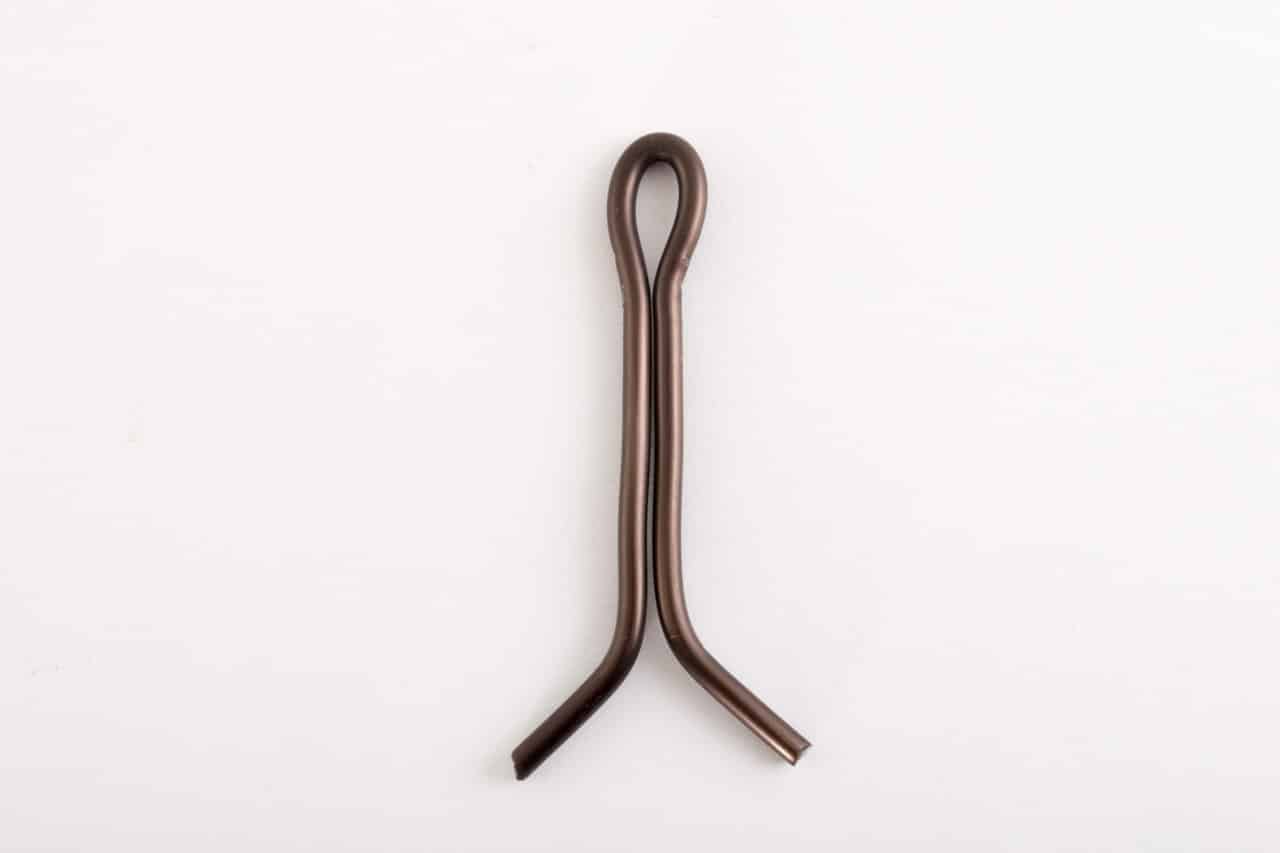
Cotter pin
The straight section of the pin needs to be at least as long as the drainage hole.
Using the drainage hole to determine the size of the cotter pin
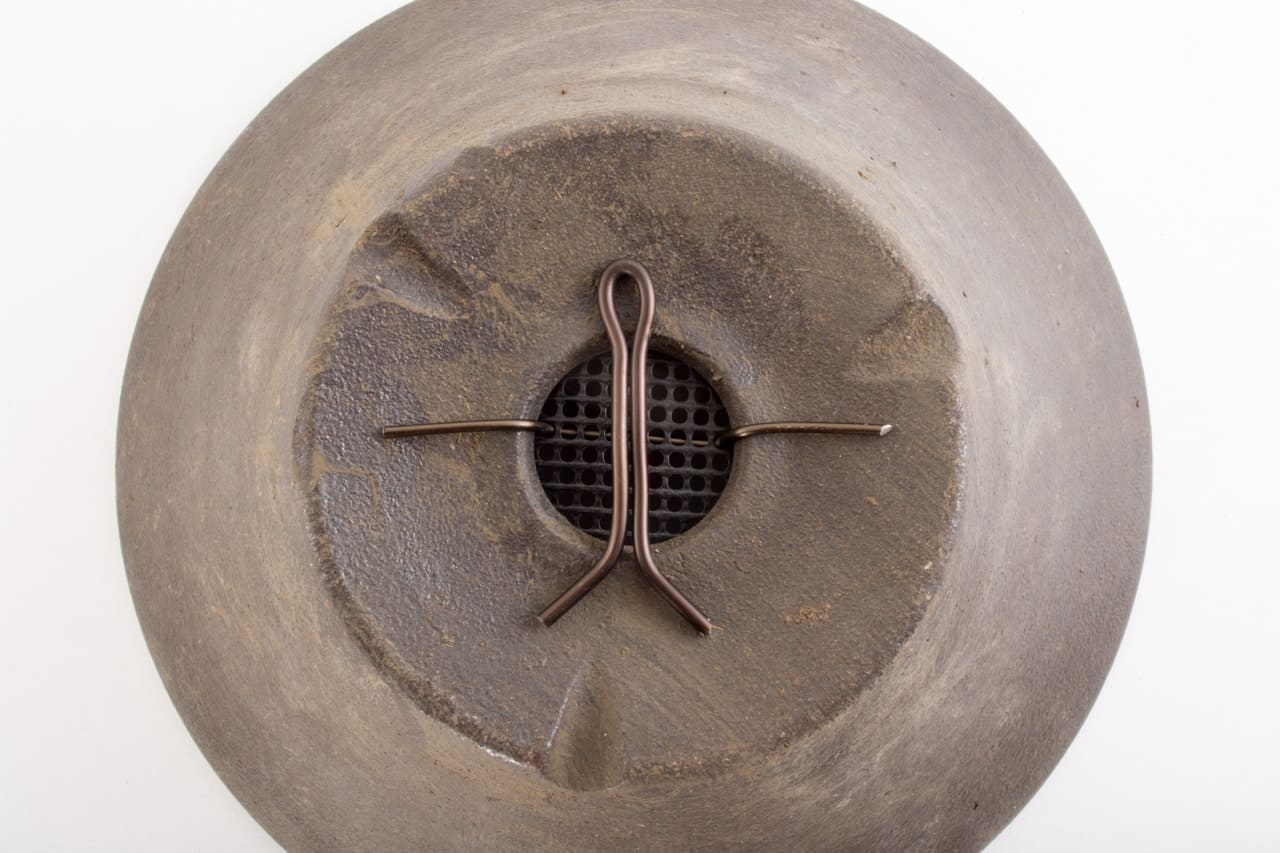
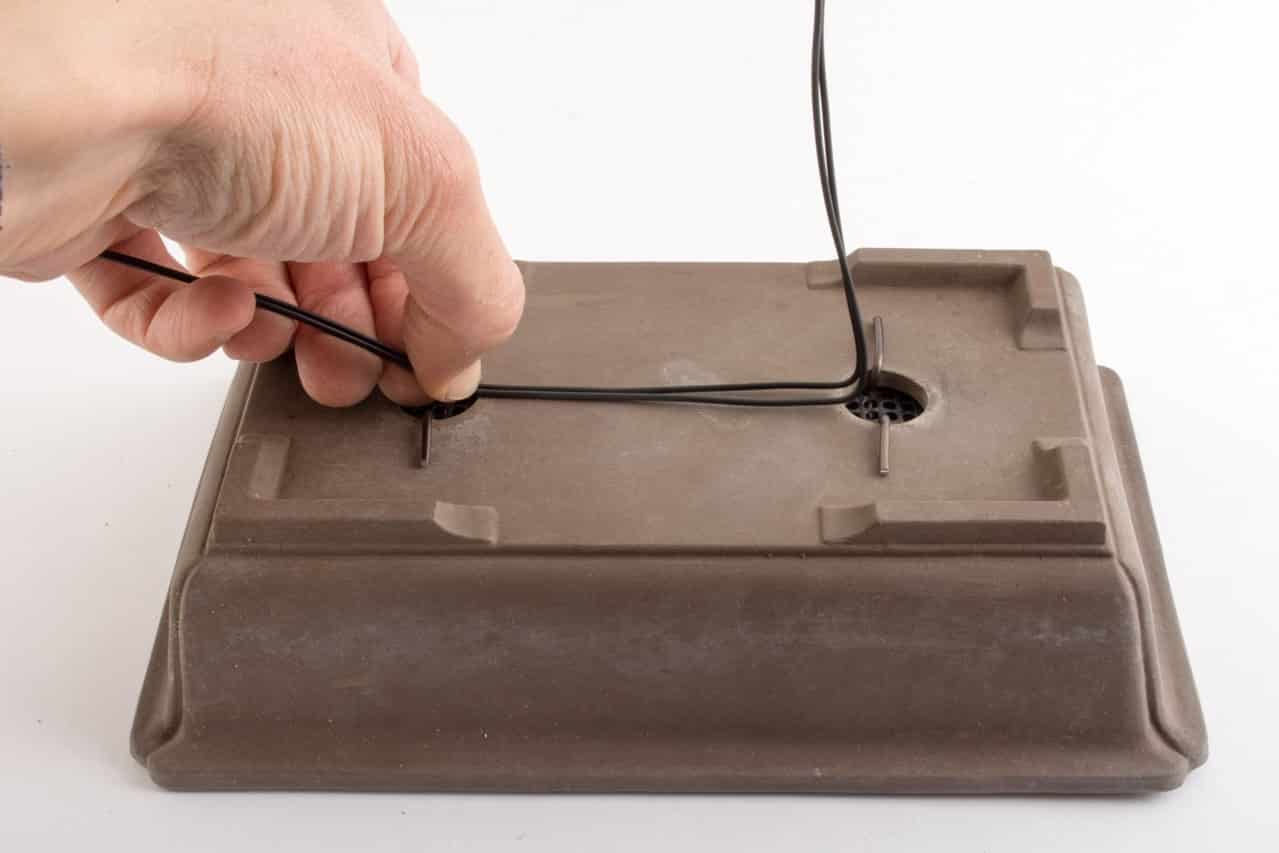
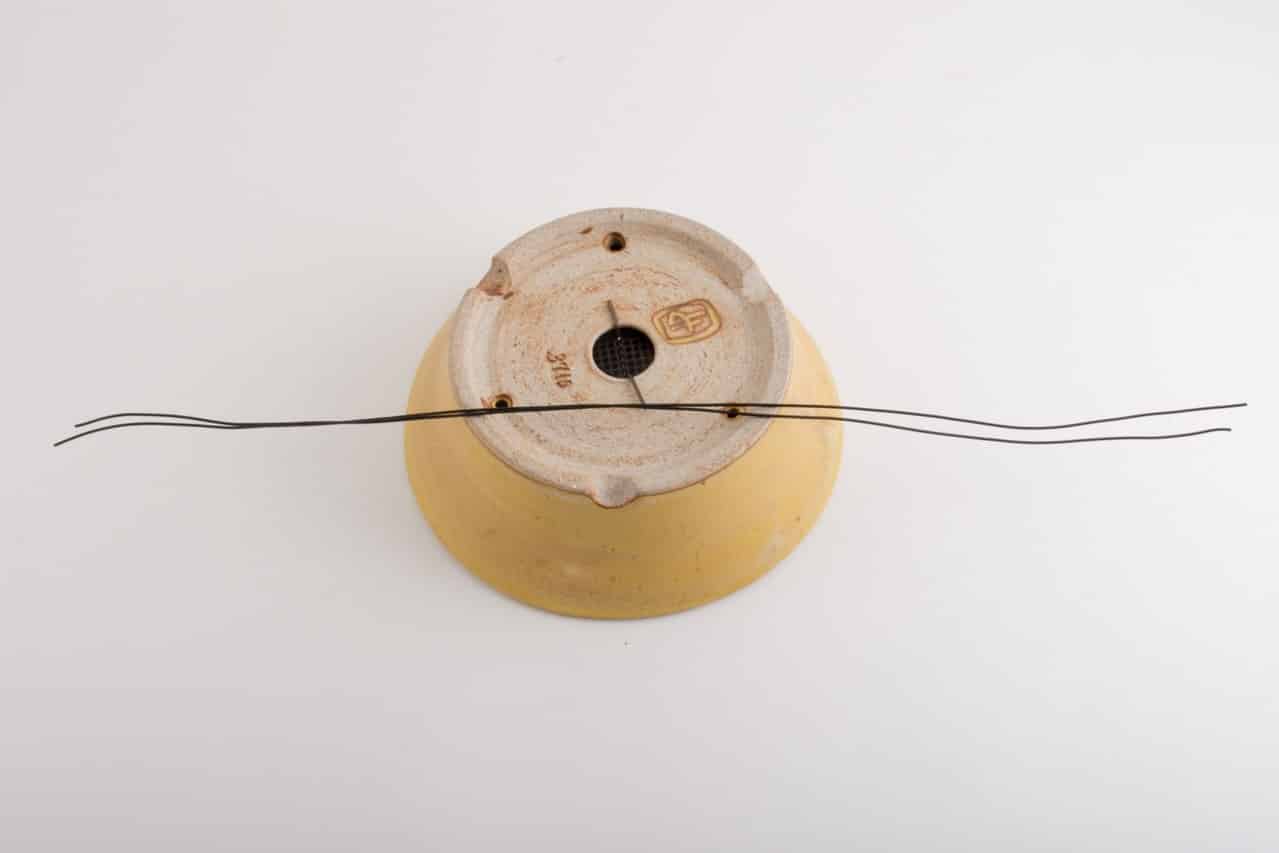
The tie-down wires are then wrapped around the pin at least one and a half times.
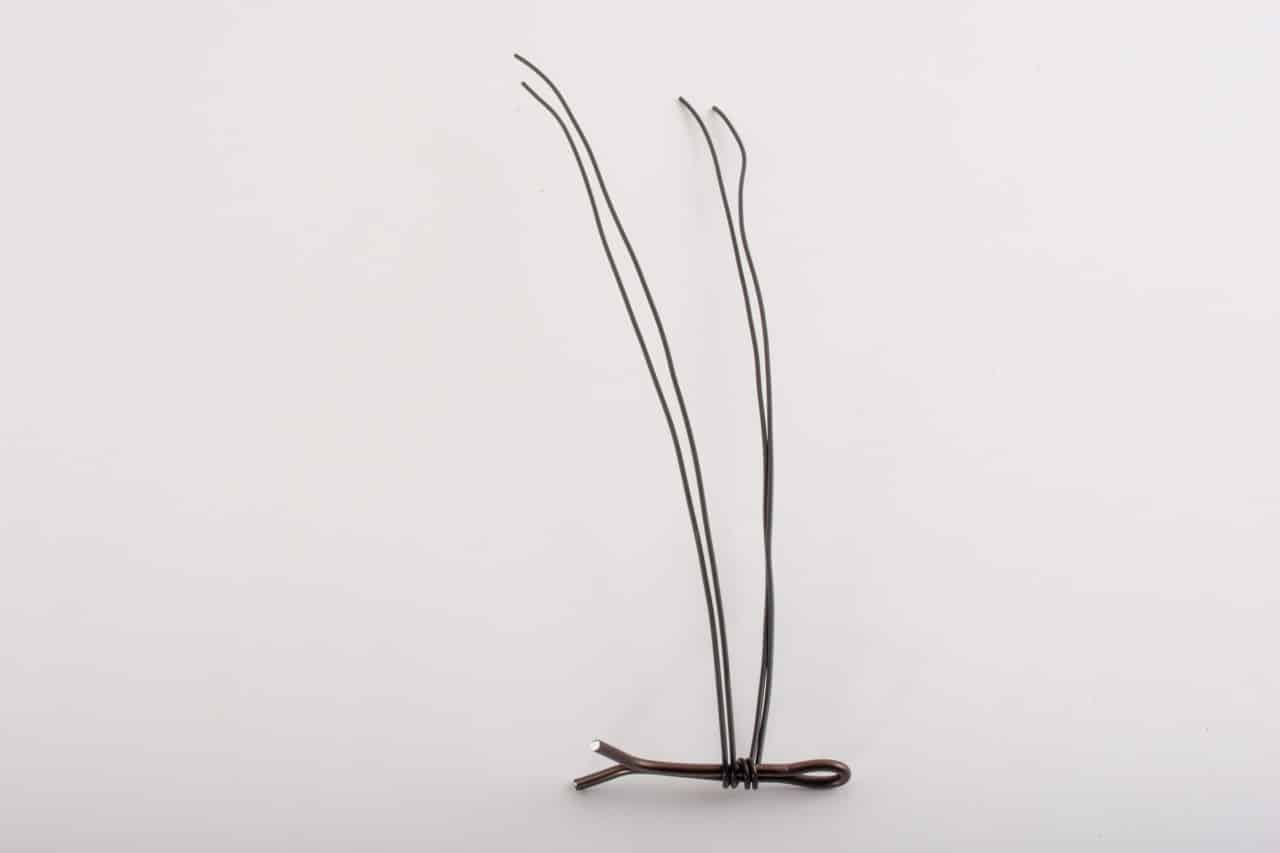
Tie-down wires secured to the cotter pin
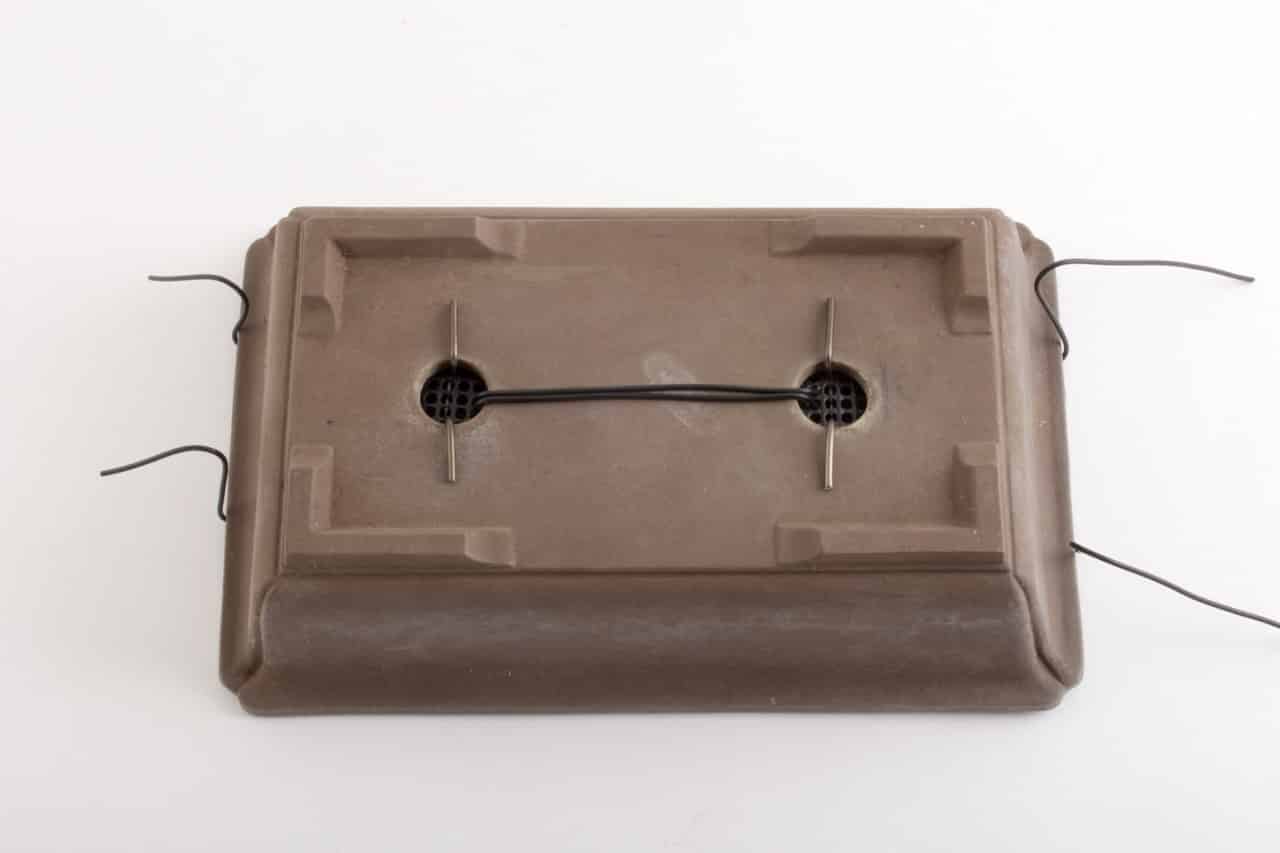
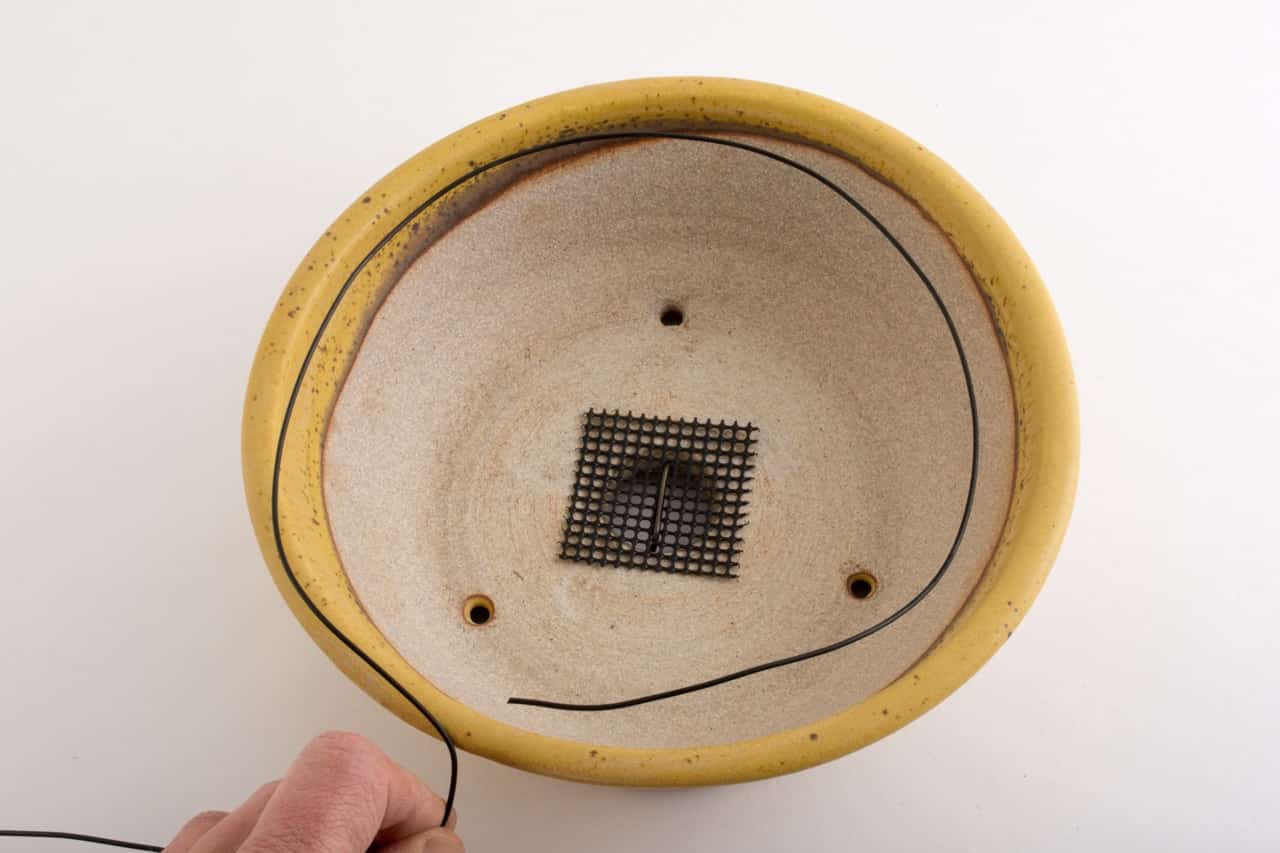
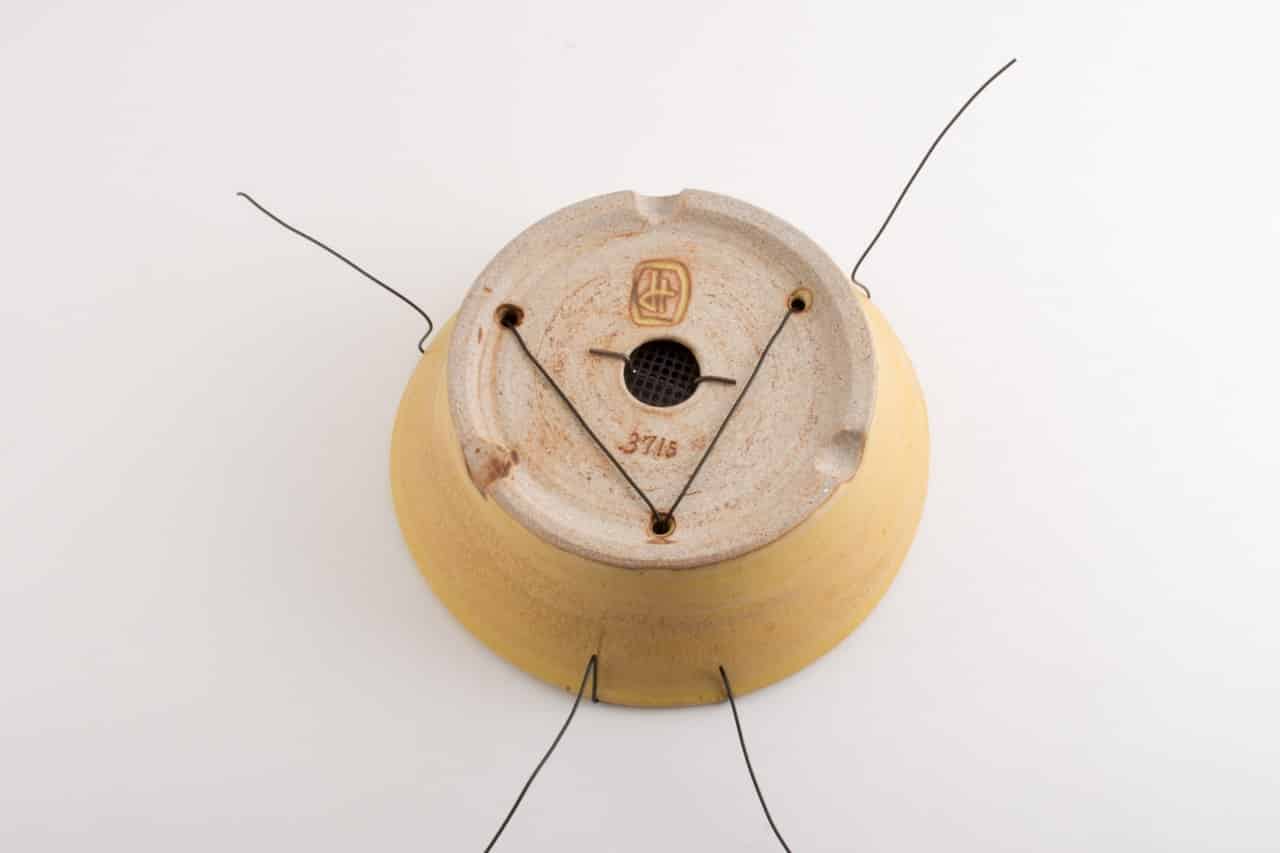
If you carefully feed the ends of the tie-down wires through the mesh of the drainage screen, the prepared pot will look like the pot in the photos below.
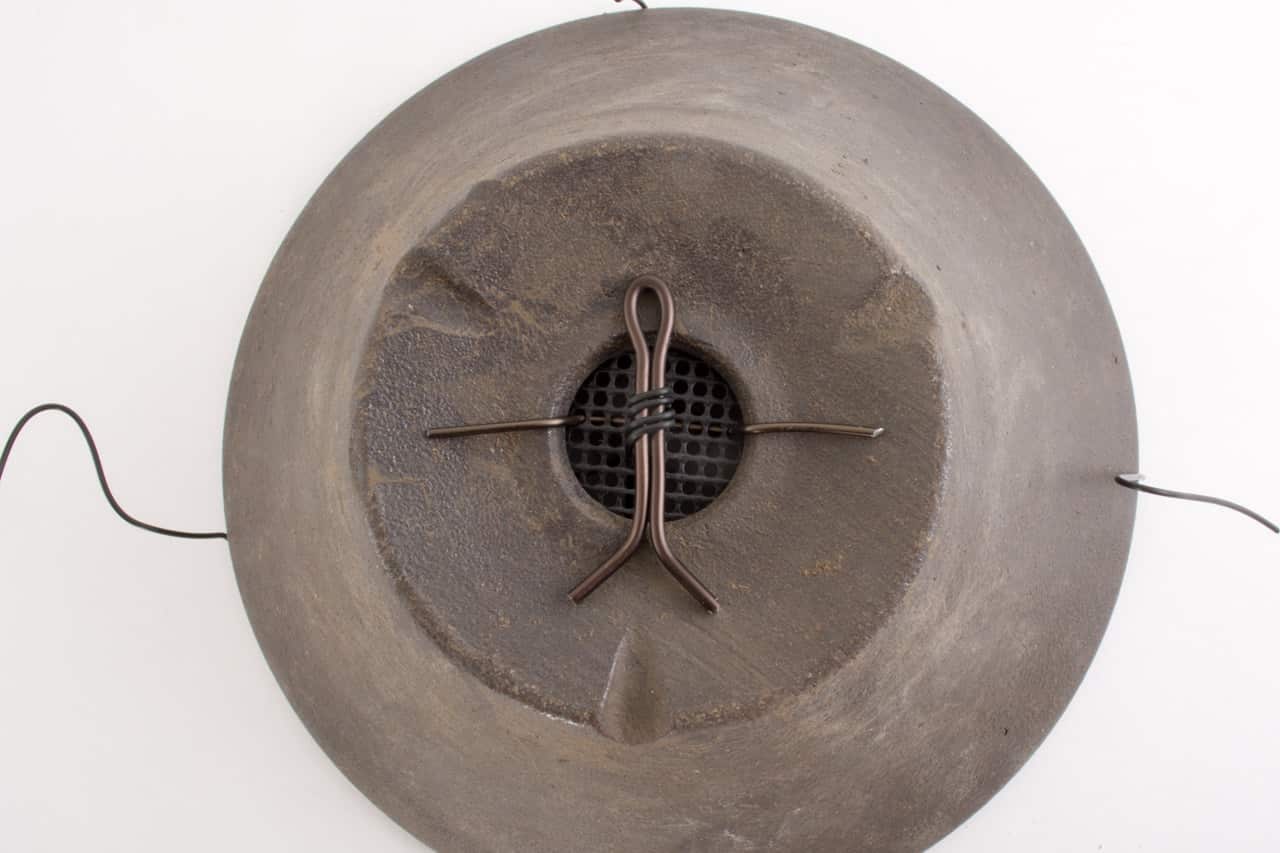
Prepared one-hole pot from below
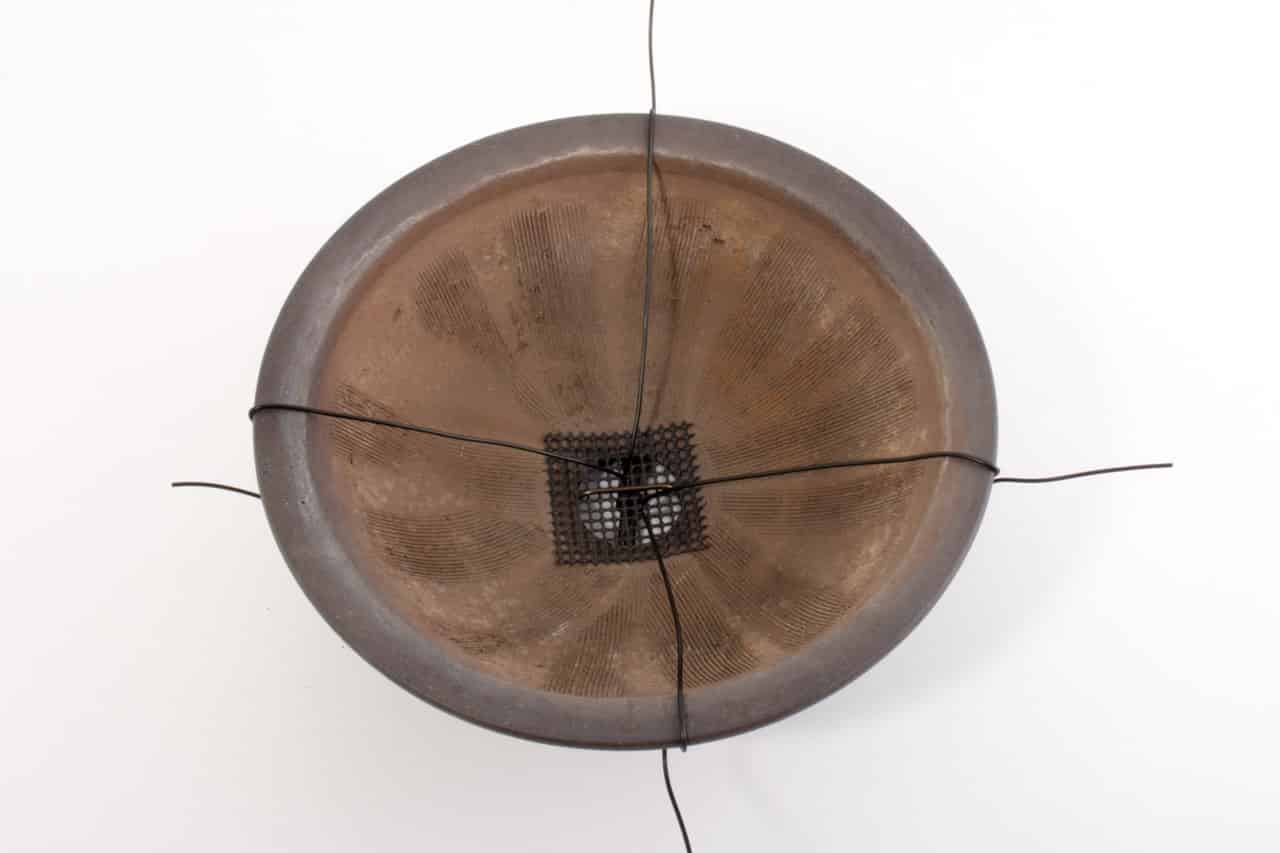
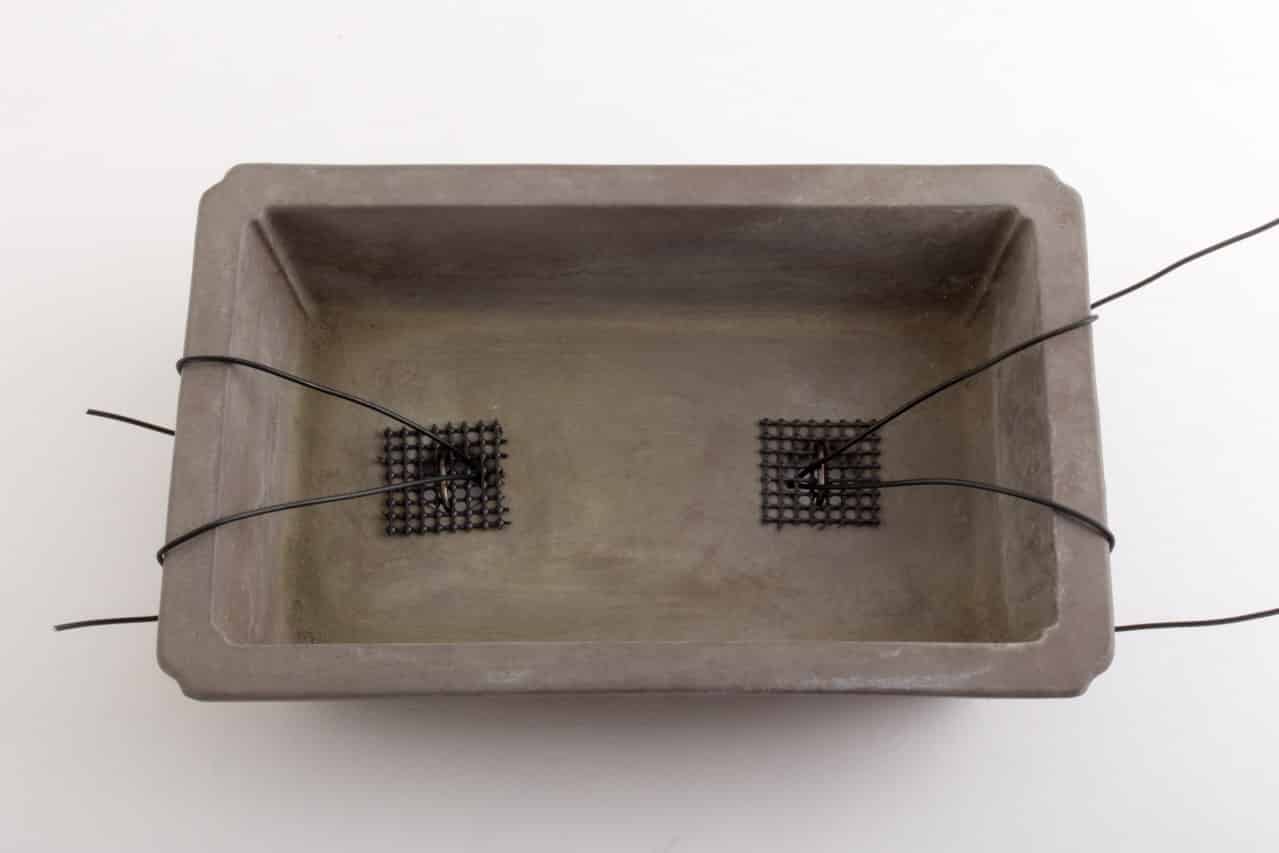
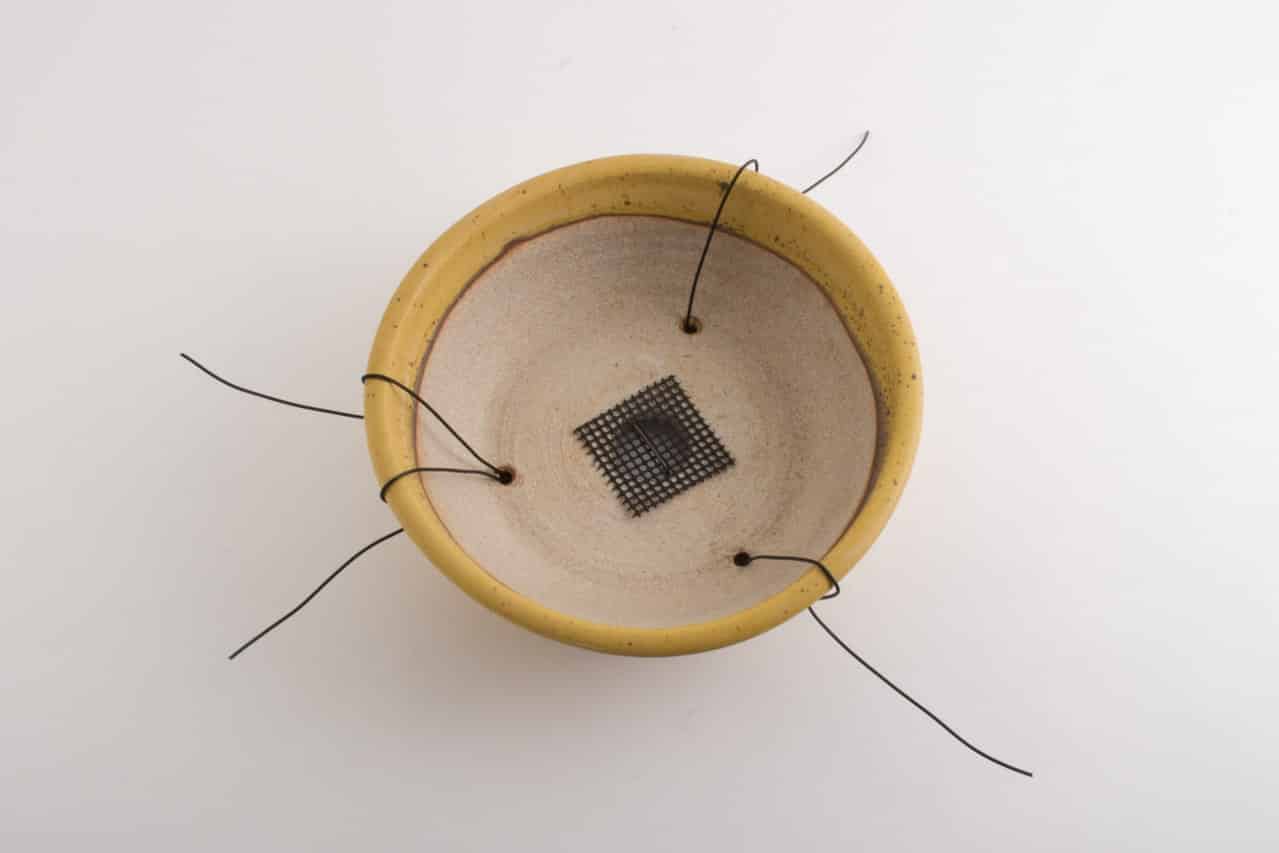
Prepared one-hole pot from above
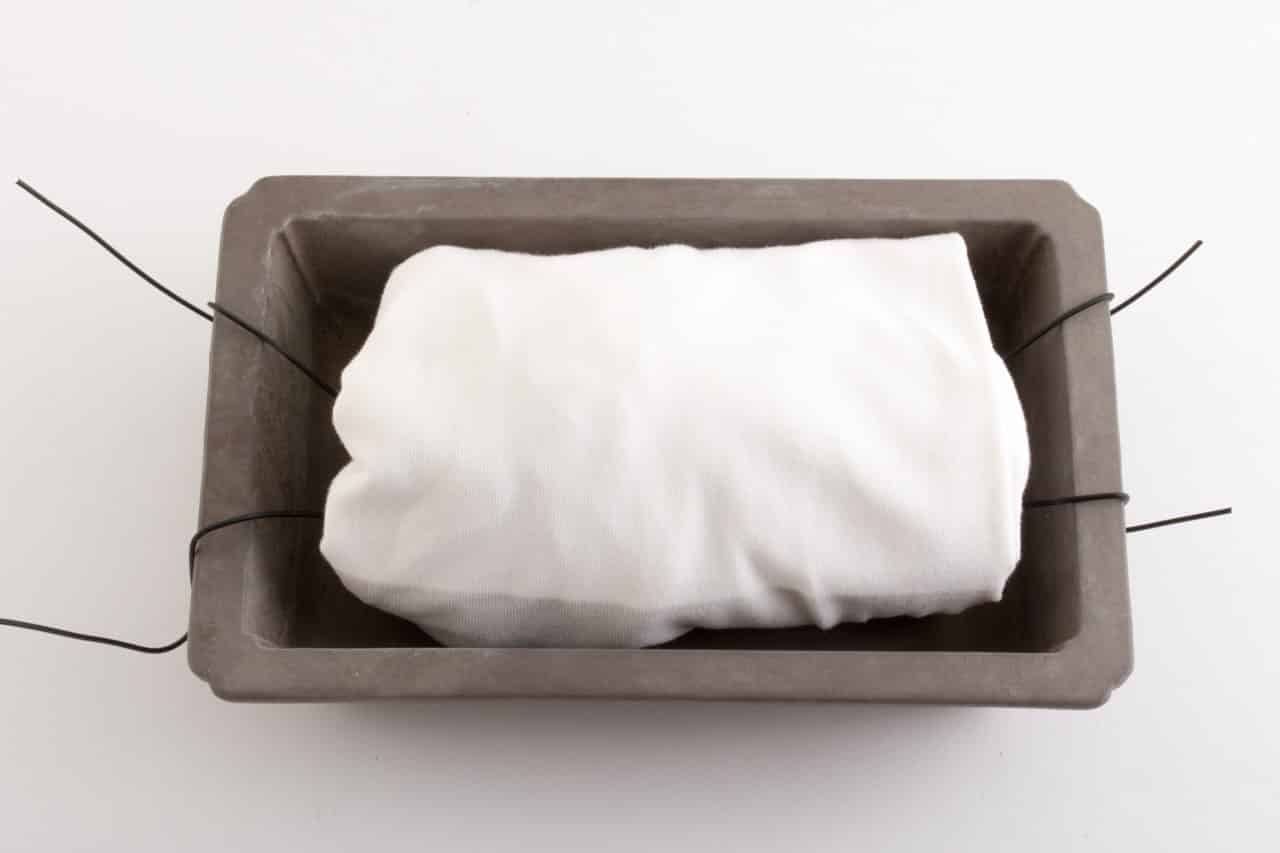
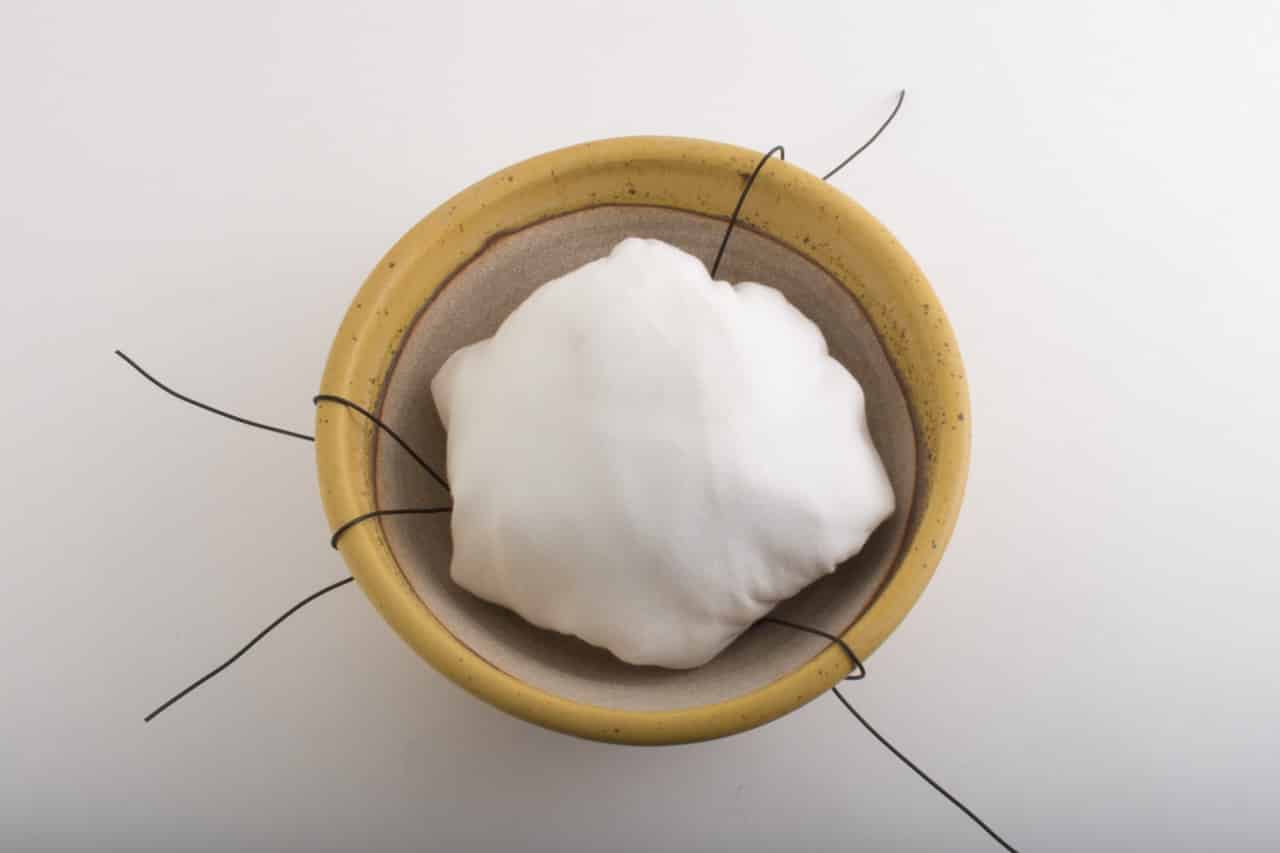
As it can be hard to see tie-down wires against bonsai soil, I’ll demonstrate securing the rootball with a fabric stand-in.

Fabric “rootball”
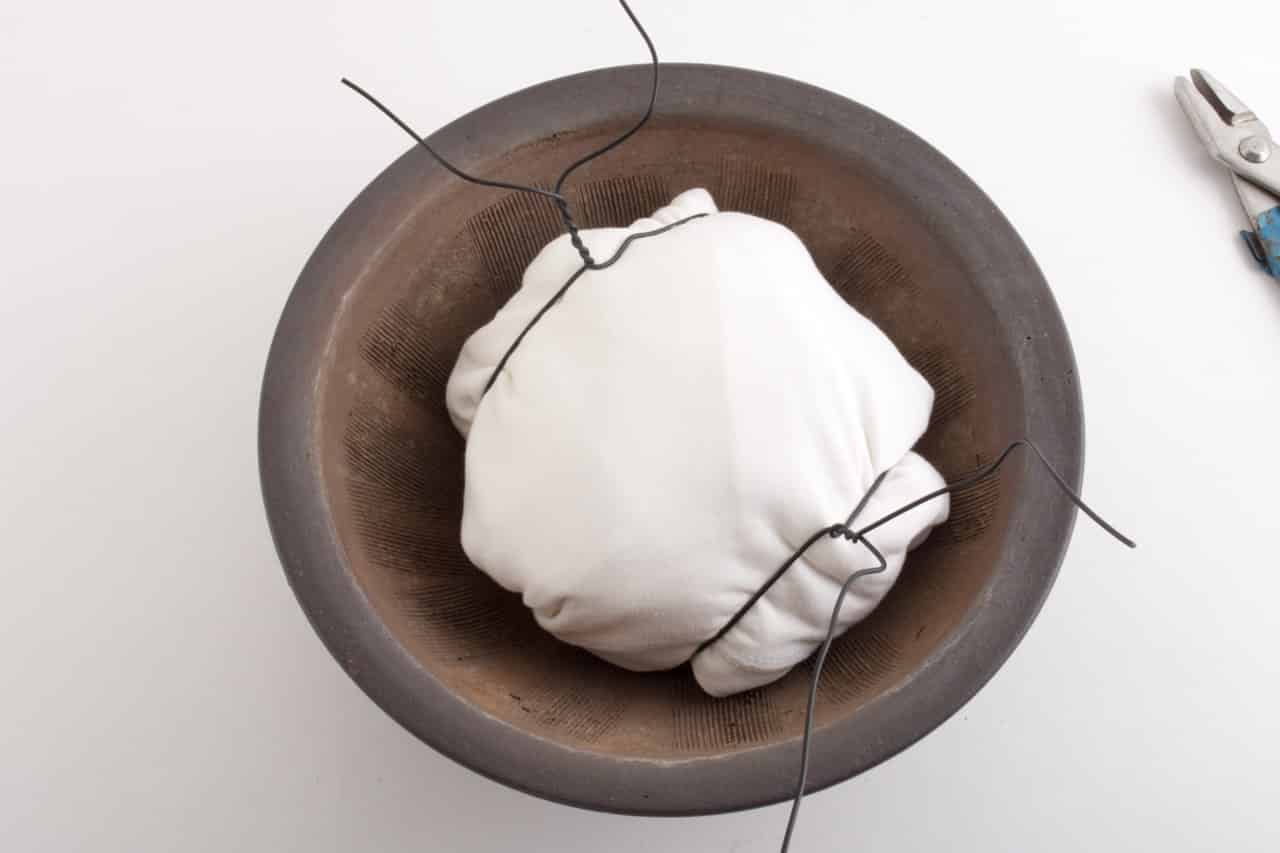
To secure the rootball, select two adjacent wires and connect them by twisting the wires.
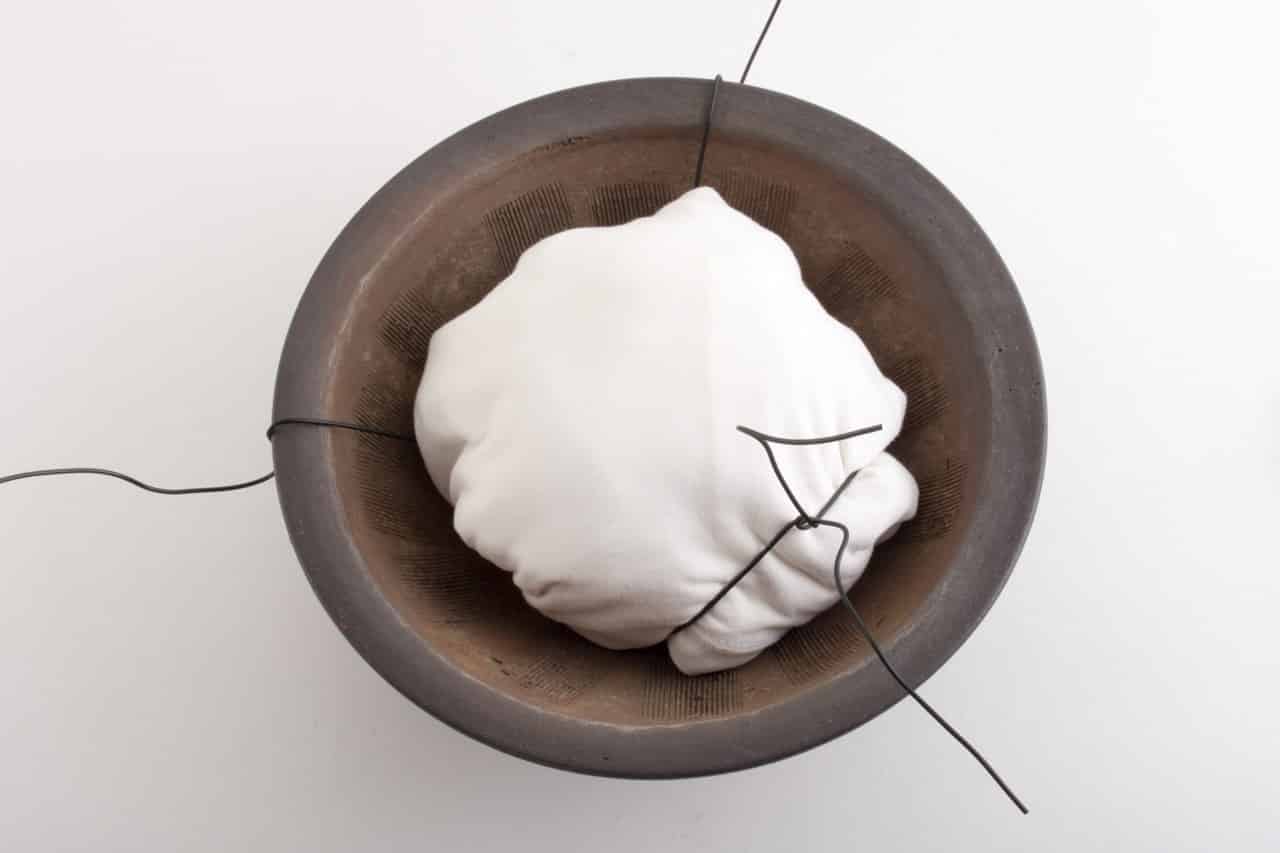
First two wires secured
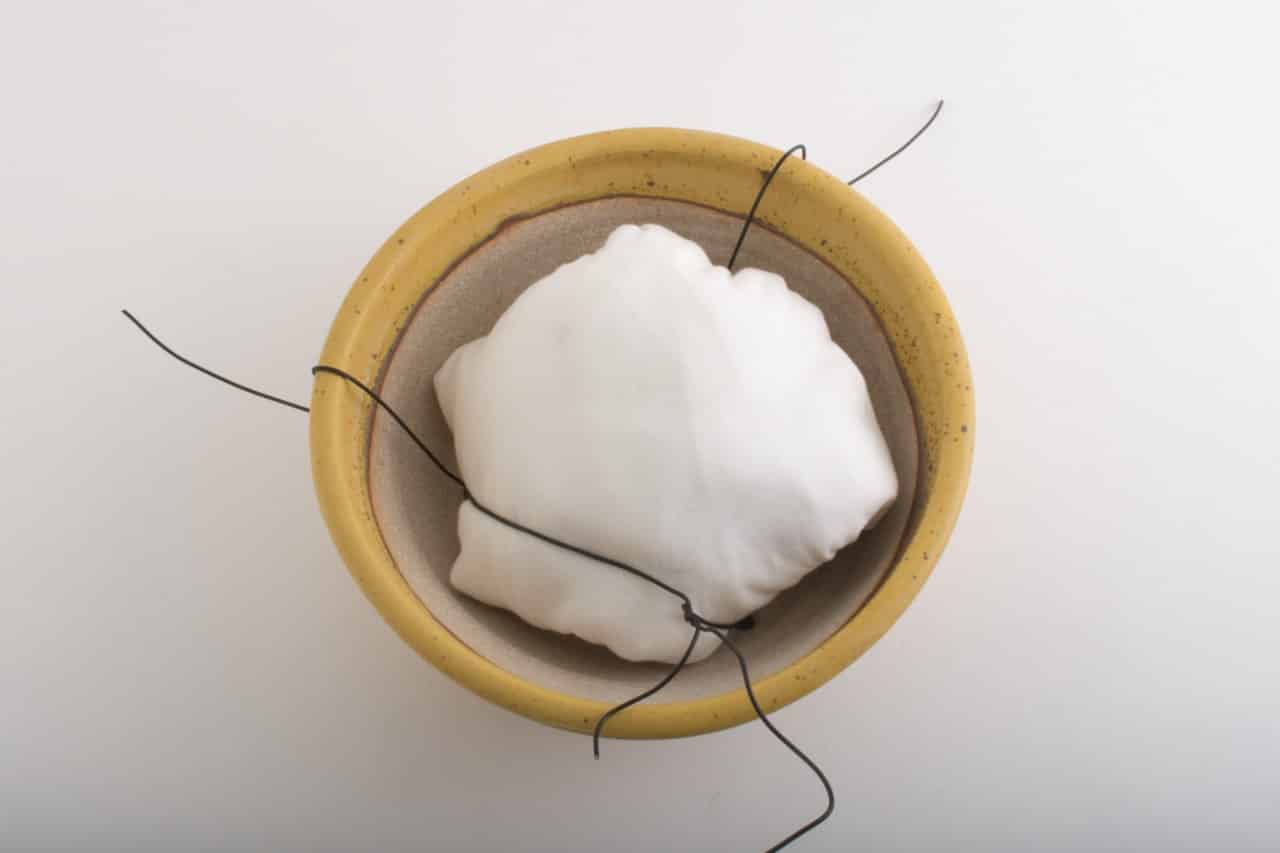
Next, connect the other two wires over the rootball and twist the wires until they are secure.
Second wires secured
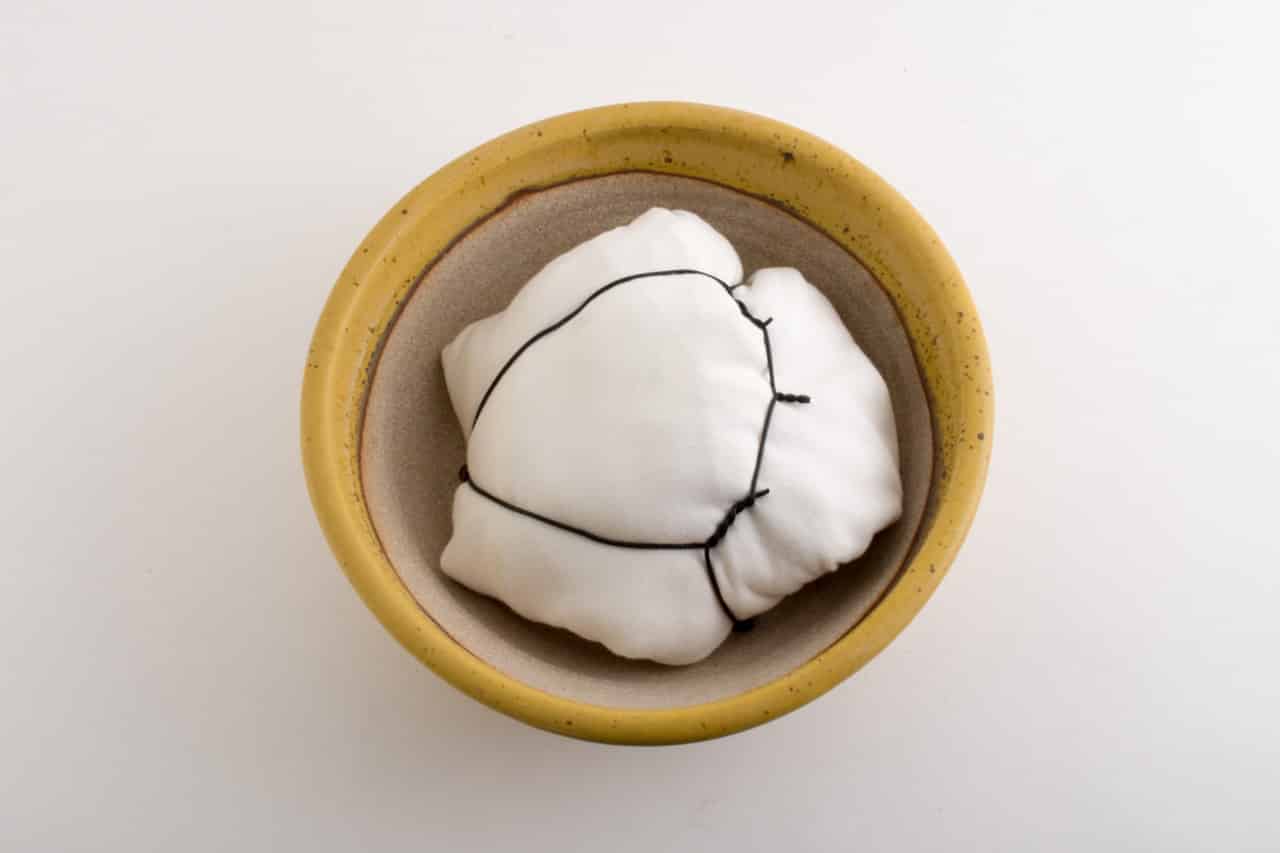
If there is excess wire, remove it.
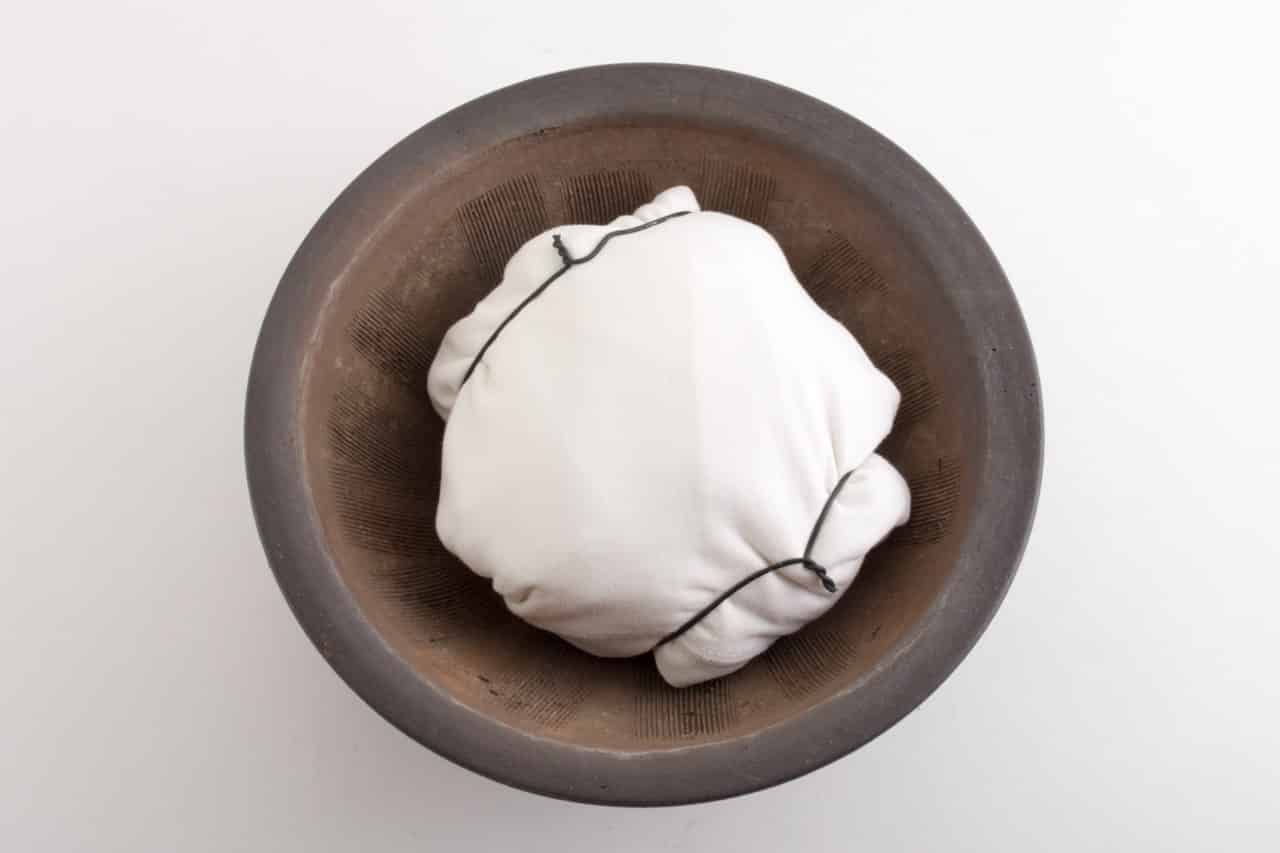
Excess wire removed
That’s it for securing bonsai in one-hole pots. This approach isn’t as secure as the following approaches, but it’s the best way to hold a tree in place when only one drainage hole is available.
Two-hole pots
Two-hole pots have two or more holes.
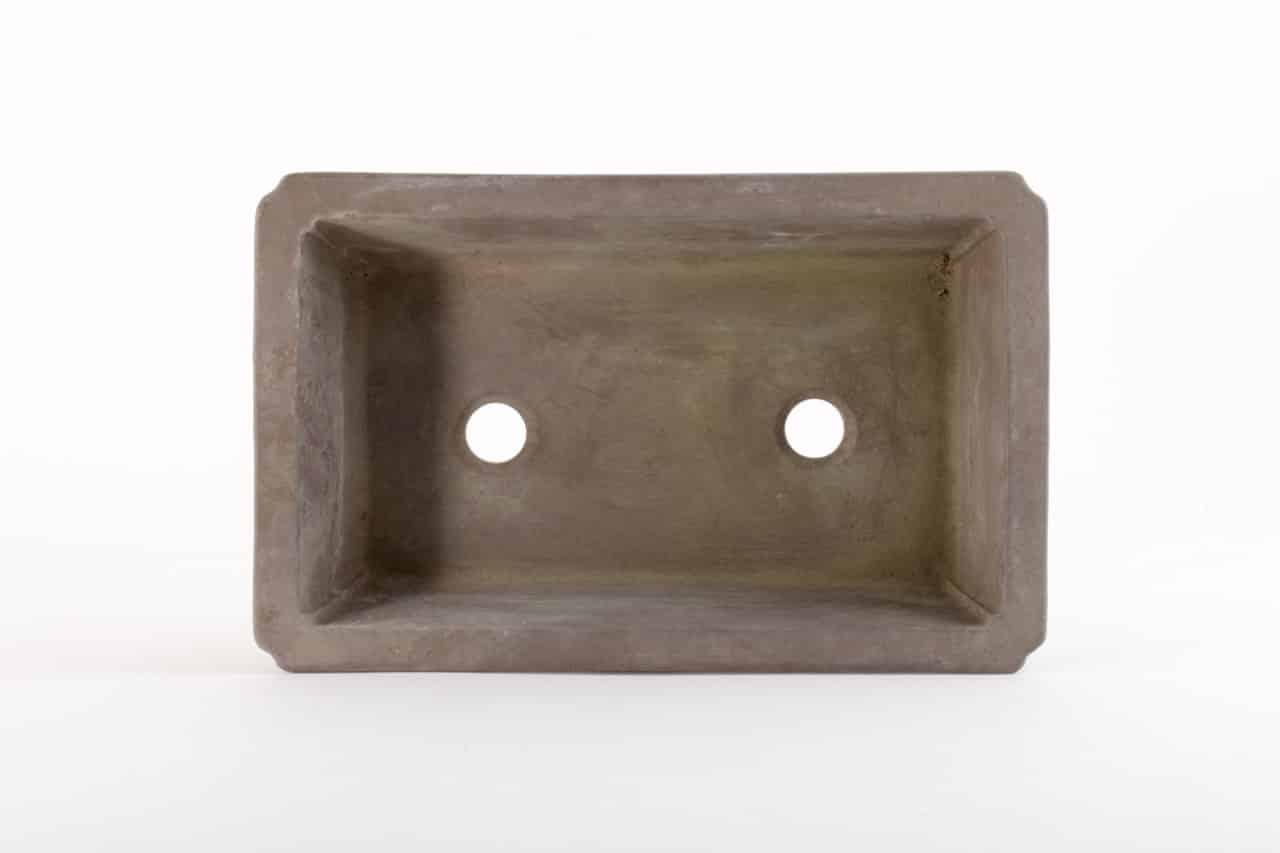
Two-hole pot
Some pots will have a third hole between the two holes shown above, but the tie-down procedure remains the same.
Start by measuring two lengths of tie-down wire equal to the sum of two long sides and one short side of the pot.
Measuring the tie-down wires – two long sides plus one short side
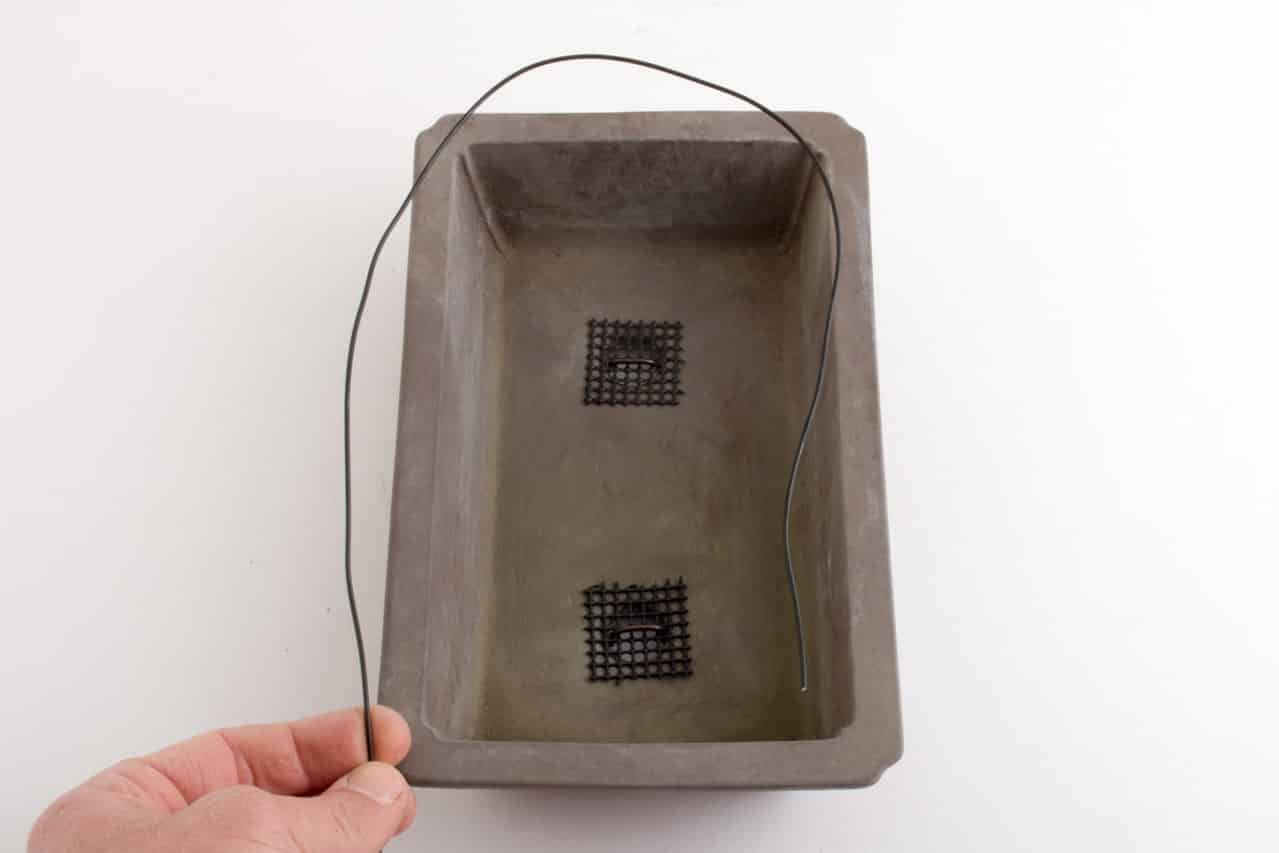
Next, pre-bend the tie-down wires and insert them into the drainage holes, keeping the wires snug against the inside edges to prevent the screen from moving when the wires are tightened.
Bending the tie-down wires
Prepared two-hole pot from below
Prepared two-hole pot from above
Once the rootball is in place, connect the wires in front with a few twists.
The stand-in rootball in place
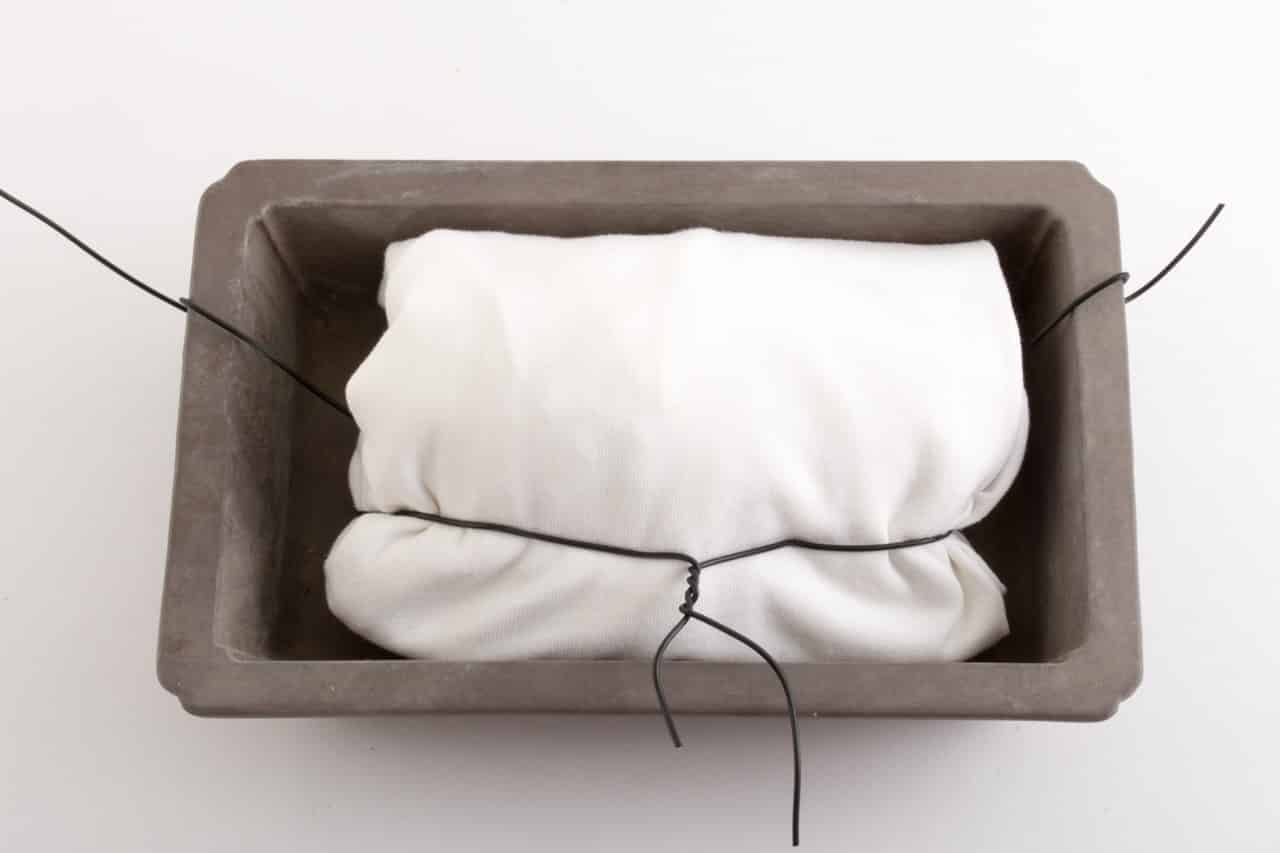
After connecting the front two wires
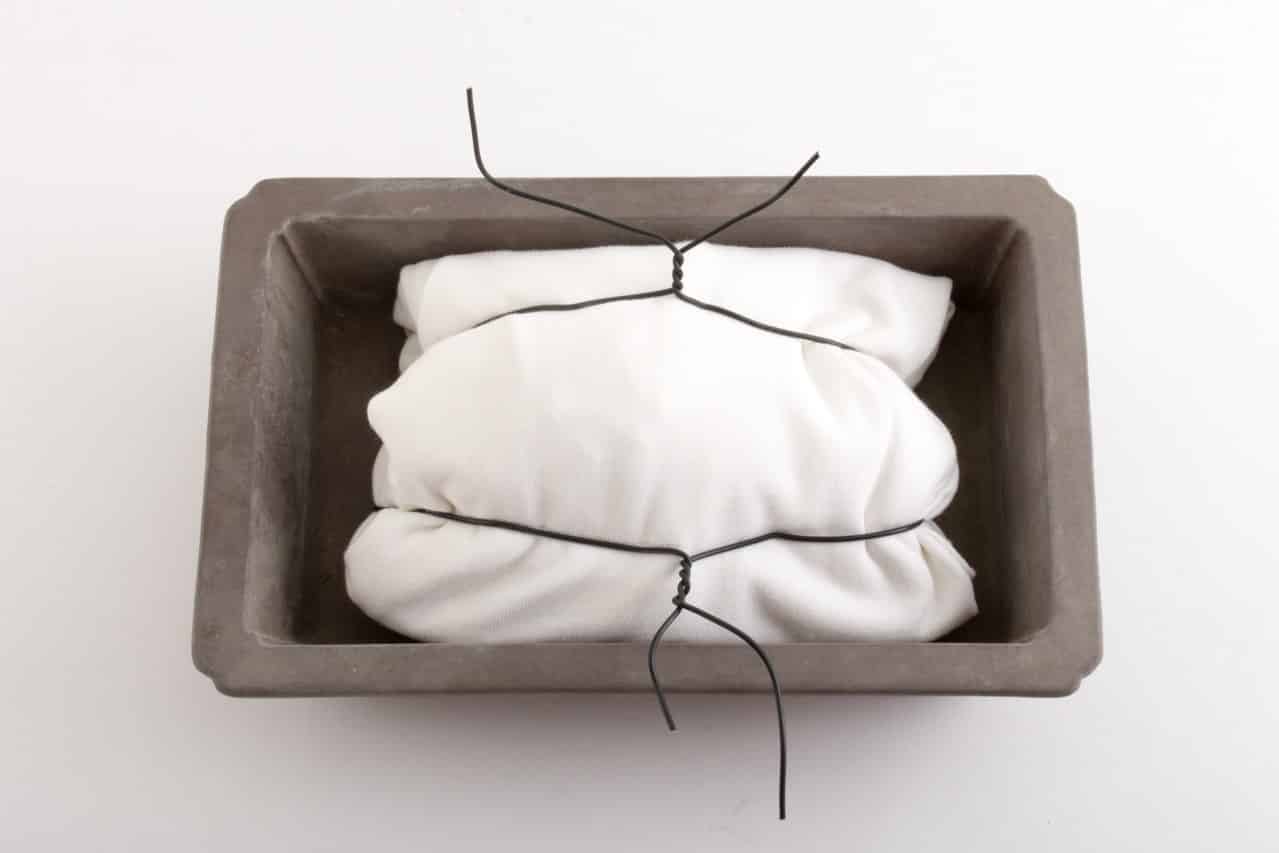
After connecting the back two wires
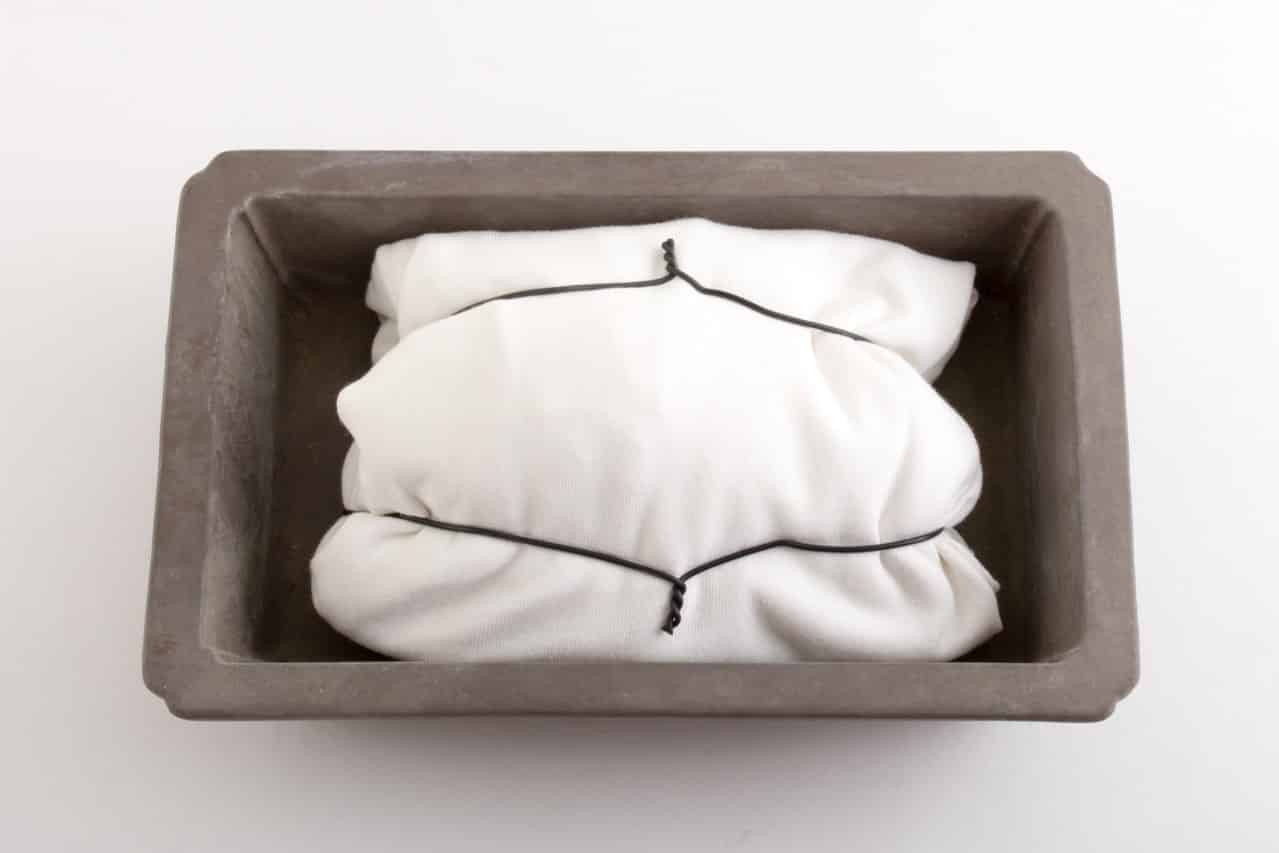
After removing the excess wire
The finished product resembles the finished product of the one-hole pot, but the approach is more secure as there are two anchor points instead of one.
Three-hole pots
Three-hole pots have at least three drainage or tie-down holes.
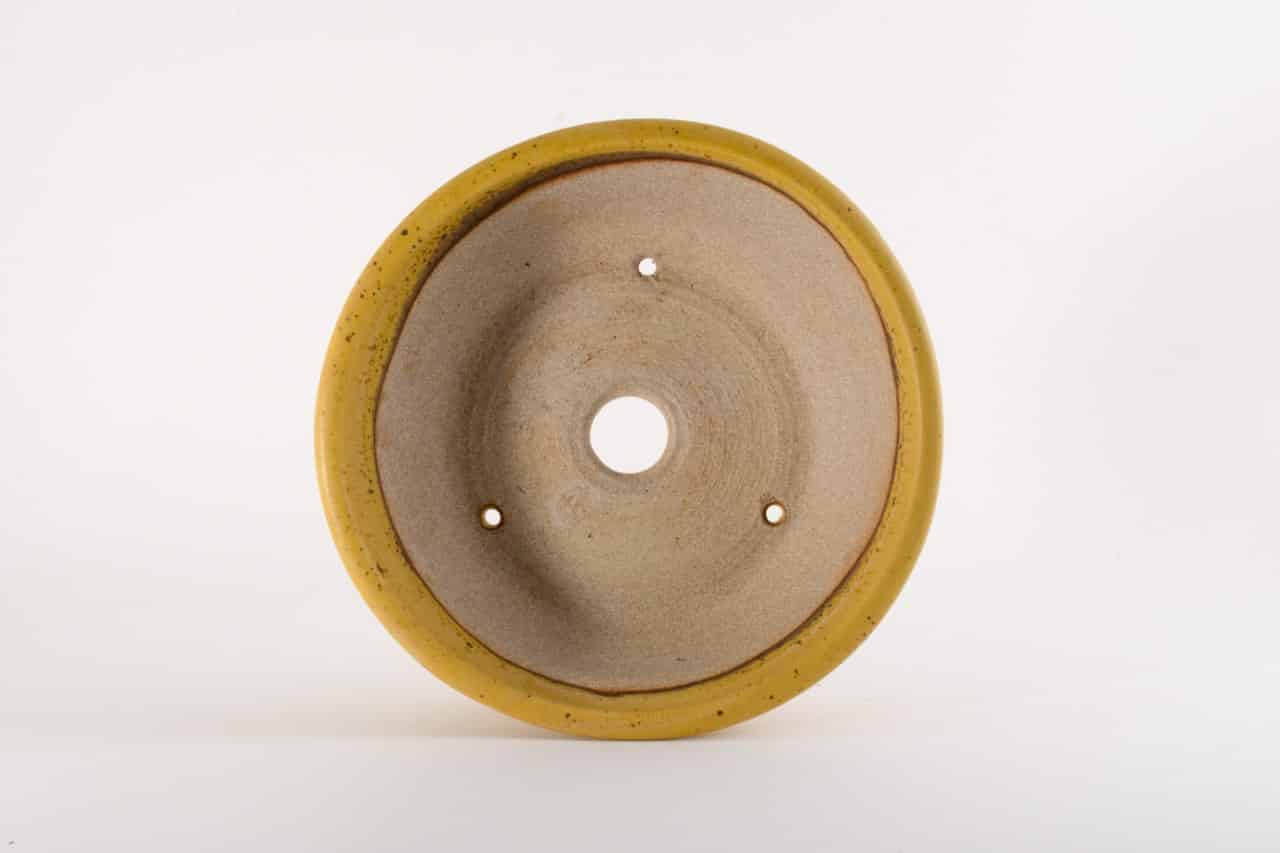
Three-hole pot with three tie-down holes and one drainage hole
As the pot is round, cut the tie-down wires equal to the circumference of the pot.
Measuring a tie-down wire
Pre-bend the wires so they can connect any two tie-down holes.
Lining up the tie-down wires

Tie-down wires bent
Next, insert the tie-down wires so they connect the drainage holes.
Prepared three-hole pot from below
Prepared three-hole pot from above
The most common question that comes up relating to three-hole pots is which hole gets two wires instead of one. Here’s how to figure this out.
First, determine which side of the pot will be the front. Next, determine if the tree leans to the left or right. If the tree leans to the right, the hole with two wires should be on the right. If the tree leans to the left, the hole with two wires should be on the left. The pot below is wired for a bonsai that leans to the left.
Prepared three-hole pot with rootball
There are two options for connecting the wires in three-hole pots. The first option is to connect each pair of wires in the middle as you did for the two-hole pot.
For added security – especially recommended for cascade or semi-cascade bonsai – connect the wires closer to the holes with one wire each. Here’s what this approach looks like.
First pair of wires connected close to a hole with one wire

Second pair of wires connected close to the other hole with one wire
Taking this approach allows us to connect the tails of each pair of wires to each other for added strength. As this point is the strongest connection, it’s used to counter the weight of cascading branches on the opposite side of the tree.

Connecting the tails
Secured rootball – appropriate for cascade or semi-cascade bonsai that flow to the left
The above tree-hole approach can lead to some confusion when it comes to figuring out which holes should get one or two wires. One way to overcome this is with some practice. Another approach is to repot your tree with a more experienced practitioner. I can add to this a single tip.
If you have a cascade or semi-cascade bonsai, you may find that the tree is tippy after preparing the rootball. If you place one finger on side of the rootball opposite the cascading branch, you’ll find that a single anchor point can keep the tree from falling to the side. This anchor point is where you want the final tie.
Four-hole pots
Four-hole pots have drainage or tie-down holes in each corner of the pot. There may be additional holes in other locations.
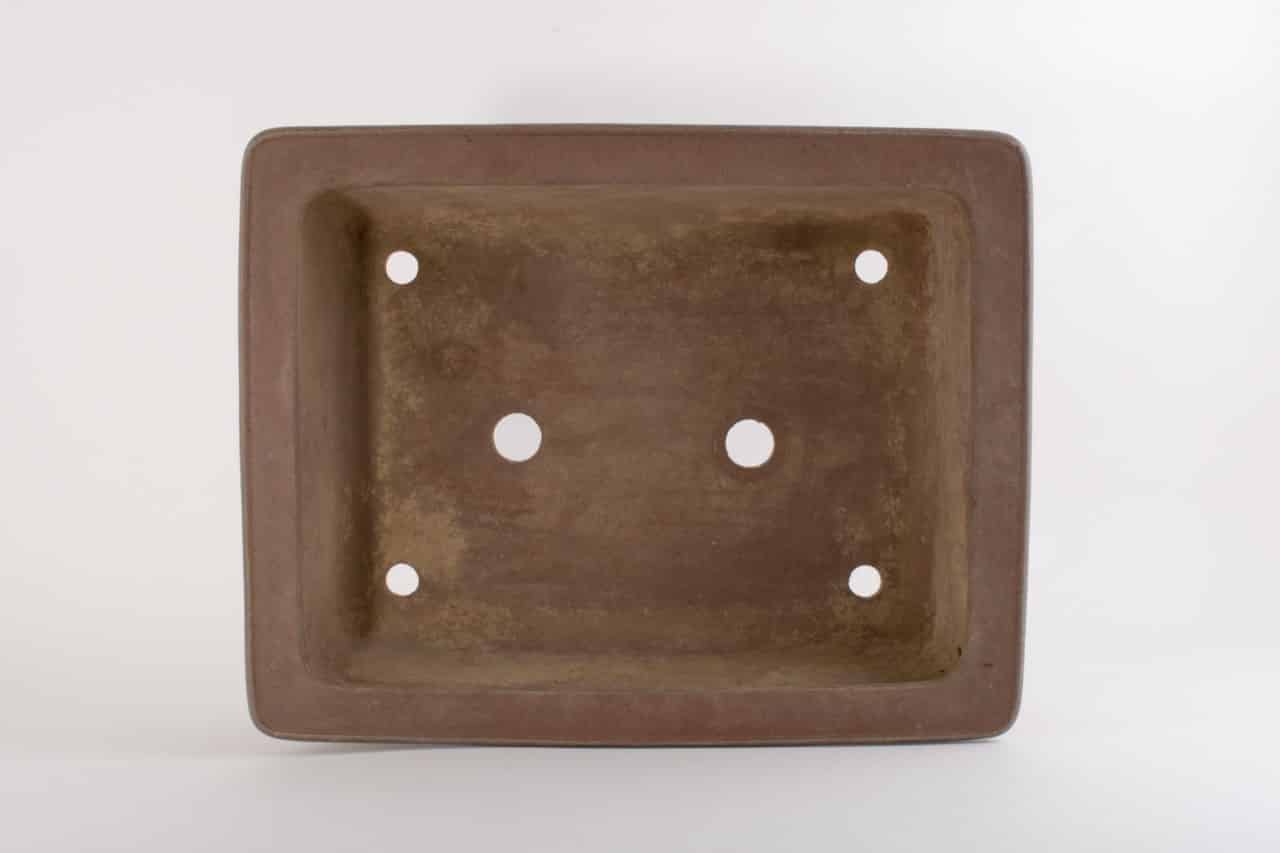
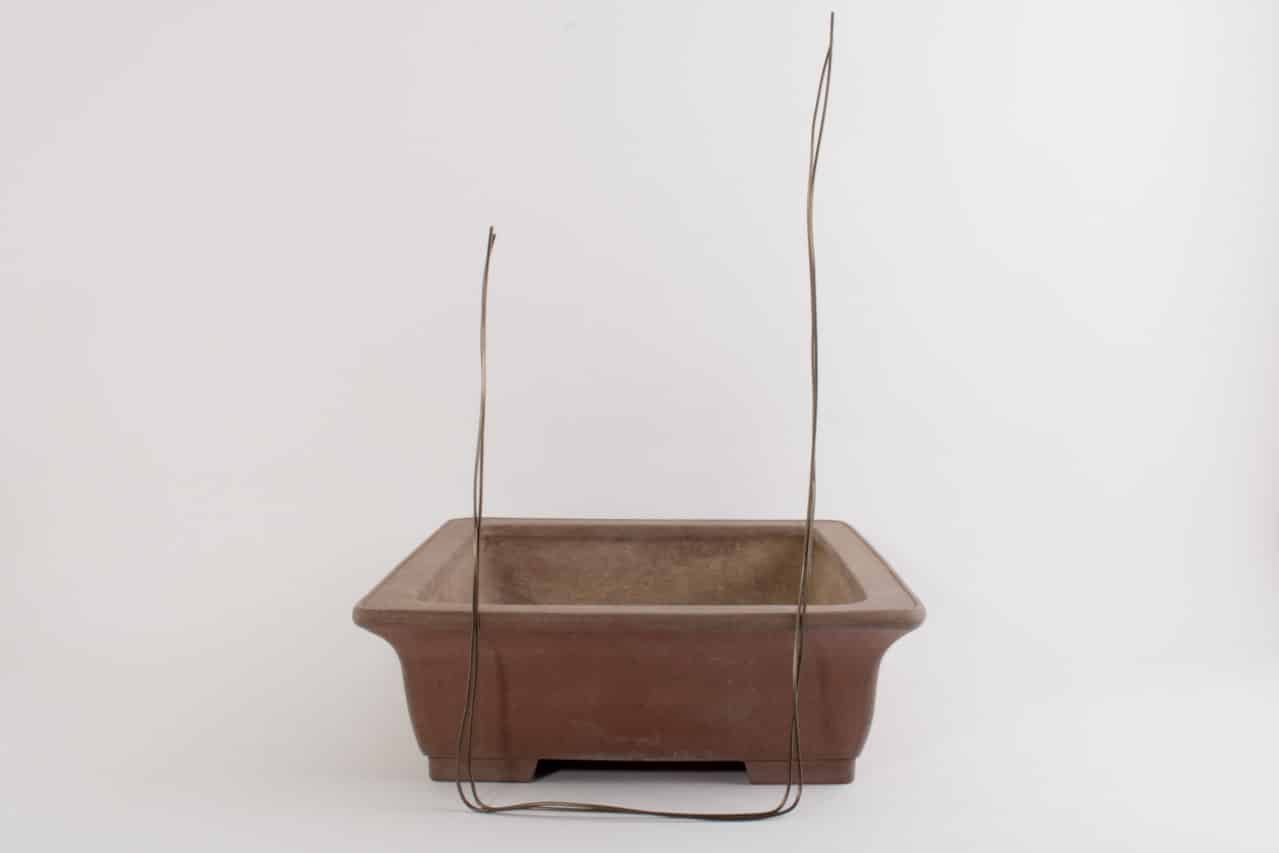
Four-hole pot
As the pot is a rectangle, measure the tie-down wires equal to the length of two long sides of the pot and one short side.

Measuring a tie-down wire
At this point, there are a couple of options. The simple option is to follow a modified version of the two-hole approach that uses the corner holes instead of the drainage holes in the middle of the pot. This approach can be good for trees with solid rootballs.
A second approach has a few more steps, but provides a more secure connection. Here are the steps for the more secure approach.
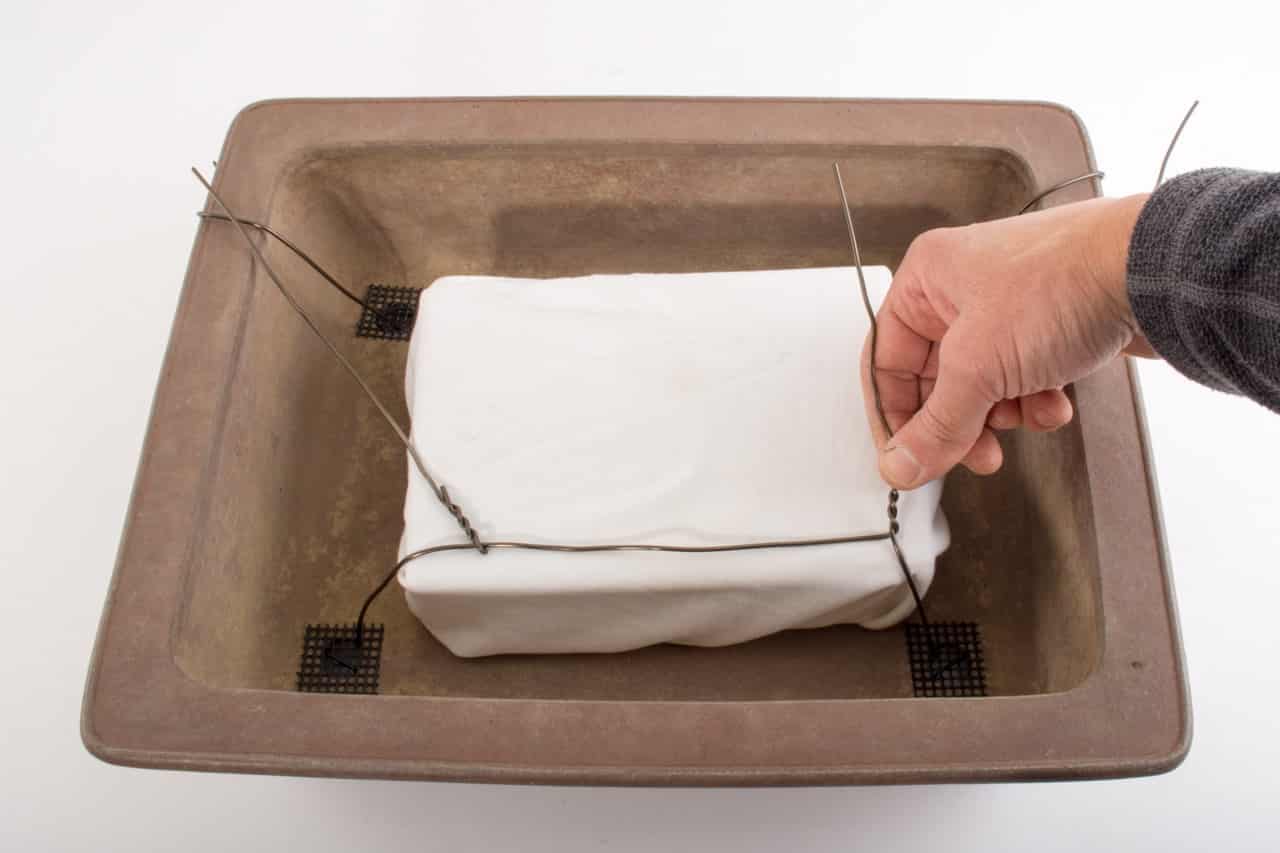
When pre-bending the tie-down wires, make one side longer than the other.
Tie-down wires bent as seen from the left-hand side of the pot
When inserting the tie-down wires in the corner drainage holes, connect the holes on the left with one wire and the holes on the right with the other wire.

Prepared pot from above
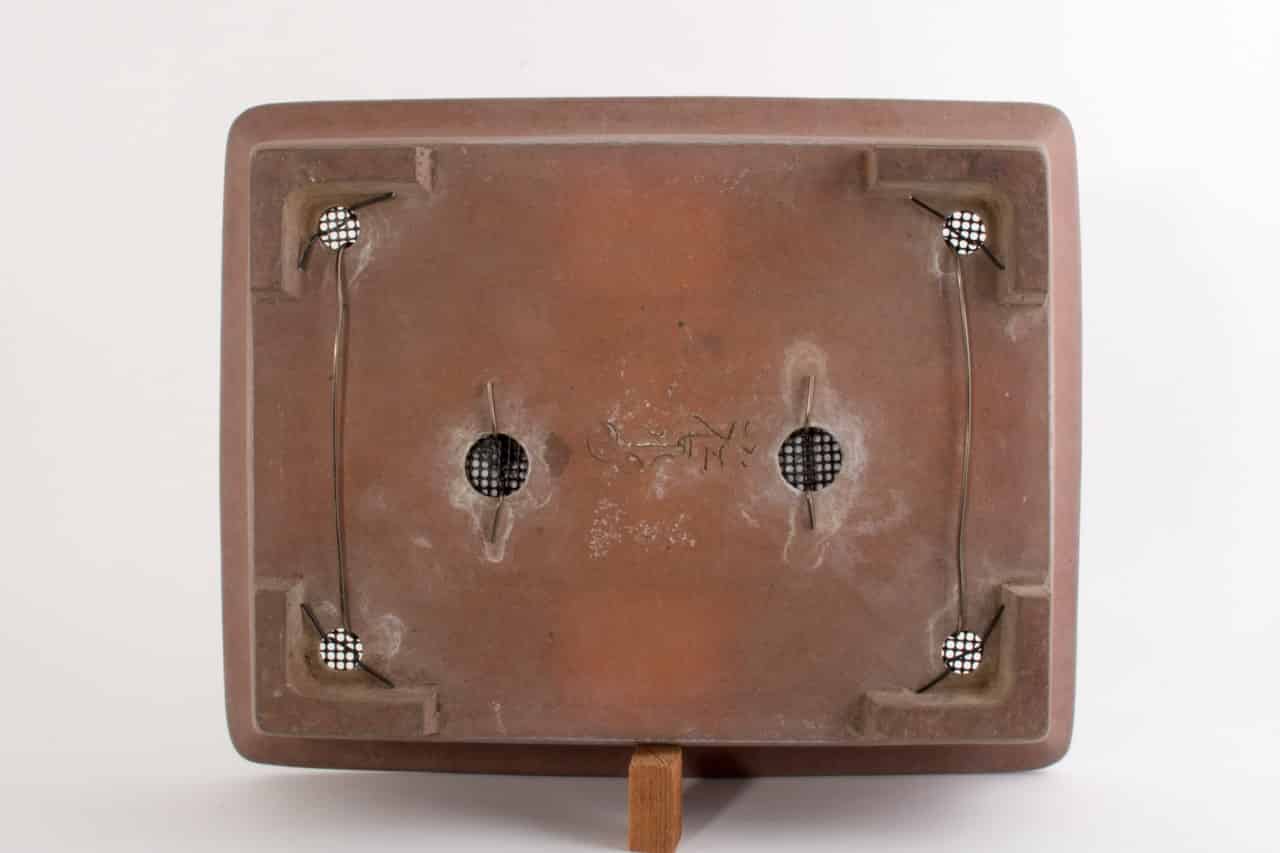
Prepared pot from below
Which holes get the longer sections of wire? Like the three-hole approach, this bit depends on which way the tree leans.
- If the tree has strong movement to the right, place the longer sections of wire in the front left and back right holes.
- If the tree has strong movement to the left, place the longer sections of wire in the front right and back right left holes.
- If the tree doesn’t have strong movement in either direction, either of the above approaches will work.
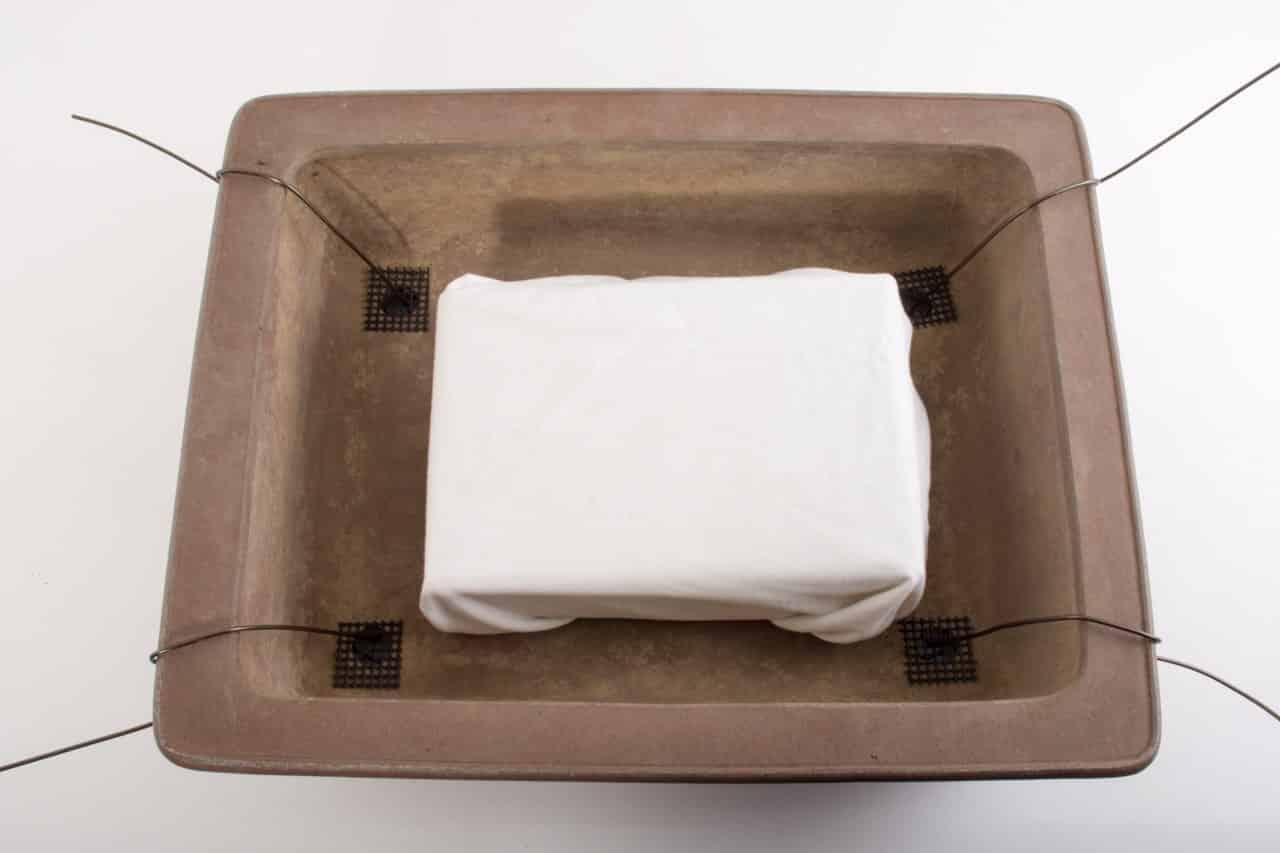
Prepared pot with rootball
For this example, we’ll assume the tree leans to the right. First, prepare a short section of wire with a loop on one end.

Short section of wire with loop
Insert the front left wire into the loop. We’ll use this “tail” for the final tie.
The tail affixed to the front left wire
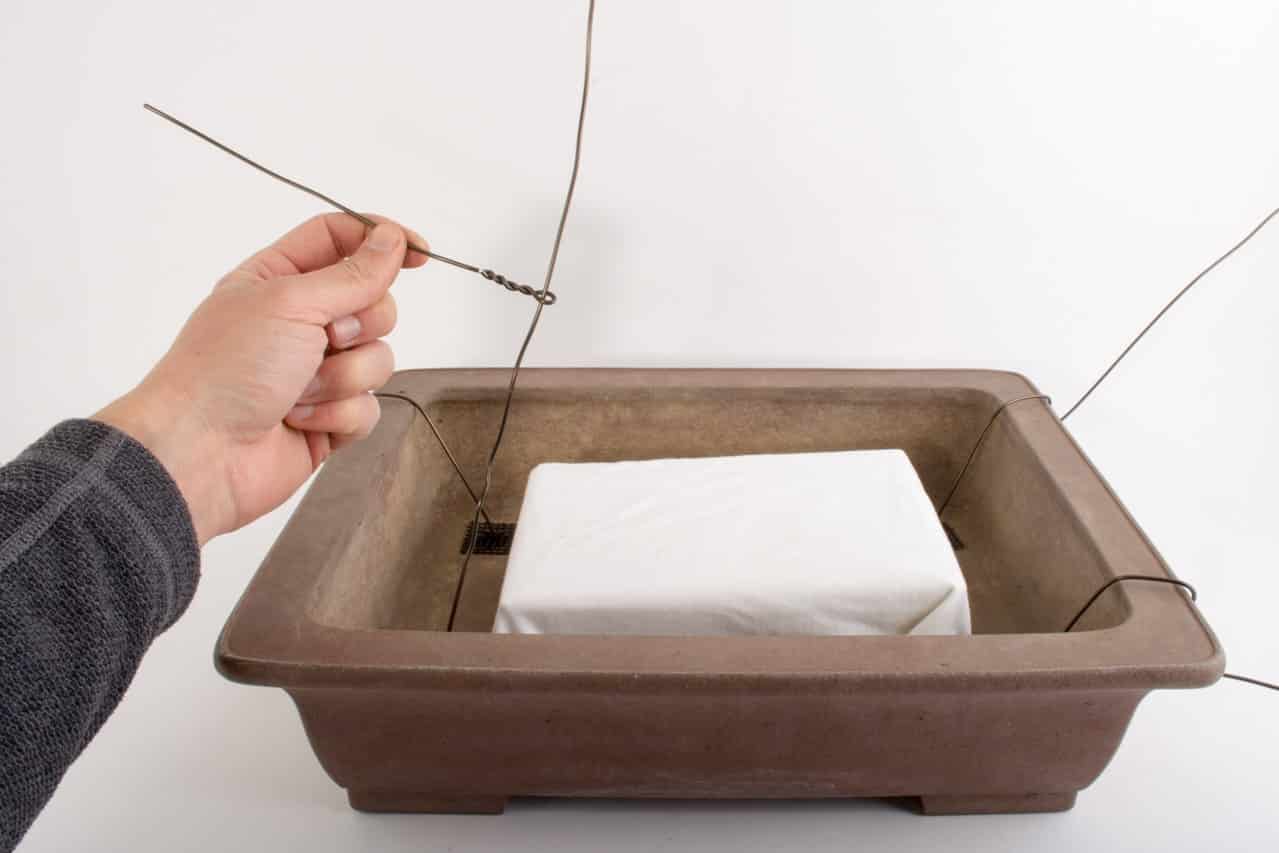
Bring the front left wire across the rootball to the front right drainage hole and connect the wires with at least three twists. The twists can be done with pliers or fingers.

Covering the rootball with the first tie-down wire
The first connection
Next, bring the front right wire across the rootball to the back right corner.
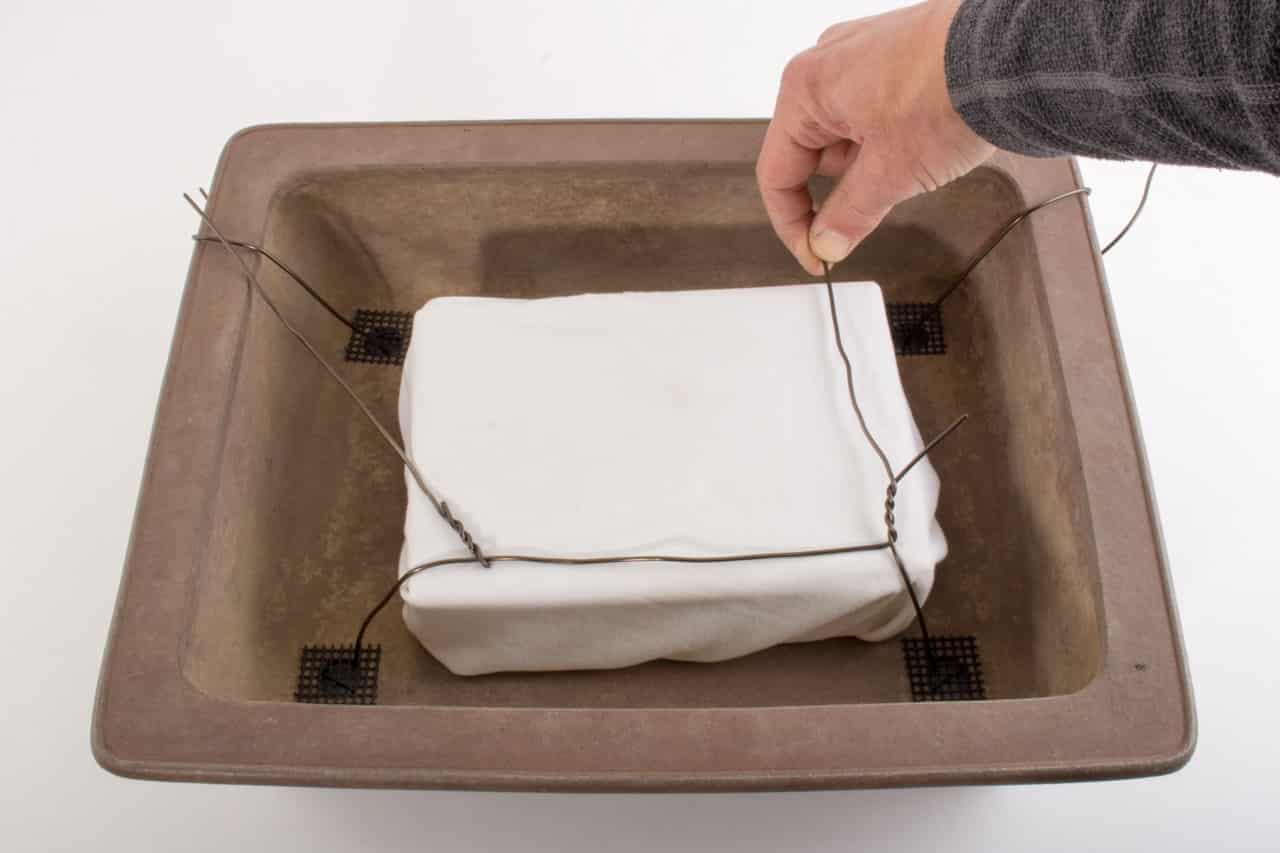
Covering the right side of the rootball
Connect these wires with a few twists. Next, bring the back right wire across the rootball towards the back left corner.

Covering the back side of the rootball
Connect the wires.
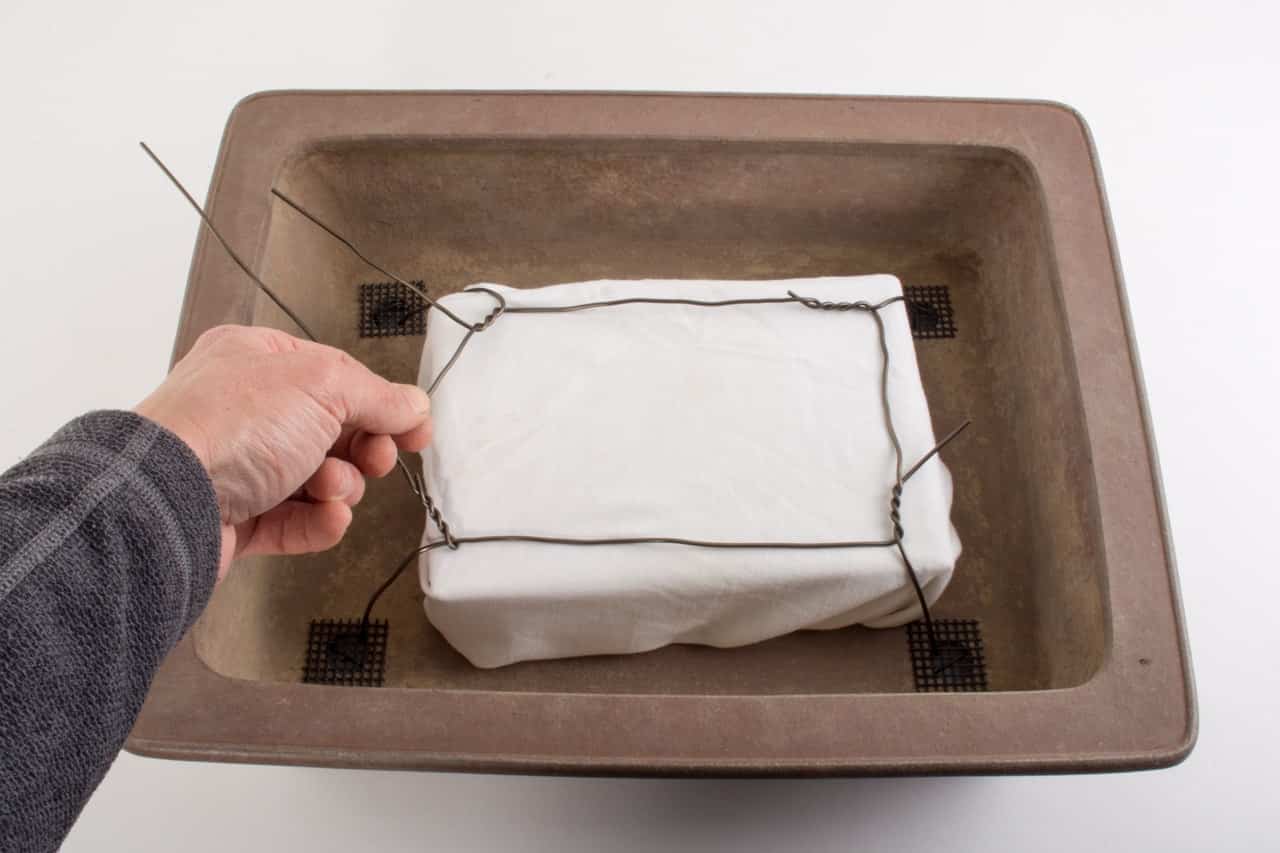
Back left wires connected
This is where the tail comes in. For the final tie, connect the tail in the front left corner with the wire in the back left corner.
Connecting the back left and front left wires
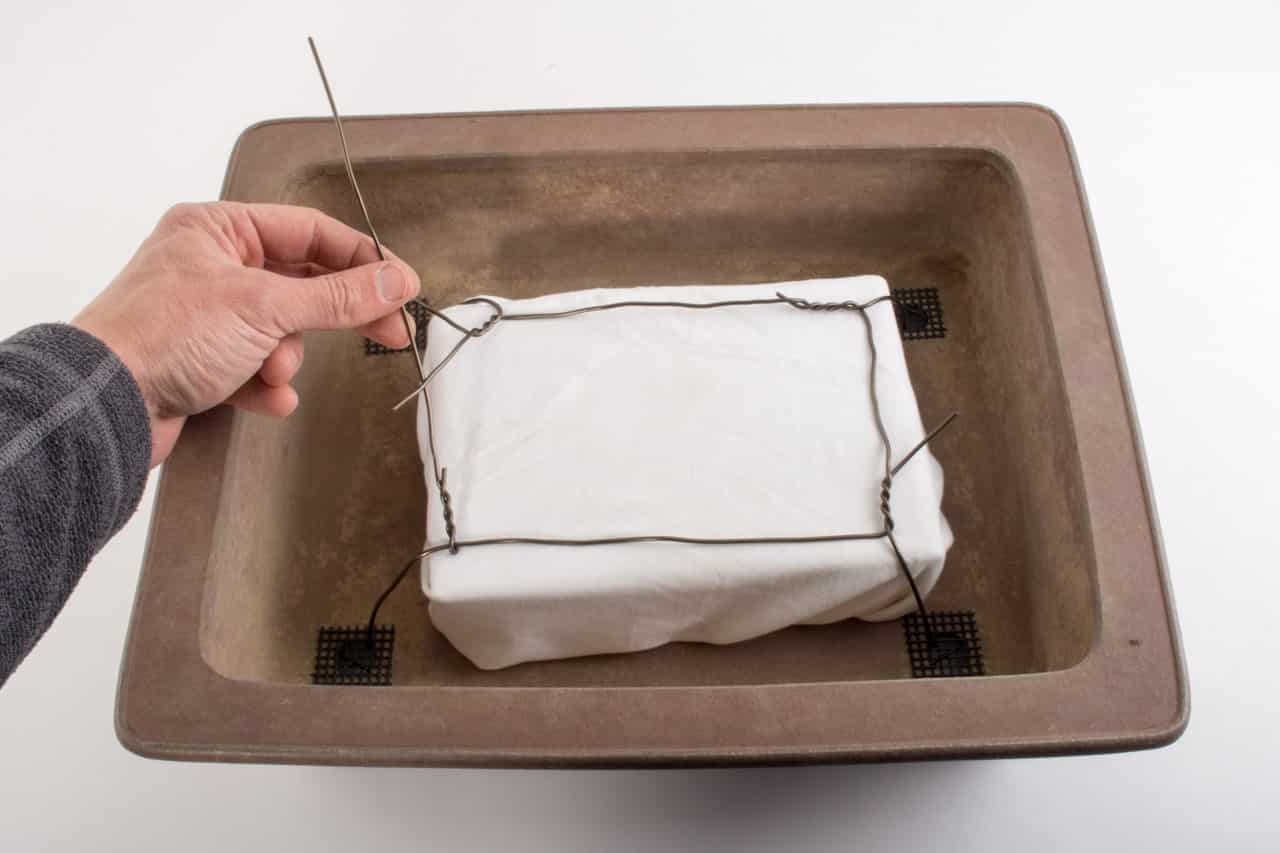
This final connection should be tightened with pliers. Remember to pull first, then twist when tightening the connection.

The final tie

Rootball secured
Like the three-hole approach, this approach may take some getting used to. Practicing with a block of wood or getting 1-1 instruction during a workshop can help. With enough repetition, this approach can become natural.
Some common questions about the four-hole approach:
- Does it matter if I connect the wires counter-clockwise as in the example or clockwise? Not really. If proceeding clockwise, however, the longer sections of tie-down wires will need to be reversed (for trees that lean to the right, place the long sections in the top left and bottom right holes and start with the front right wire).
- Does it matter if I start in the front or the back of the tree? Only if the tree has a strong lean. As the final tie is the strongest anchor point, try to arrange the wires so the final tie is on the side opposite the part of the tree that leans.
General questions about securing bonsai in the pot:
- I’ve seen videos where bamboo stakes are driven into the rootball and the tie-down wires simply hold the stakes in place. Does this approach work well? The bamboo stake variation can work great when the rootball is solid, and it uses less wire. It doesn’t work as well if the rootball is loose.
- Should I use copper wire, aluminum wire or steel wire for tie-downs? Any wire that doesn’t erode quickly will work. I usually use aluminum wire as it’s less expensive than copper wire and it’s easy to work with.
- What size wire should I use for the tie-downs? This depends on the size of the tree and how strong a lean the tree has. I use 1.5mm or 2mm aluminum for most trees and 2.5mm or 3mm – or stainless steel wire – for the largest trees.
Would you like to see some examples using real trees? Here are step-by-step shots of the process with a trident maple, with a young black pine, and with a Sawara cypress. These articles, particularly the trident maple article, will also provide an overview of the basic repotting process.
Next up: Part 8 – how to wire a Y
Subscribe to Bonsai Tonight
New Posts Delivered Every Tuesday and Friday
Charles Orr says
This article is fantastic. I’ve been wrapping wire around the trunk for years. Now I see how these techniques are far superior. I can’t wait to try them out this spring. Thank you.
Mac McAtee says
Jonas, You have done it again! When is the book coming out?
Boon was at the Triangle Bonsai Society, Raleigh, NC last year and demonstrated the four hole technique with the added tail.
It went so fast and visibility wasn’t so hot so I missed out on the part about adding the tail. My entire spring repotting I spent trying to figure out how he made those four wire ends come together and securely tie the tree in the pot, now I know what I missed.
Many thanks for your dedication to educating all of us folks in the hinterlands. Your work is greatly appreciated.
Felix Laughlin says
Jonas, this is truly the best step-by-step demo on how to apply tie-down wires in one-, two-, three- and four-hole pots which all bonsai lovers will enjoy. Boon was recently at the Morikami Museum & Japanese Gardens in Delray Beach, FL where I watched him demonstrate each of these steps so I was amazed to see your blog come out today to give me a photographic record I can keep handy for the future. Many thanks!
Felix
Charlie Mosse says
Home run!!! Excellent explanation and photos. I will pass the link onto our club.
Angela V. says
Thank you for the explanation , great photo of pots and wires. Boon, recently showed this procedure at Morikami to the Bonsai volunteers, good memory refresher for m. Thank you
LanceMac10 says
Excellent presentation. Quick, well illustrated and to the point.
Using the fabric stand-in was straight genius!
I got better at securing these tie-downs after I figured out I didn’t have to go “gorilla” on them!!
Thanks for the great posting!!