Wiring is a fundamental bonsai technique. It helps us guide new growth and rearrange existing growth. Its application can be difficult, and even removing wire from branches can be trying when there’s little space to work.
Wiring can also be a lot of fun. We impart a little of ourselves when we wire, and with practice, the technique can become second nature.
Beginning students often find wiring intimidating, and for good reason. There are few resources detailing how to go about it, and improving one’s skill generally requires good instruction and lots of practice.
Every time we sit down to change the location of a given branch we’re essentially given a problem we can solve with wire. For an introduction to wiring, I’d like to start with approaches to a single discrete problem – how to wire a branch that divides into two smaller branches.
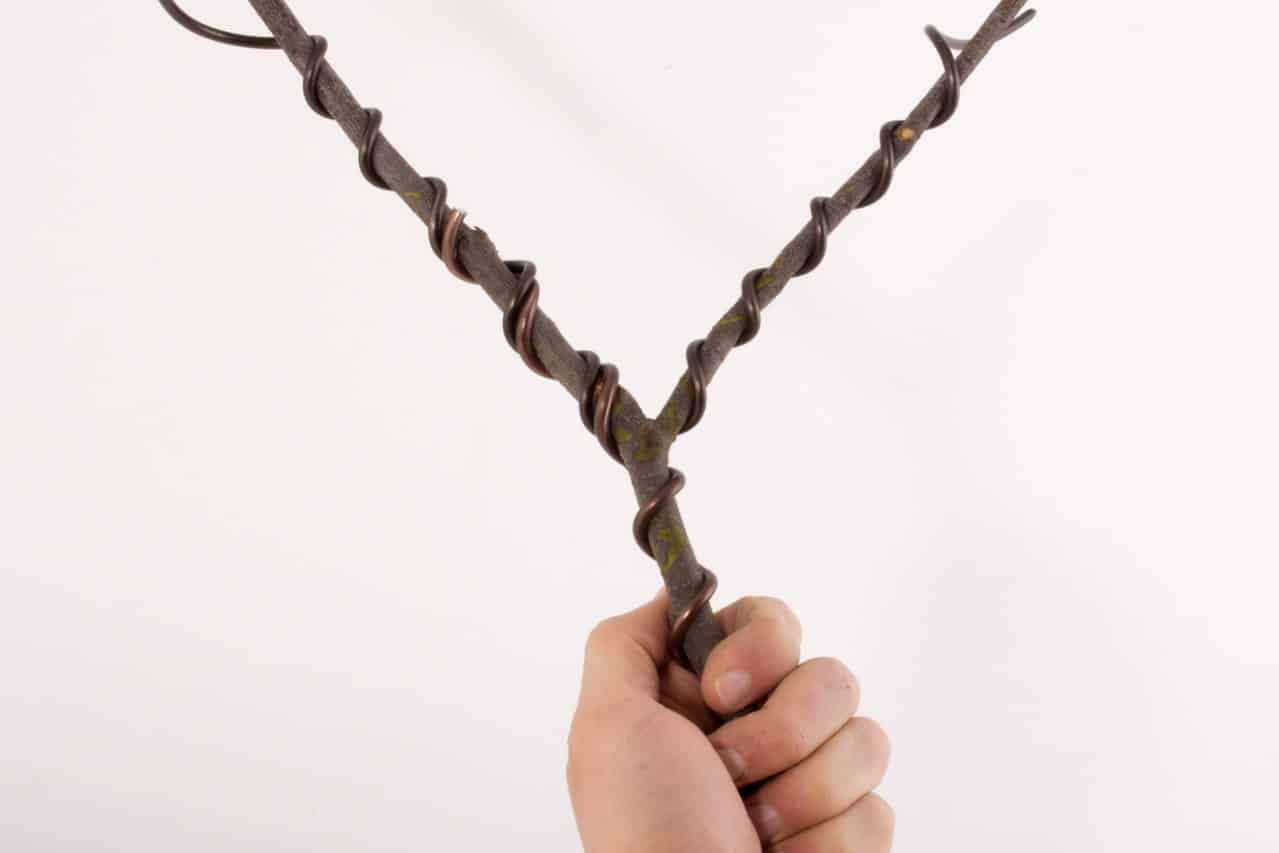
How to wire a Y-shaped branch intersection
Wiring a straight branch is relatively straightforward – we continue to spiral the wire along until we reach the end of the branch. More often than not, however, branches will split into smaller branches that form a “Y” shape.
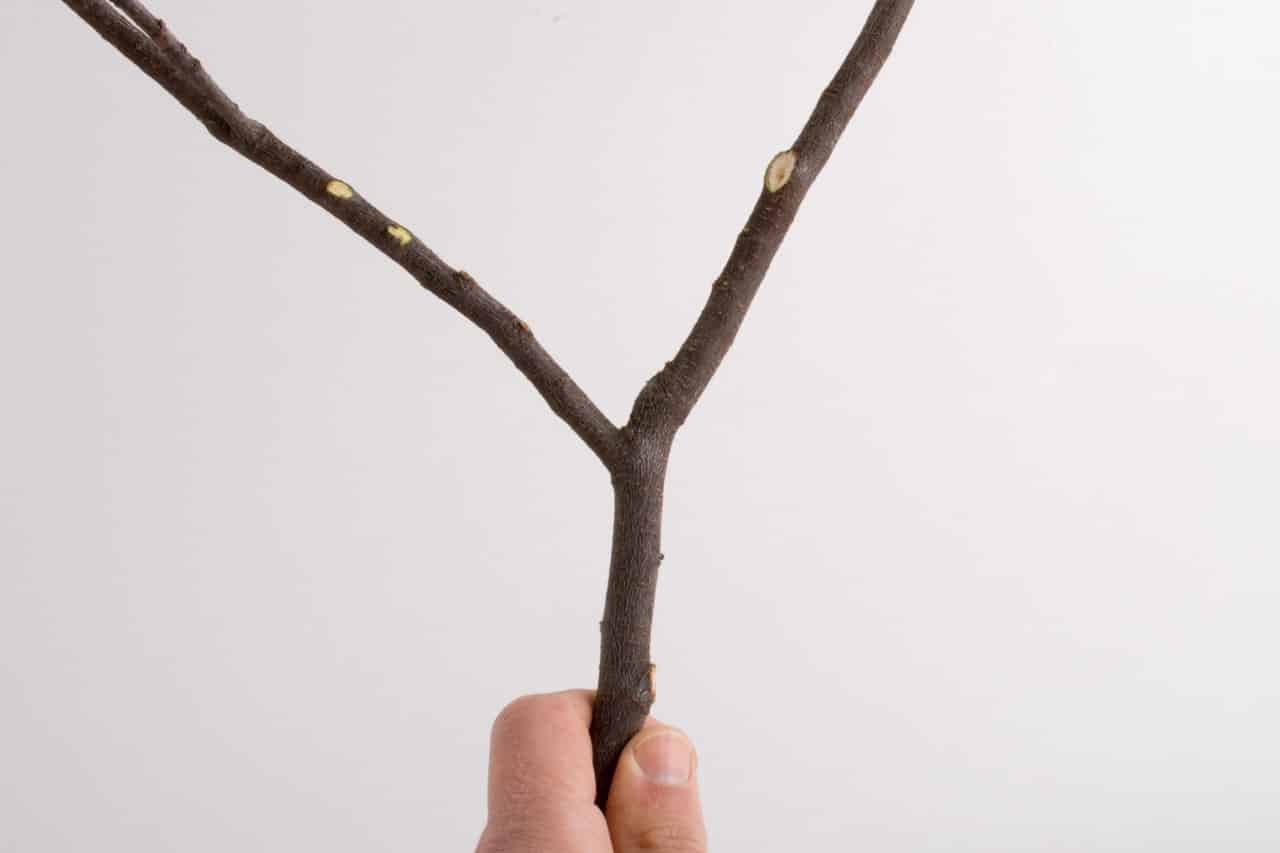
Y-shaped branch intersection
Here a basic principle of wiring bonsai will come in handy: in general, aim to connect two branches of similar size with a single wire.
I can add to that a second basic principle: when connecting two branches with one wire, start wiring where the branches meet.
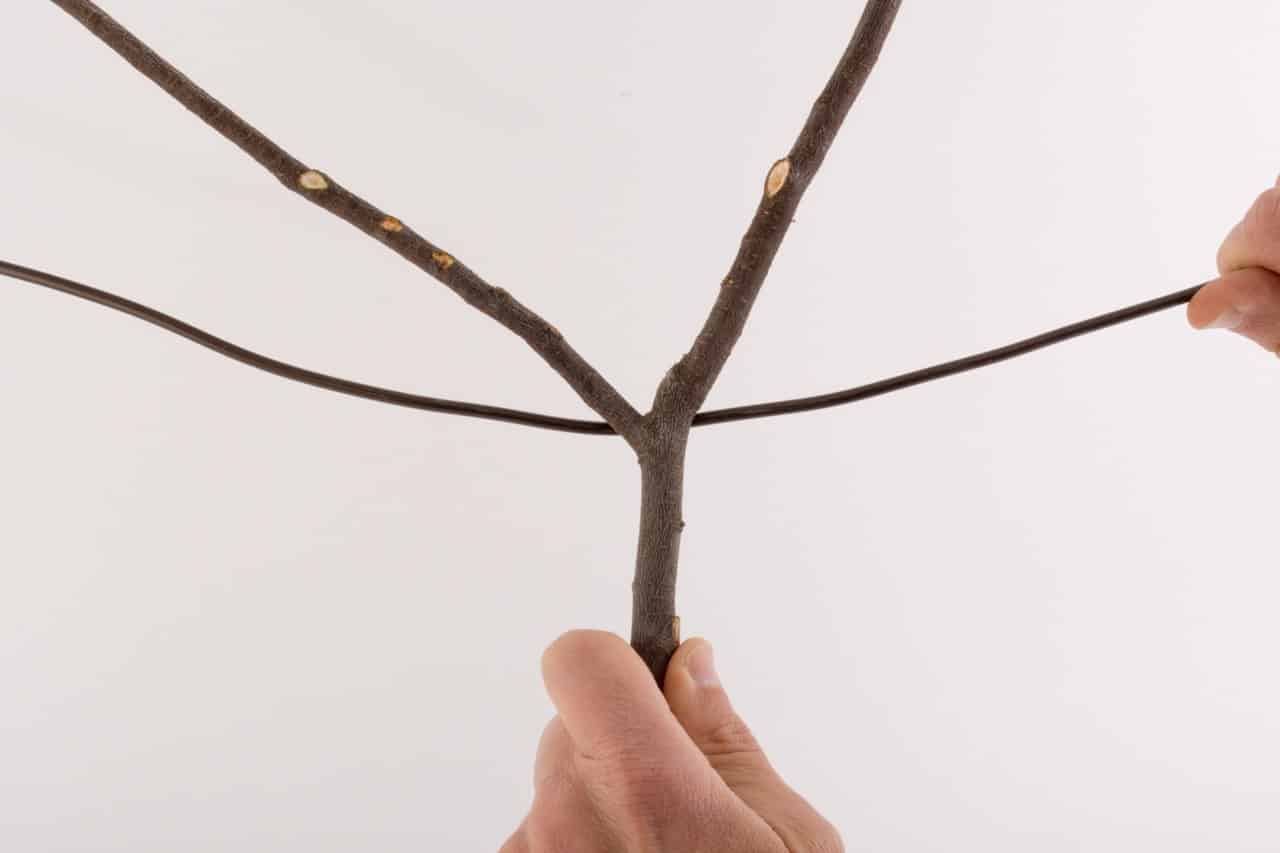
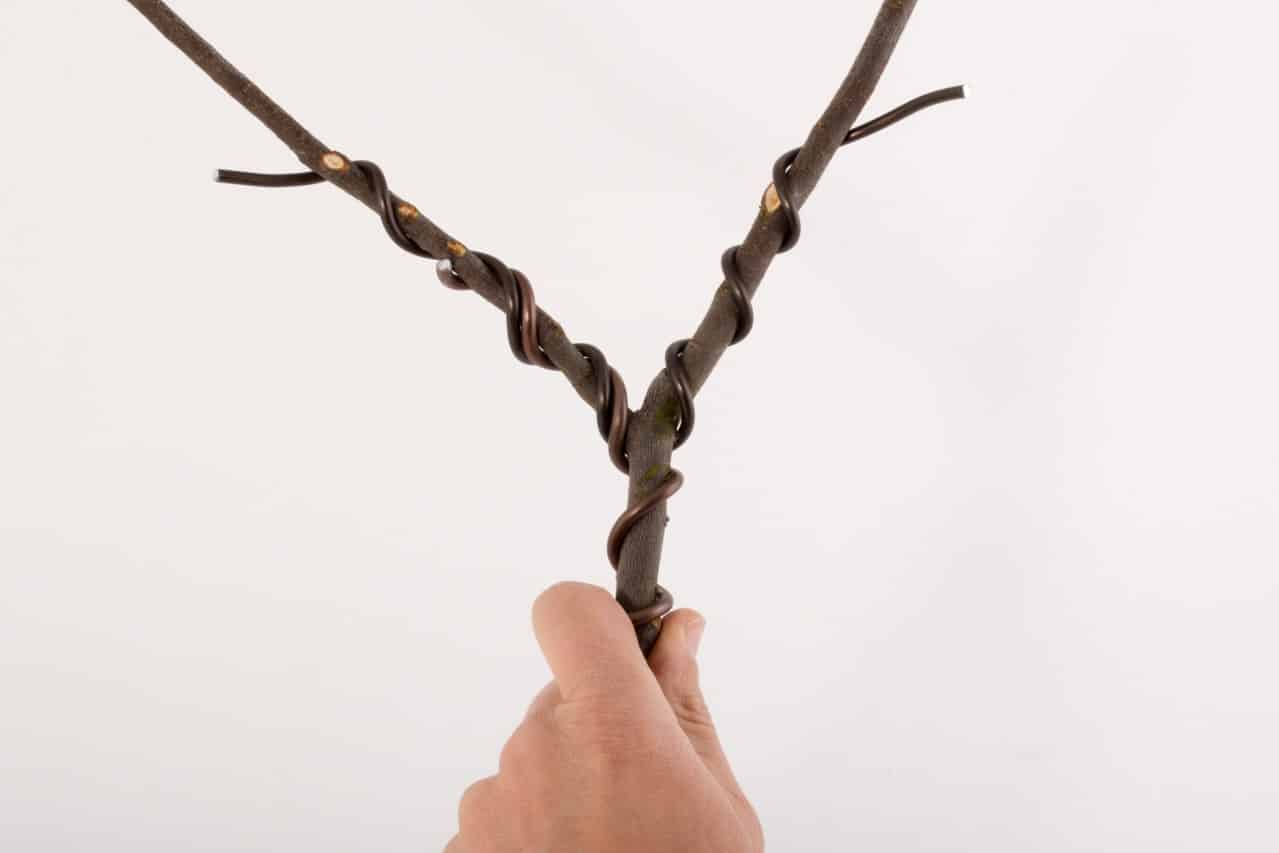
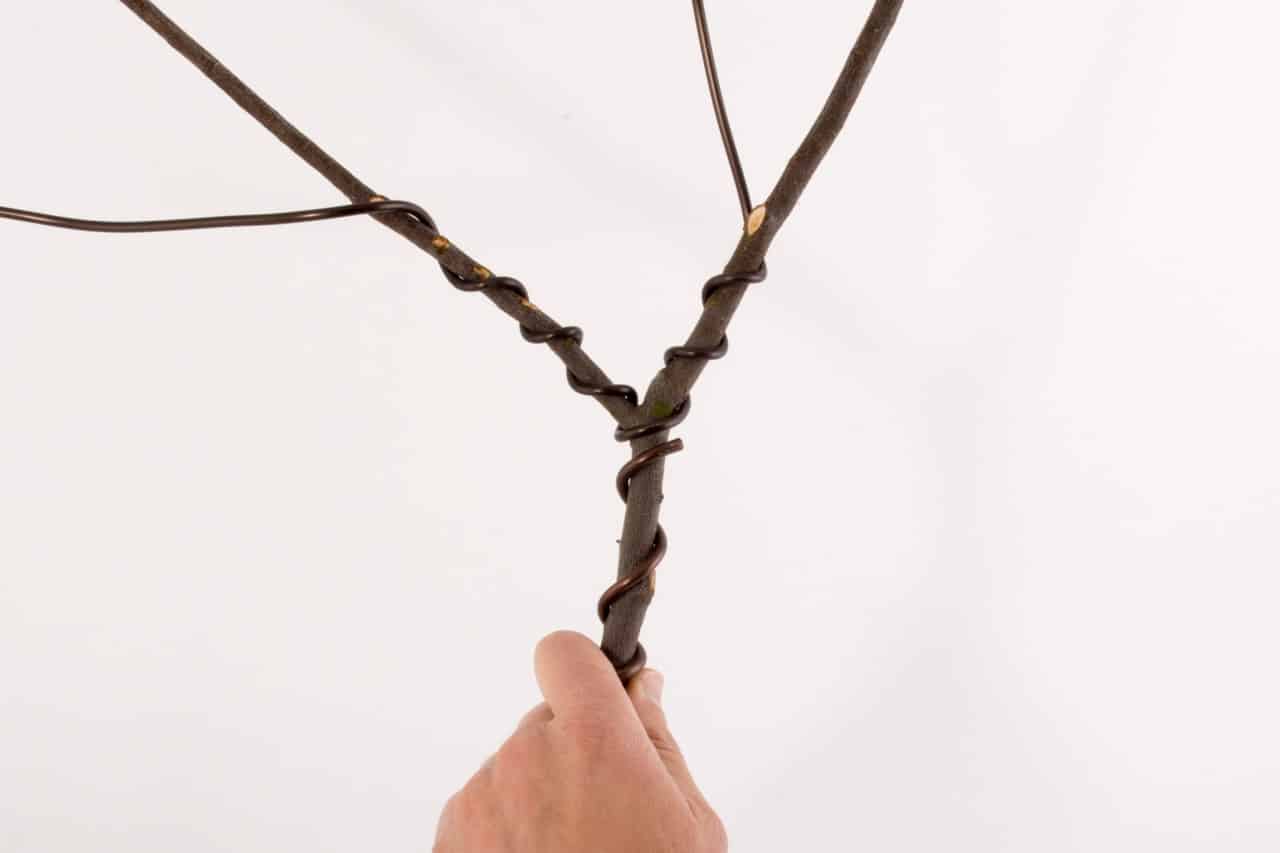
There are several ways to go about this, and good reasons why one may choose one approach over another. For today, I’d like to start with the most simple approach. When connecting two branches at a Y-shaped intersection with a single wire, there are two great starting points. You can begin by placing the wire on top of the Y and adding spirals from there, or you can place the wire below the Y and wiring outwards from there. Both approaches are acceptable.
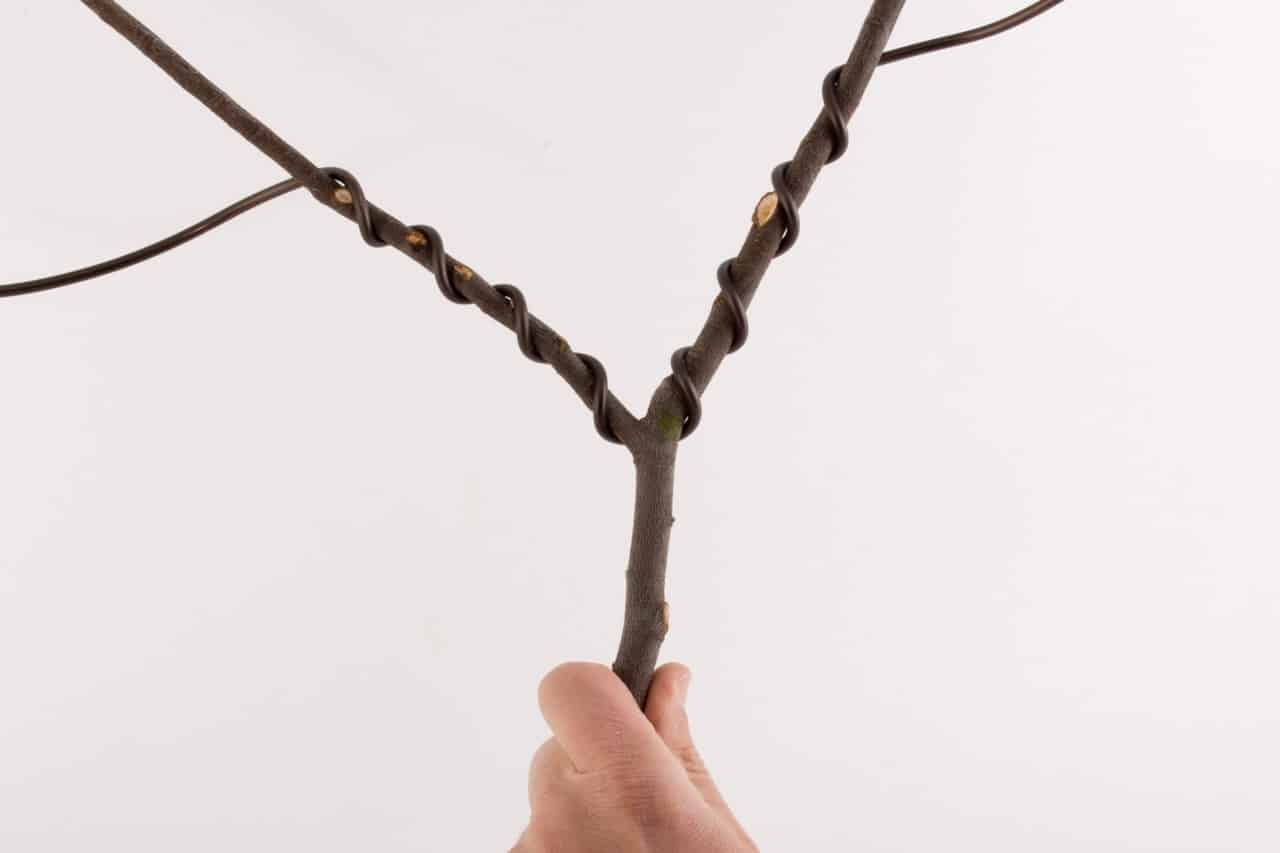
Here’s what this looks like when starting with the wire on top of the Y.
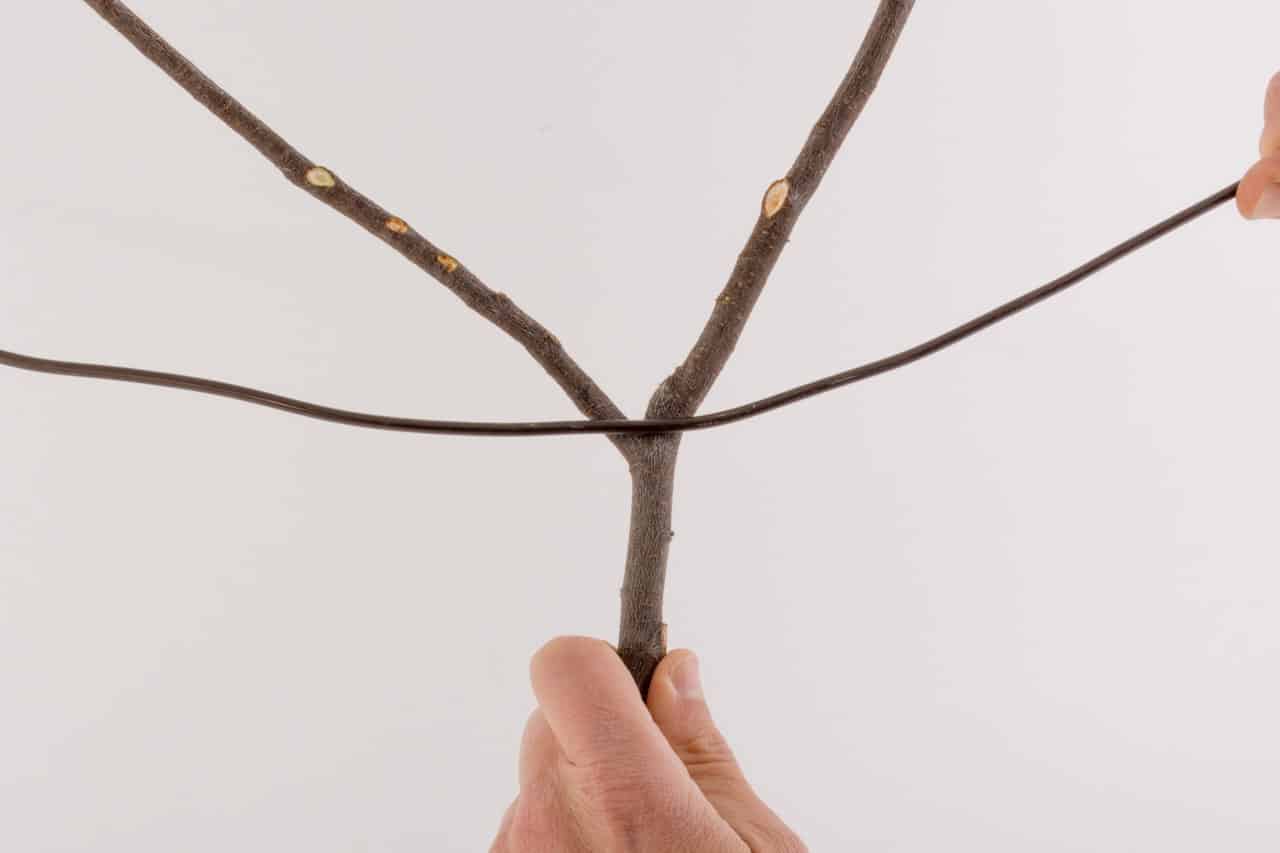
Placing the wire on top of the Y

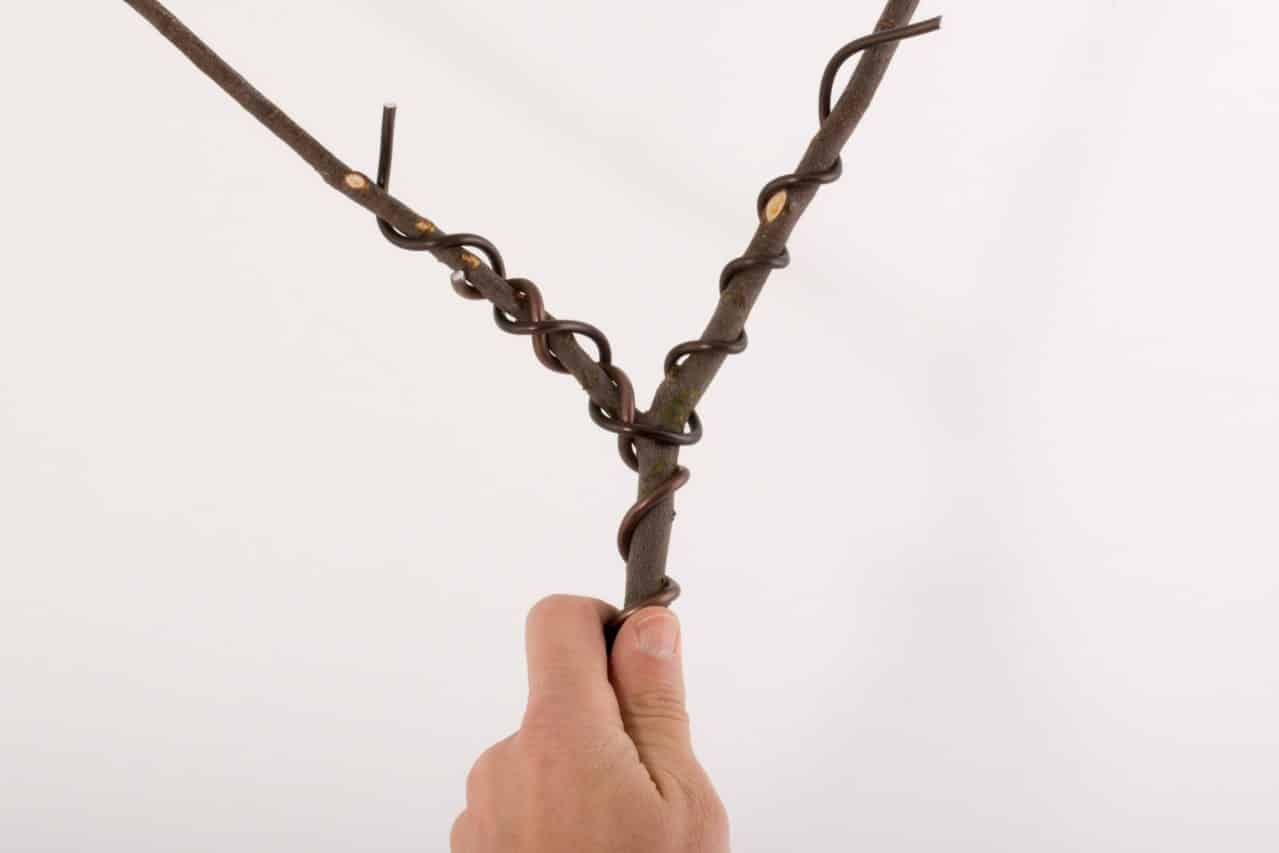
Wired branches
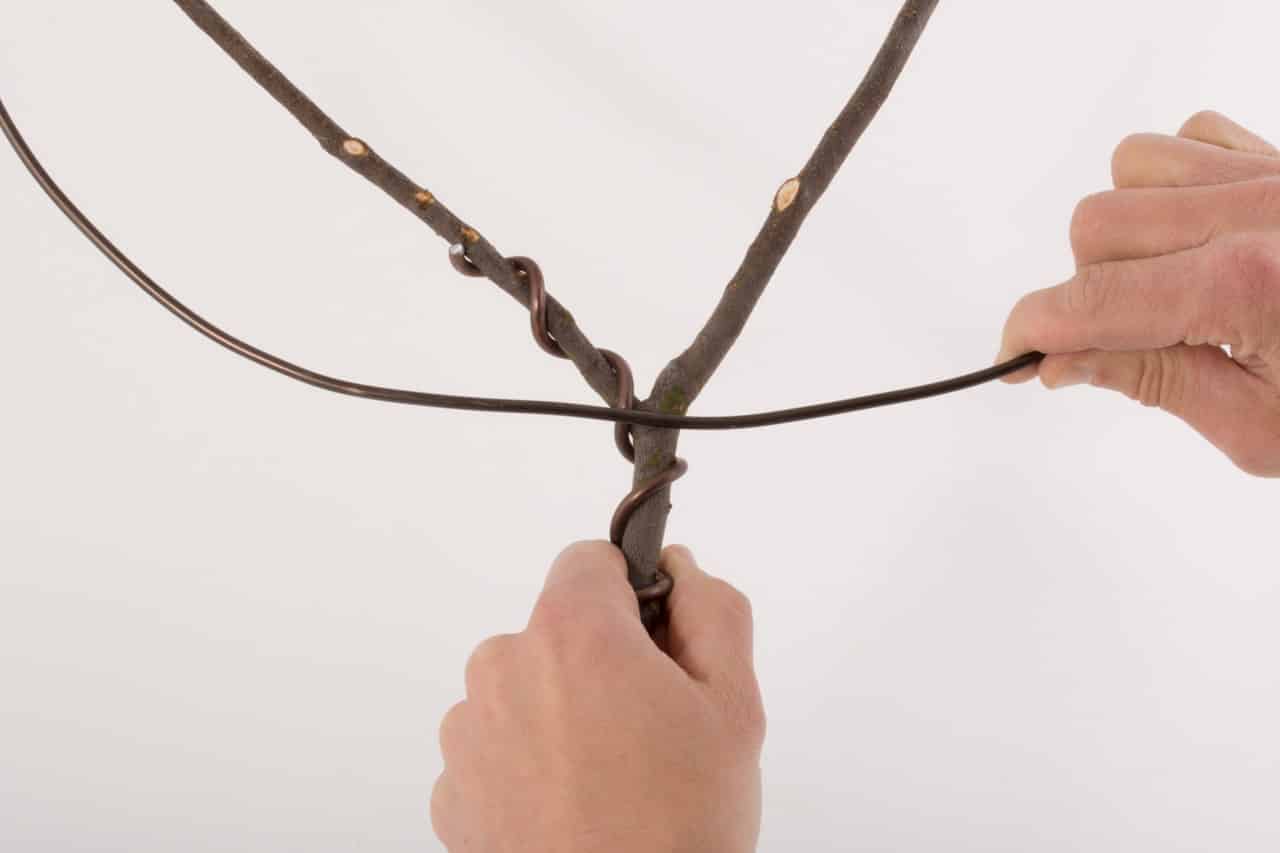
And here’s what the process looks like when starting with the wire below the Y.
Placing the wire below the Y
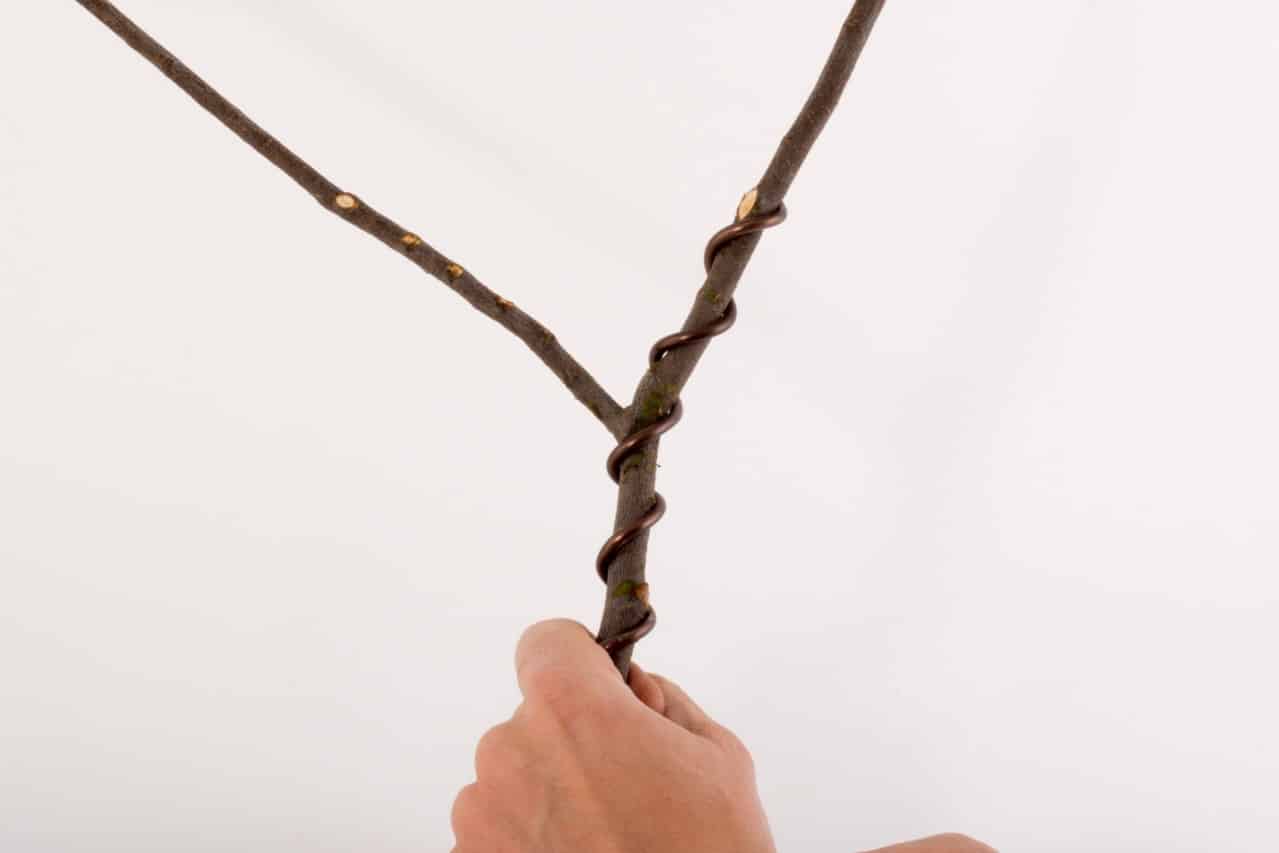
Wired branches – the starting point is below the Y
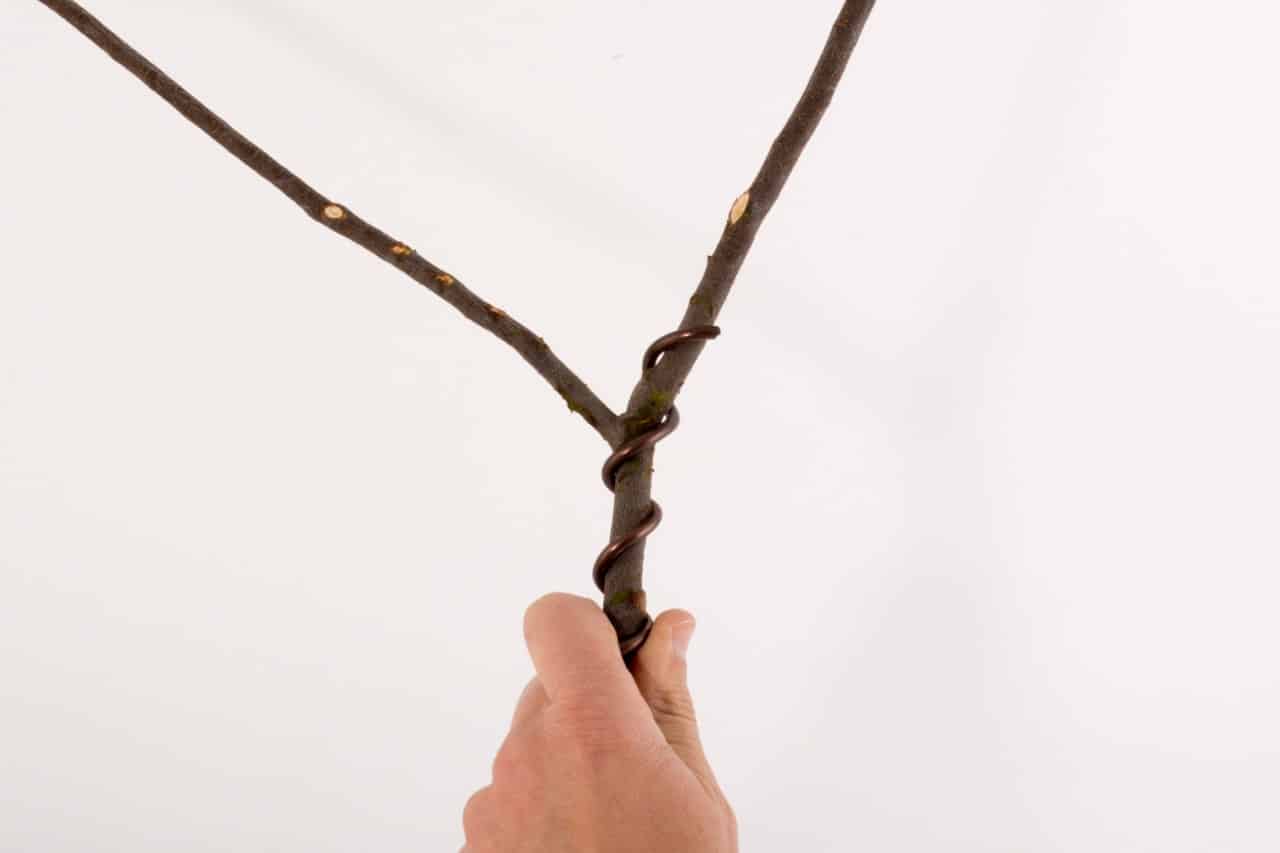
Before going any further, take note of the shape of the wire that connects the two branches. Although it’s rare that wiring puzzles can be solved so simply, this pattern will come into play a lot.
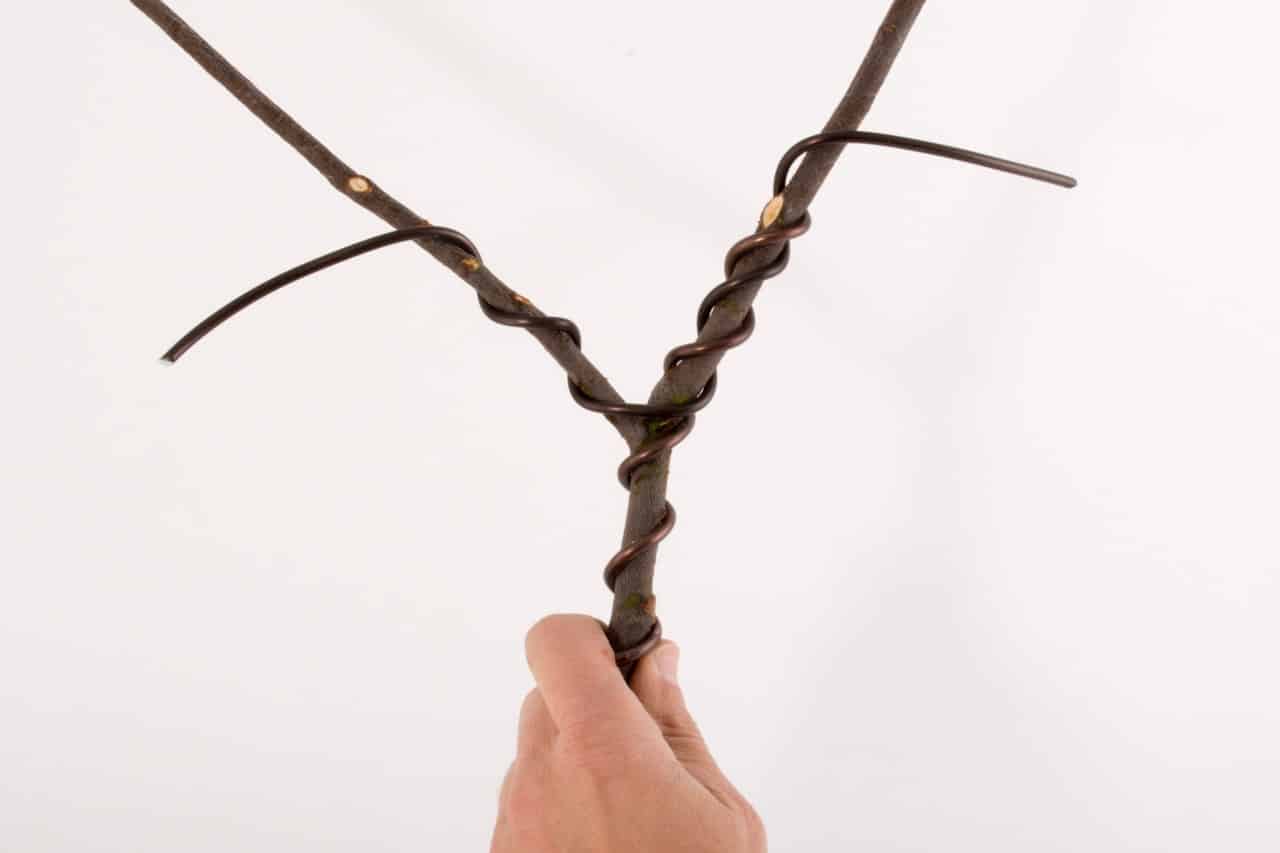
What’s missing is an anchor wire.
When we wire two branches of equal size, we often find that bending one wire causes both branches to move. When a wire is properly anchored, we can bend each branch independently.
I’ll say more about anchoring in the next post, but for now I’ll introduce the most simple method for anchoring the wires that connect a Y-shaped branch intersection.
How to anchor the wire connecting branches in a Y-shaped intersection
When we’re wiring a branch that splits into two, we have three basic options for navigating the intersection. We start with the wire on the right side of the Y, in the middle of the Y, or on the left side of the Y. Here’s what this looks like.
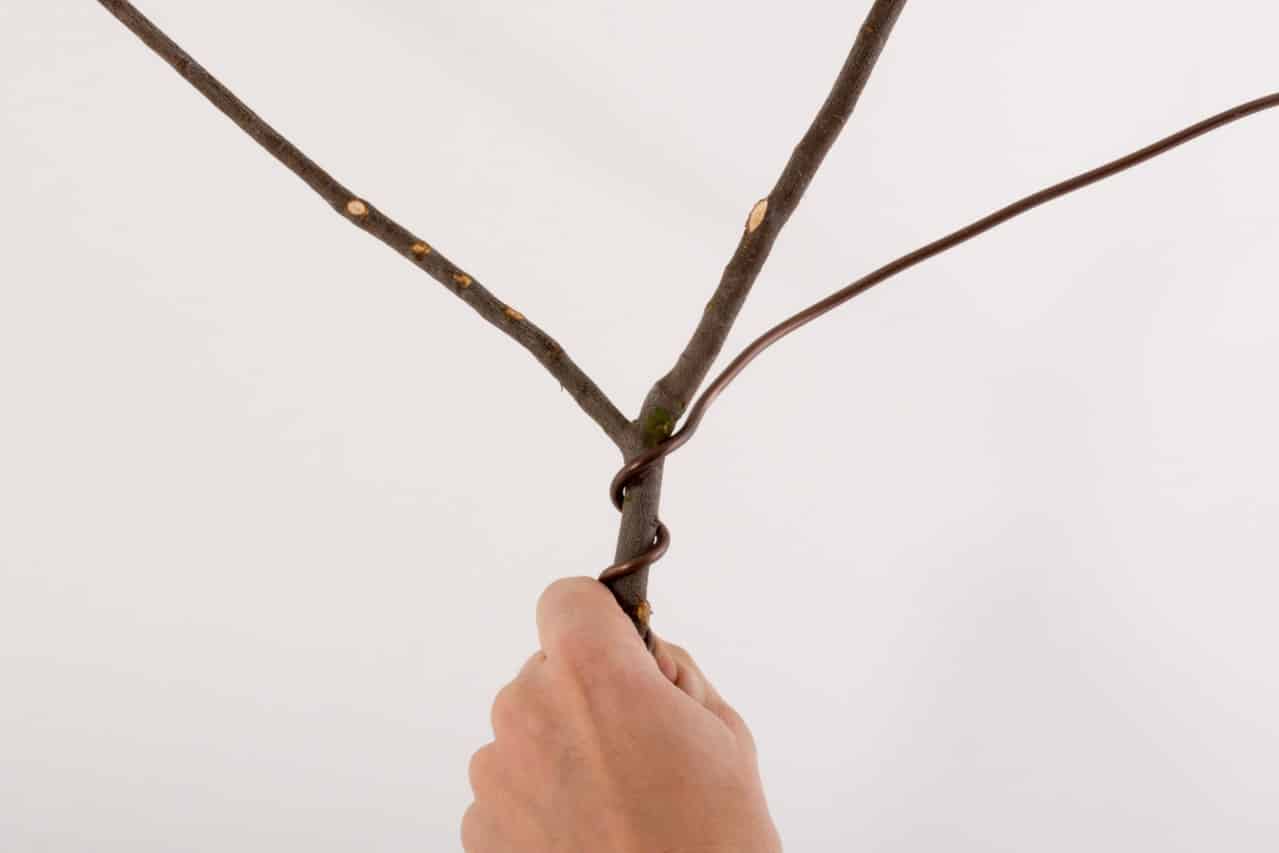
Wire on the right side of the Y

Wire in the middle of the Y
Wire on the left side of the Y
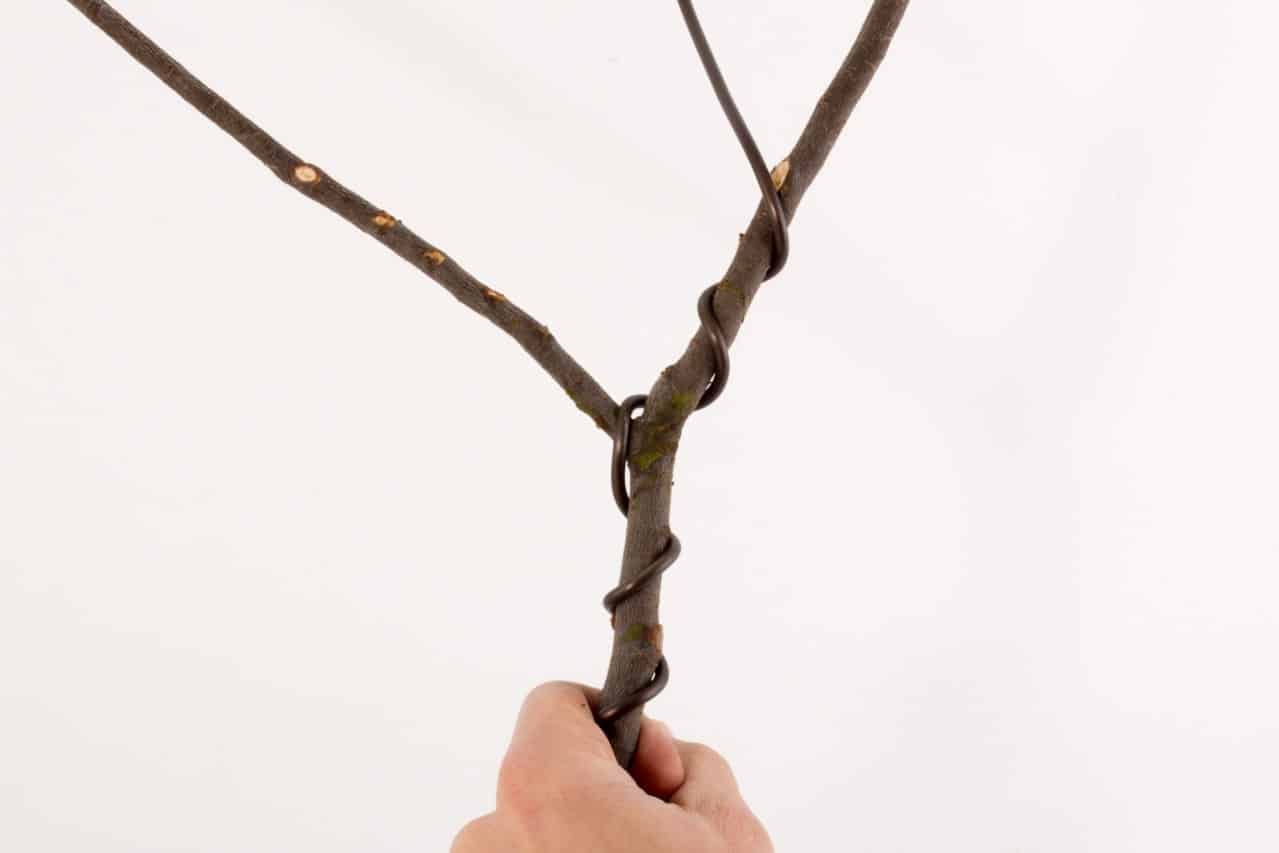
Let’s see what happens when the anchor wire starts out to the left.
Anchor wire on the left hand branch
Note that the anchor wire continues for two spirals after the branch division. In general, anchor wires should continue for 1 1/2 to 2 spirals after a branch intersection to be effective.
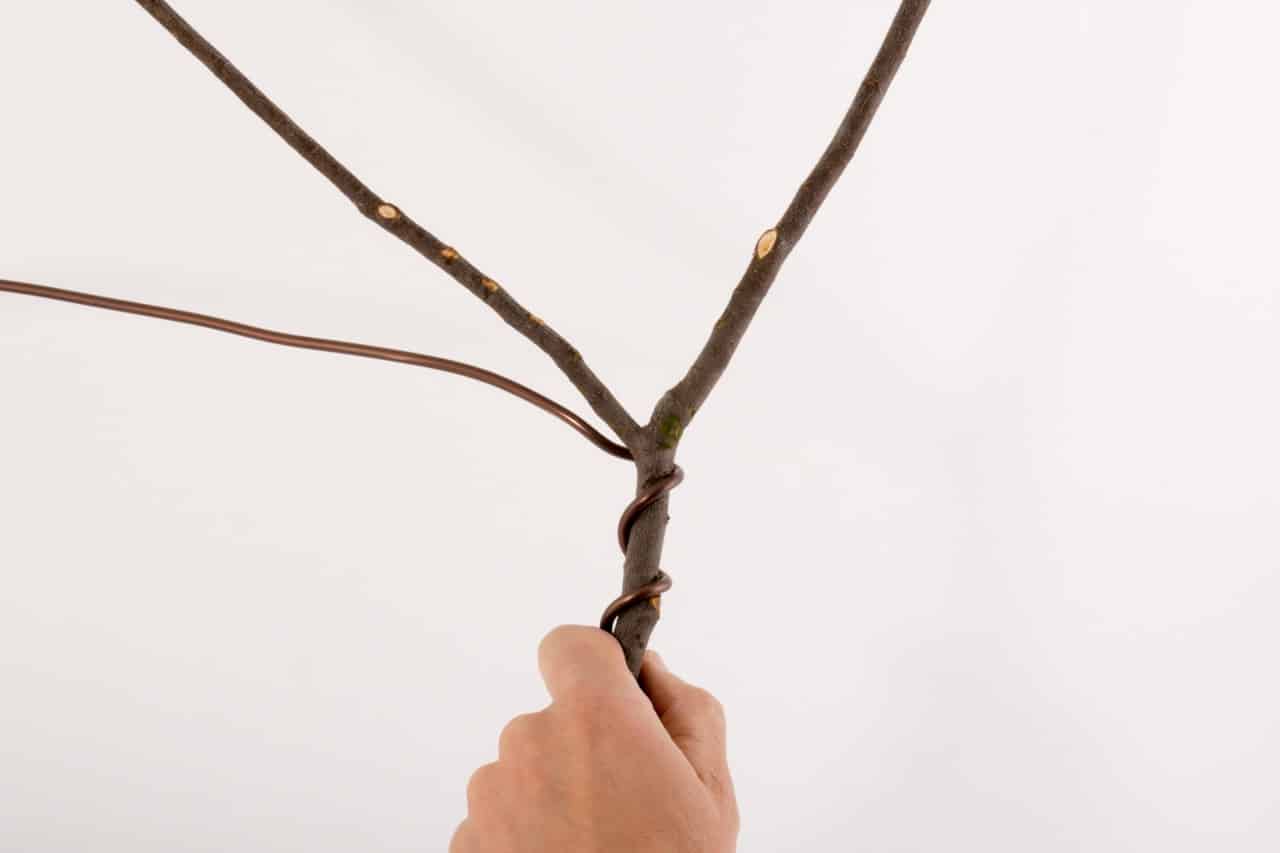
With the anchor wire in place, we can now add the wire that will connect the two branches.
As above, there are potentially two good starting points – one with the wire above the Y and one with the wire below the Y. Only one of these two options will work, however, because we want the wire to line up well with the anchor wire. It’s easy to tell which option is best by setting the wire in place and seeing how the wires line up. Let’s try starting with the wire below the Y.
Starting with the wire below the Y
Wire in place
In this case, starting with the wire below the Y was the correct option as the wires fit together well.
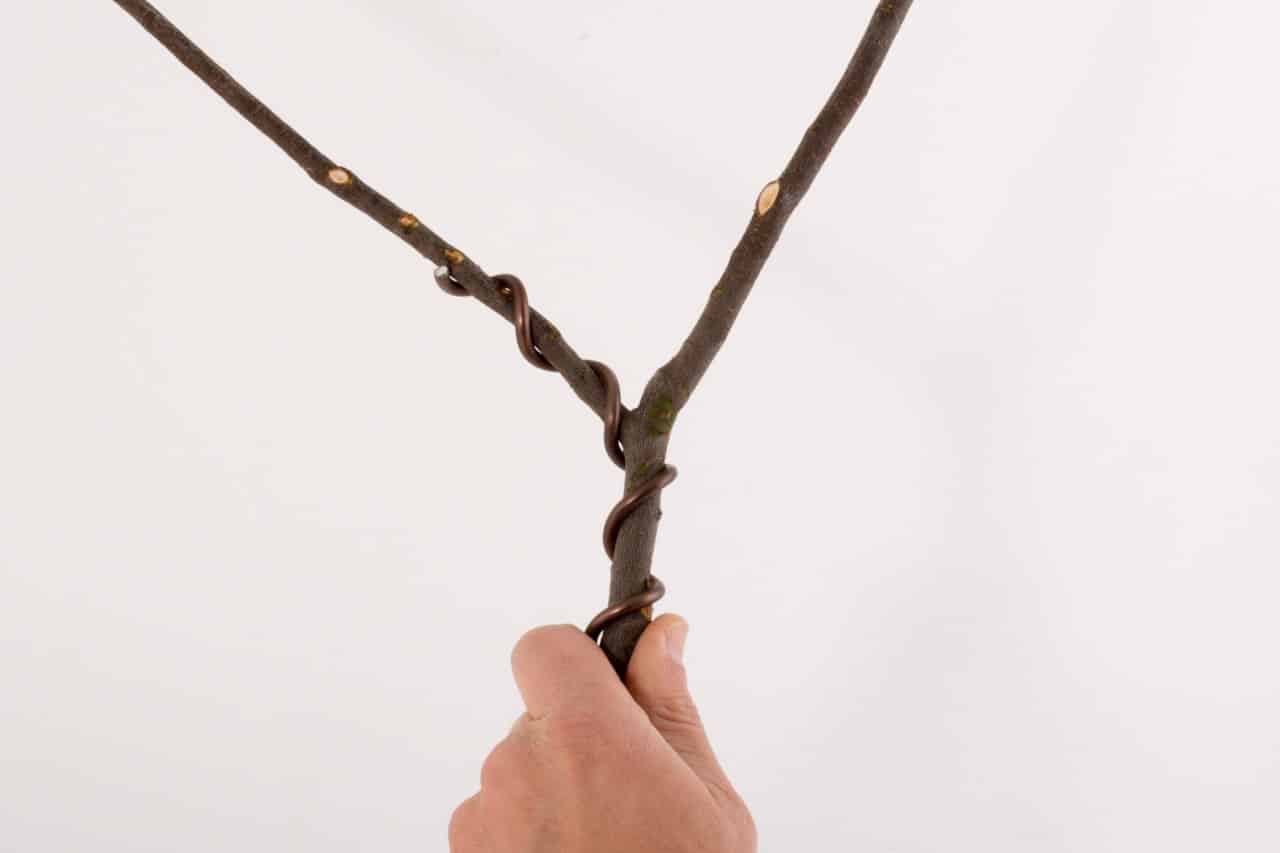
Let’s see what would happen if we start with the wire on top of the Y.
Starting with the wire above the Y
Incorrectly wired branch intersection
As is clear from the above photo, starting with the wire above the Y was not the right option in this case. Why? Crossing wires are not as effective as wires that don’t cross, and crossing wires are more likely to cut into the branch more quickly. Crossing wires also look awful. For all of these reasons, we can state another basic wiring principle: in general, avoid crossing wires.
So we wired a branch up to, and slightly beyond, a branch intersection, and then applied a second wire that neatly connected two branches. Is there any room for improvement? Yes.
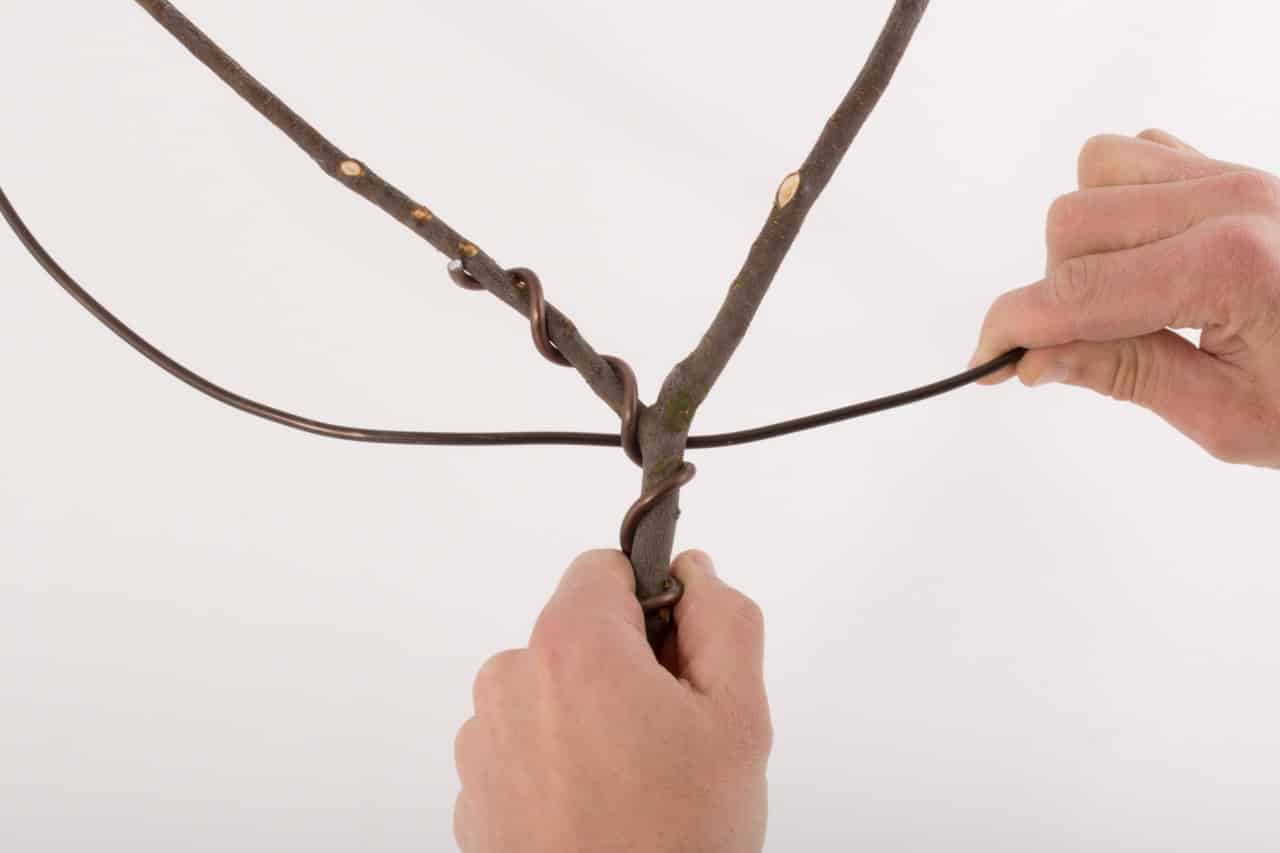
When selecting which branch gets the anchor wire, it’s best to select the thicker of the two. In many cases both branches will be the same size, but in this case, the branch on the right is more substantial. Here’s what the branch looks like with the anchor wire on the right-hand branch.
Anchor wire on the right-hand branch
Now we can again hold the next wire in place to determine if we should begin on top of the Y or below the Y.

Holding the wire above the Y
When the anchor wire is on the right in this example, the best starting point is with the wire above the Y.

Wired branch
The same branch seen from below
Common mistakes
There are a few common mistakes when it comes to wiring branches that split into a Y. One of the most common is to leave the anchor wire too short. If the anchor wire stops before the branch division, it can do nothing to anchor the second wire in place.

Anchor wire stops short of the branch intersection
The result of leaving the anchor wire short – the anchor wire does nothing to hold the smaller branches in place
The result is the same when the anchor wire passes the intersection but doesn’t continue for a full 1 1/2 to 2 spirals.
Anchor wire is too short to support subsequent wires
Continuing the anchor wire for more than 2 spirals will certainly anchor smaller wires, but it wastes wire and is unsightly.
Another common problem occurs when both wires spiral in the correct direction but there is a gap between the wires.
Gap between the wires
Although the smaller wire may be well-secured, the wiring is unsightly and it may lead to complications if additional wires need to pass through this intersection.
A final error occurs when the spirals change direction at the branch intersection.
Wire changes direction at the branch intersection
Many people who are new to wiring don’t notice when this happens until they try to connect the two smaller branches and find the above approaches don’t work. Unless you have a good reason for doing so, remove any wires that follow this pattern and try to keep the spirals in the same direction through branch intersections.
Learning to navigate Y intersections is a great technique for beginning bonsai enthusiasts to master. Once the basic approach is well understood, it’s relatively easy to learn how to navigate more complicated intersections or understand related techniques like selecting the most effective direction for the spirals.
Up next, Part 9: Tips for anchoring your wire
Subscribe to Bonsai Tonight
New Posts Delivered Every Tuesday and Friday
Paul says
Thank you for the guide Jonas. There are very few actual videos of how to wire correctly online (Colin Lewis did one I think). It might be a resource for the future but I’m not sure if I’ve seen a video how to on Bonsai Tonight???
Bonsai wanna-be says
Love anything I can find on wiring! Boon has an online tutorial you can purchase and/or rent. I found it very helpful as well but this post has helped answer a specific question I had so thank you! Jonas…another question i have is about placing the wire OVER or UNDER the branch where it intersects with the truck. I have always thought that it was important to position the wire according to how you want to bend the branch but now i am thinking it is more a matter of how to make the wiring as neat as possible. If you are in the mood can you help clarify the over/under question? Hope this all makes sense and thanks always for your wonderful blog!
Jonas Dupuich says
Great wiring question. I typically start the wire under the branch where it intersects with the trunk. If I’m bending downward, the first half-spiral follows fairly close to the trunk before spiraling out from there.
I know this may not be clear without images so I’ll make a note to cover this at a future point. Thanks for asking!