Decandling time is a good opportunity to balance vigor between sacrifice branches and the rest of the tree. This is especially true for pines nearing the end of the development phase.
Last year I let the sacrifice branches grow on several pines while decandling the lower branches. As a result, the sacrifice branches became overly strong while the branches I cared about grew weak. My goal this year is to reverse this situation and strengthen the lower part of the tree while reducing the vigor of the sacrifice branches.
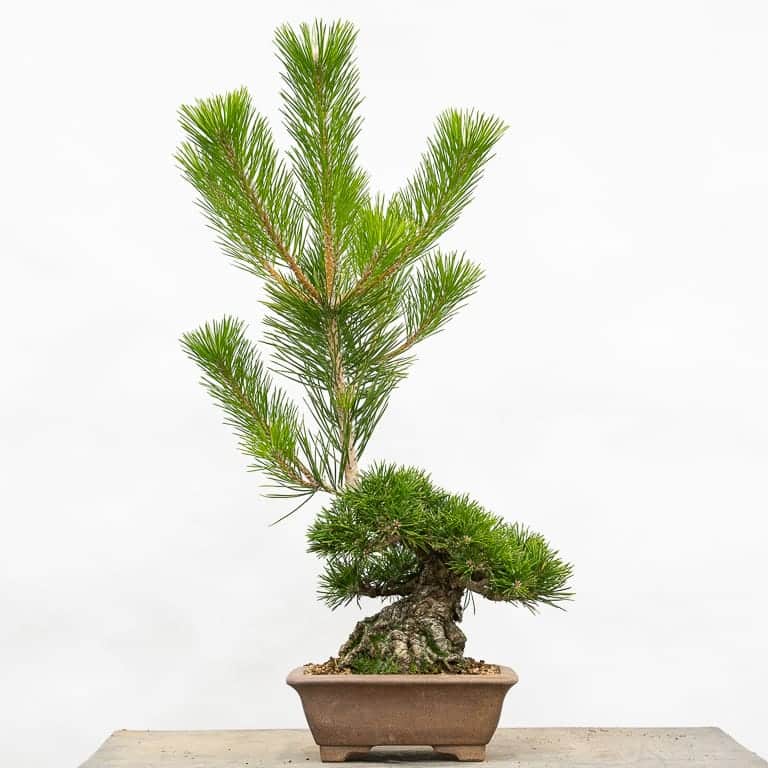
Here’s an example of a tree with a sacrifice branch that’s ready for decandling.

Black pine – 15 – 1/2 years old from seed
And here’s the tree after decandling the lower branches.

After decandling the lower part of the tree
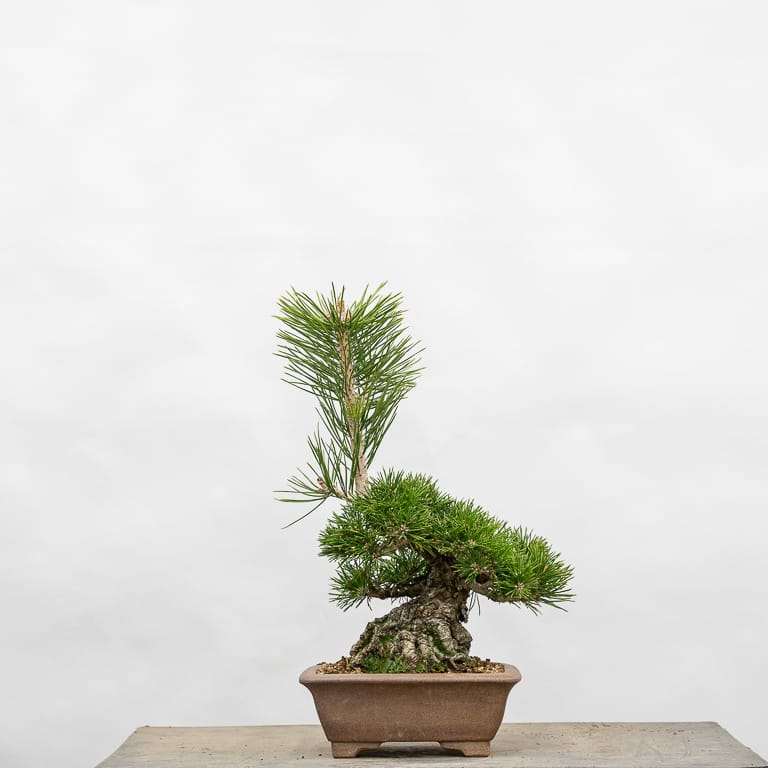
This is about what the tree looked like after decandling last year. The top branches were long and the bottom branches were short. To keep the sacrifice branch in check, I decandled it too.

After decandling the sacrifice branch
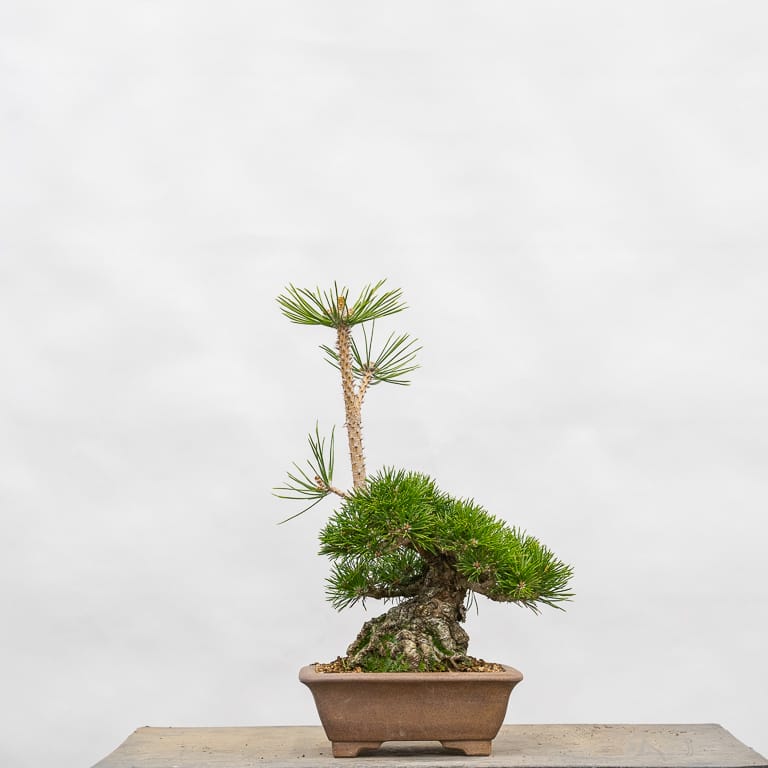
I then plucked some needles on the sacrifice branch to further slow it down.

After thinning needles on the sacrifice branch
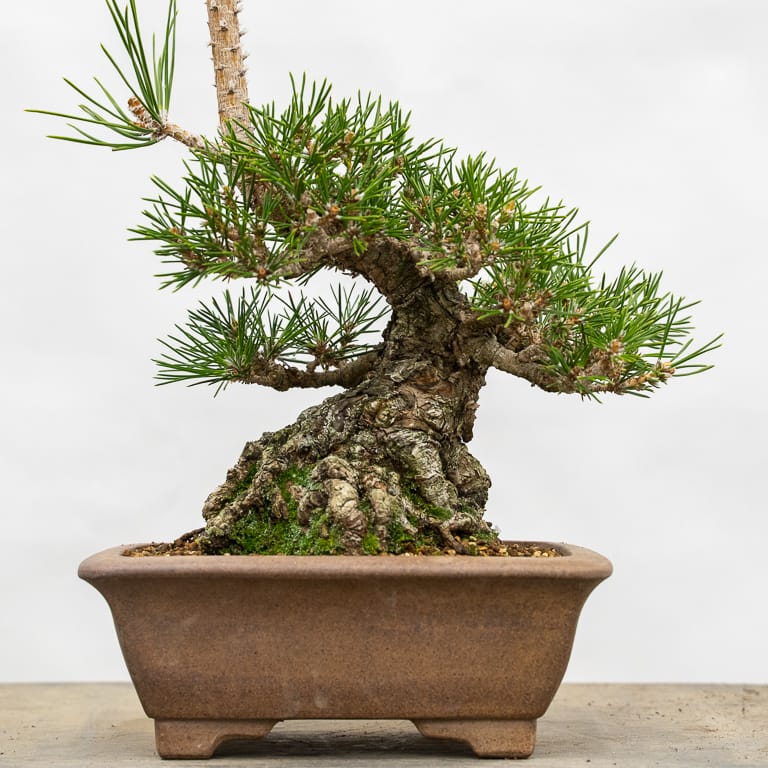
Stopping here would be a good way to encourage the lower branches to grow strong while slowing down the sacrifice branch, but because the lower branches were so dense, I thinned some needles so I could make sure every branch received adequate light.

After thinning needles on the lower part of the tree – 7″ tall
I’d thought about completely removing the sacrifice branch but wanted to leave it to prevent the rest of the tree to grow too strong. By slowing the branch down before removing it, I can reduce the odds that the tree will produce vigorous shoots after I make the cut.
In the next two posts, I’ll provide additional examples of how to balance the vigor between the top and the bottom of similar pines with sacrifice branches.
Subscribe to Bonsai Tonight
New Posts Delivered Every Tuesday and Friday
Michal Mokry says
Thanks for sharing all the knowledge! Was this tree grown all the time in a pot or was there also a period when it was in full ground? By chance do you have early photos from this tree? I would like to see the trick of having such an excellent taper and nebari. 😉
Jonas Dupuich says
Thanks Michal! This tree was completely container grown. I plan to post some earlier photos if I can find them. The secret, however, is establishing good roots before letting the sacrifice branches grow too big. Hope this helps!
Jonas Dupuich says
Hi Michal – here are some photos from 2015 (it’s the second tree in the post): https://bonsaitonight.com/2015/07/31/redirecting-growth-on-pines/
Michal Mokry says
Thanks! This is excellent! Could you maybe share one more trick? When you first time wire the seedling. How long do you keep the wire ? Have you also tried to let it grow in and let it stay there forever to thicken the trunk (and have the curls…)?
Jonas Dupuich says
Hi Michal – how long to keep the wire is the same in most cases: until the wire starts cutting in or until the bend sets. Typically, I keep the initial wire in place for 3-12 months on young pines.
I haven’t tried the technique of leaving the wire in place permanently, nor have I tried the approach of letting it cut in a lot to speed up thickening. I’ve thought about trying the latter approach but haven’t because it’s hard to get the swelling to occur where you want it (in most cases I’ve seen, the swelling starts up too high) and even if it is in the right place, the bark forms differently as a result.
Peter Grisdale says
Tree looks great, did you graft those lower branches ?
Loving all these posts you do have learnt sooo much.
Jonas Dupuich says
Thanks Peter! No grafts on this tree – the lower branches were created from small branches that were already there.
scott chadd says
great information, how long have you been working with these small pines? thanks, see you at REBS
Jonas Dupuich says
Thanks Scott! The tree is just over 15 years old. The first pines I started from seed are ten years older than that!
Andy Johnson says
Thanks as ever for the posts Jonas. I have them all bookmarked and regularly go backwards and reread them.
I’m confused by this control of the sacrifice. I thought we developed sacrifice branches and let them go in order for them to grow big and develop / thicken the trunk? I am not sure why you need to cut the sacrifice back, unless you plan on removing it?
Also, in the first picture, I notice on the sacrifice you have left all of the smaller side branches on the main branch. I thought we had to remove these and just leave one candle so that it would grow away and all energy would go in to this one candle?
Thanks again Jonas,
Andy
Jonas Dupuich says
Hi Andy – thanks for the questions! The short answer is yes, I plan to remove the sacrifice branch and am slowing it down before I make the final cut.
As for the shape of the sacrifice branch – one shoot vs. one shoot with lateral branches – there are any options for how much foliage to keep. In some cases I’ll leave a single shoot and on others I let the sacrifice development into fairly large branches with lots of side branches. The latter approach is the one I use most often.
Charlie Mosse says
This is one of the better explanations of energy balancing nuances for JBP’s. Learned a a few more things the way this was presented. Thanks!!!
Jonas Dupuich says
Thank you Charlie!