• Skip to main content
  • Skip to footer

Bonsai Tonight

An educational website about bonsai development

  • Blog
    • How-to Guides
  • Podcast
  • Shop
    • Bonsai
    • Books
    • Soil
    • Soil (wholesale)
    • Supplies
    • Tools
    • Video Consulting
    • Northern California Bonsai Resources
  • About
    • Workshops

Decandling before and after – red pine forest

July 22, 2011 by Jonas Dupuich

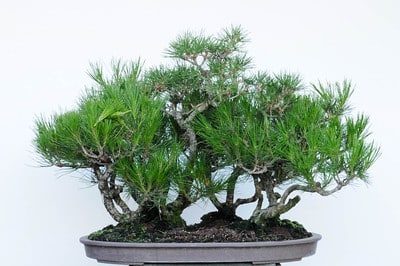
Decandling is a great technique for improving ramification or for maintaining it. What little ramification my red pine forest has can be attributed to a few years of decandling. I don’t currently have any plans to further develop the trunks in this forest, so the branches are getting all of my attention. Here is the group planting before decandling.

Red pine forest - before decandling

Red pine forest – June, 2011

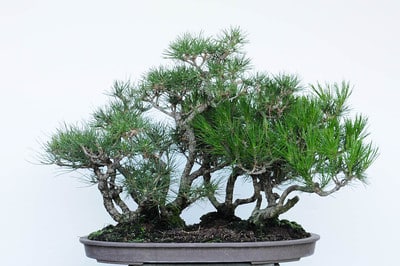
1/3 done

Top 1/3 decandled

2/3 done

2/3 decandled

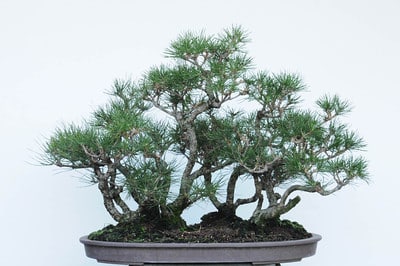
Decandling complete

Completely decandled

In addition to removing the spring shoots, I removed some extra vigorous branches to better balance the tree. The shoot below is quite vigorous – more than I want for this bonsai.
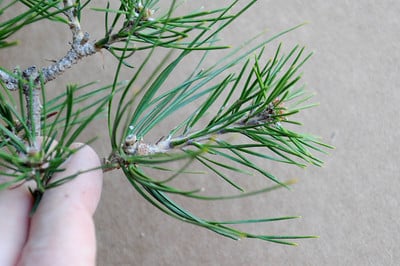
Branch with great vigor - it is out of balance with the other branches

Vigorous branch

The branches below are better suited for development into branch pads.
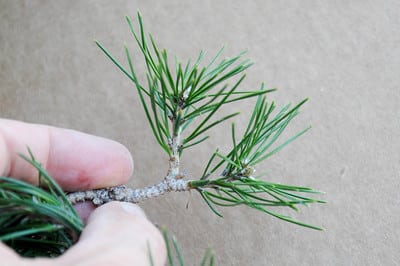
Appropriate vigor

Desirable growth

Where extra-vigorous shoots were crowding out more refined growth, I removed the vigorous shoots.
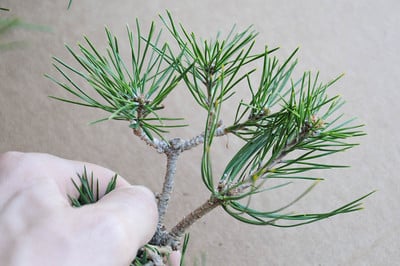
What to do with an extra-vigorous shoot?

One of these shoots is not like the others
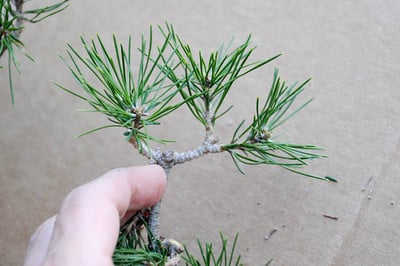
Vigorous shoot removed

Extra-vigorous shoot removed

As I worked, I found a few anomalous shoots like those below. They weren’t spring shoots, but they weren’t exactly summer shoots either. Where did they come from?
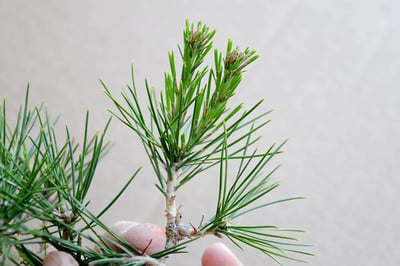
Accelerated growth

Mystery shoots

About two months ago, I thinned these trees and shortened some of the candles – see “Thinning a red pine forest” for details. On one or two occasions, I accidentally broke the candles before they had time to develop. It was as if I “de-candled” these branches on the early side. The result of these mistakes are the strong shoots you see pictured above. As these shoots would continue to develop ahead of the properly decandled branches, I removed them to maintain balance.
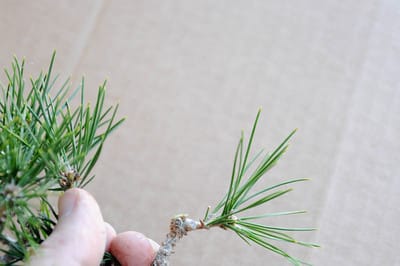
Strong shoot removed

Mystery shoots removed

After removing all extra-vigorous shoots and plucking needles from some of the more dense areas, I wrapped up my work for this season.
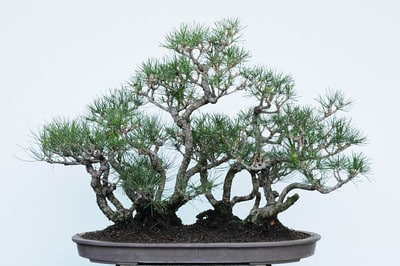
Decandling and needle pulling complete

Decandling complete

This forest is another good candidate for wiring this fall. Once the branches are in place, I plan to repot the group in a slightly smaller pot.

✕

Subscribe to Bonsai Tonight

New Posts Delivered Every Tuesday and Friday

Success! Now check your email to confirm your subscription.

There was an error submitting your subscription. Please try again.

We won't send you spam. Unsubscribe at any time. Powered by ConvertKit

Filed Under: Bonsai Development Tagged With: Decandling, forest, Red Pine

Previous Post: « Decandling Japanese black pine
Next Post: Summer at the Lake Merritt Bonsai Garden »

Reader Interactions

Comments

  1. gaycarboys says

    July 22, 2011 at 8:55 am

    I like this group very much. I was at the nursery today for a pot but bought another tree. If I sent you a few pics would you share some ideas for development? It’s advanced nursery stock but I can’t stand plastic pot so I’ll over-pot it and feed it this summer, do a prune now and some 1st season wiring. Would you be happy to share you thoughts?

    • xwires says

      July 22, 2011 at 9:15 am

      Sure thing – feel free to send pics and I’ll see if I have any suggestions.

  2. gaycarboys says

    July 22, 2011 at 8:55 am

    Oh BTW it’s a Black Pine

  3. John Kirby says

    July 22, 2011 at 10:00 am

    I am not sure if folks realize how big this nifty cluster of trees is! I really like this grouping, it is really fun and interesting to see. John

  4. Bruce says

    July 22, 2011 at 10:28 am

    So, how big is it?

    • xwires says

      July 22, 2011 at 10:39 am

      The red pine grove is about 18″ tall and 28″ wide.

  5. Andrew Kasper says

    July 22, 2011 at 3:08 pm

    It does not look that big. I really like it.

  6. gaycarboys says

    July 22, 2011 at 9:19 pm

    i’ll take a few pics thisafternoon. Should I email?

  7. Christopher says

    July 24, 2011 at 11:11 pm

    I too quite like this planting. Very interesting curves. And I too didn’t think it was that big. Nice job!

Footer

Follow Bonsai Tonight

Subscribe

Instagram ● Facebook ● Twitter
  • Blog
  • Podcast
  • Shop
  • About

P.O. Box 6560, Alameda, CA 94501 · 510-915-2025 · jonas (at) bonsaitonight (dot) com

© Copyright 2009-2023 Bonsai Tonight · All rights reserved · Privacy · Log in

This website uses cookies to improve your experience. You can opt-out if you wish. Accept Decline Read More
Privacy & Cookies Policy

Privacy Overview

This website uses cookies to improve your experience while you navigate through the website. Out of these, the cookies that are categorized as necessary are stored on your browser as they are essential for the working of basic functionalities of the website. We also use third-party cookies that help us analyze and understand how you use this website. These cookies will be stored in your browser only with your consent. You also have the option to opt-out of these cookies. But opting out of some of these cookies may affect your browsing experience.
Necessary
Always Enabled
Necessary cookies are absolutely essential for the website to function properly. This category only includes cookies that ensures basic functionalities and security features of the website. These cookies do not store any personal information.
Non-necessary
Any cookies that may not be particularly necessary for the website to function and is used specifically to collect user personal data via analytics, ads, other embedded contents are termed as non-necessary cookies. It is mandatory to procure user consent prior to running these cookies on your website.
SAVE & ACCEPT