If you’ve been working with bonsai for several years, you may have an idea of what needs to happen when. If you’re new to bonsai, or to a given species, it can be helpful to create a calendar to keep track of annual maintenance tasks.
Here’s a guide to help you develop your own bonsai calendar. I’ve focused on maintenance tasks and techniques for black and red pine bonsai as an example.
To customize the calendar for your garden, adjust the dates to line up with conditions where you live. You can create similar calendars for other species by listing the techniques that apply to the species and identifying the conditions that indicate the best time to do the work.
Bonsai Calendar for Black and Red Pine Bonsai
Plant Pine Seeds
Although you can germinate pine seeds any time of year, it’s common to sow seeds in late winter or early spring when daytime temperatures hit 50° – 60° F. I’ve started pine seeds in the Bay Area throughout the year, but I typically plant seeds in February. See “How to grow Japanese black pine from seed” for details.
Create Seedling Cuttings
The best time to make seedling cuttings is after the initial set of immature leaves open and the center bud begins to elongate. This is typically 30-60 days after germination. See “How to create seedling cuttings” for details.
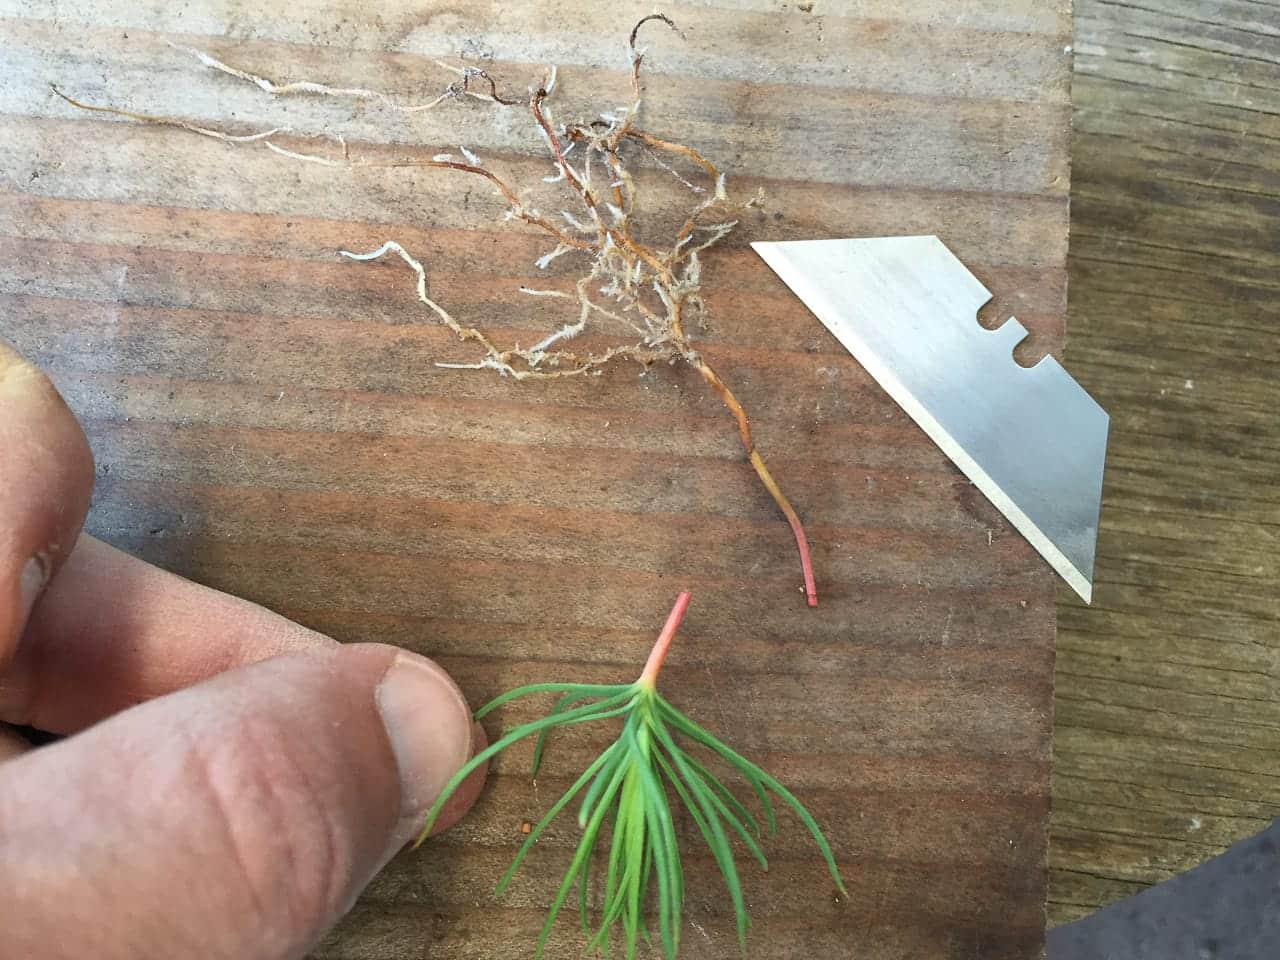
Making a seedling cutting
Grafting
Side veneer grafts can be made at different times of the year, but the success rate for pines is best when the trees are dormant. After grafting, the tree needs to be protected from hard freezes (temperatures below 28° F). In the San Francisco Bay Area, I do most grafting from late December until just before buds begin to swell in February. See “Creating cork bark black pine” for pine grafting basics.
Repotting
The best time to repot black pines is when the roots become active just before buds begin to swell in spring. In my garden, pine roots start growing in January so I can begin repotting early in the year. Because I start fertilizing one month after repotting, repotting early lets me start fertilizing early. See “How to repot a young Japanese black pine” for details.
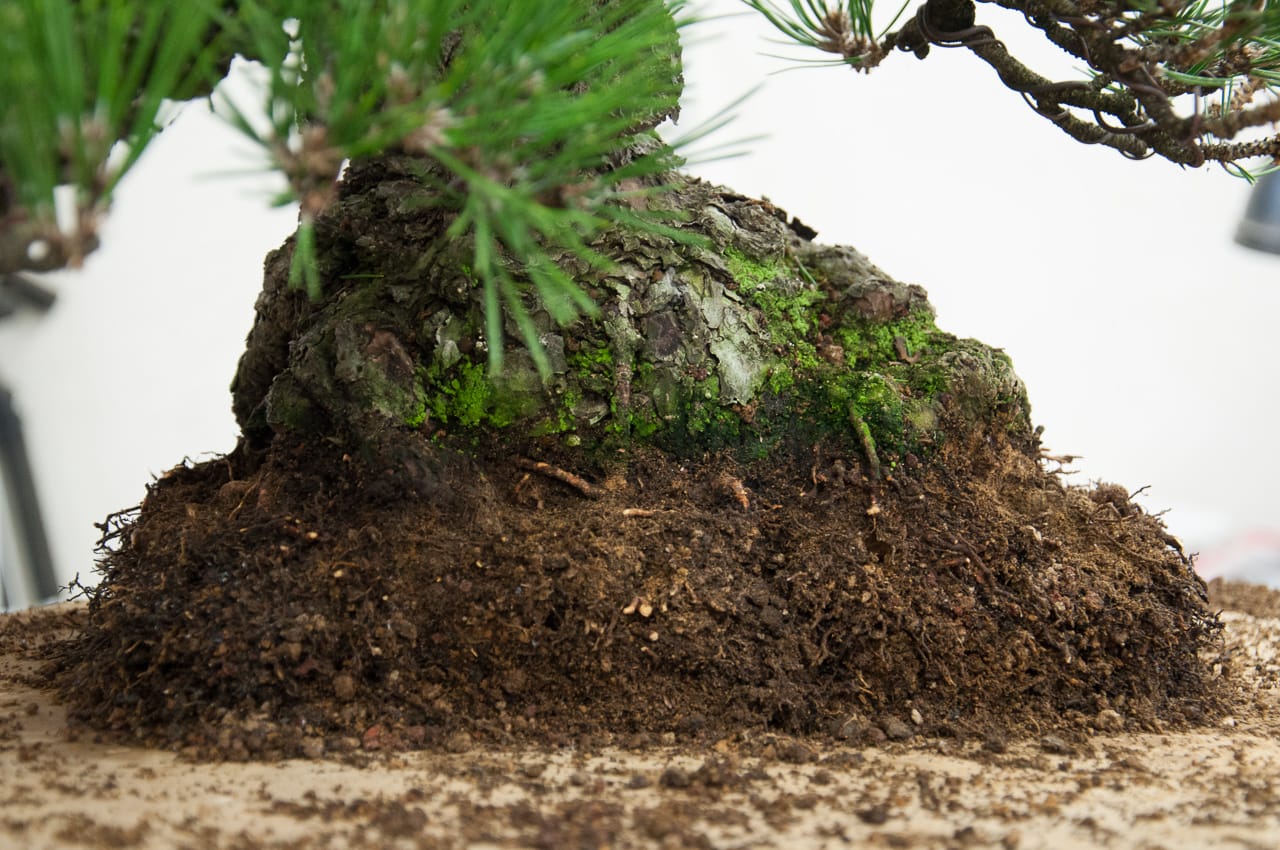
Repotting a black pine
Fertilizing
Bonsai can benefit from fertilizer year-round. The main exceptions are periods of excessive cold or excessive heat. Because it’s mild where I live, I can fertilize pines every month of the year.
There are many approaches to fertilizing pine bonsai. See “How to fertilize black pine bonsai” for details on one approach.

Fertilizing black pine
Pinching Candles
One technique for reducing vigor in refined pines is to break elongating candles in spring. Where I live, this means shortening candles in March or April. See “Pinching spring candles” for details.
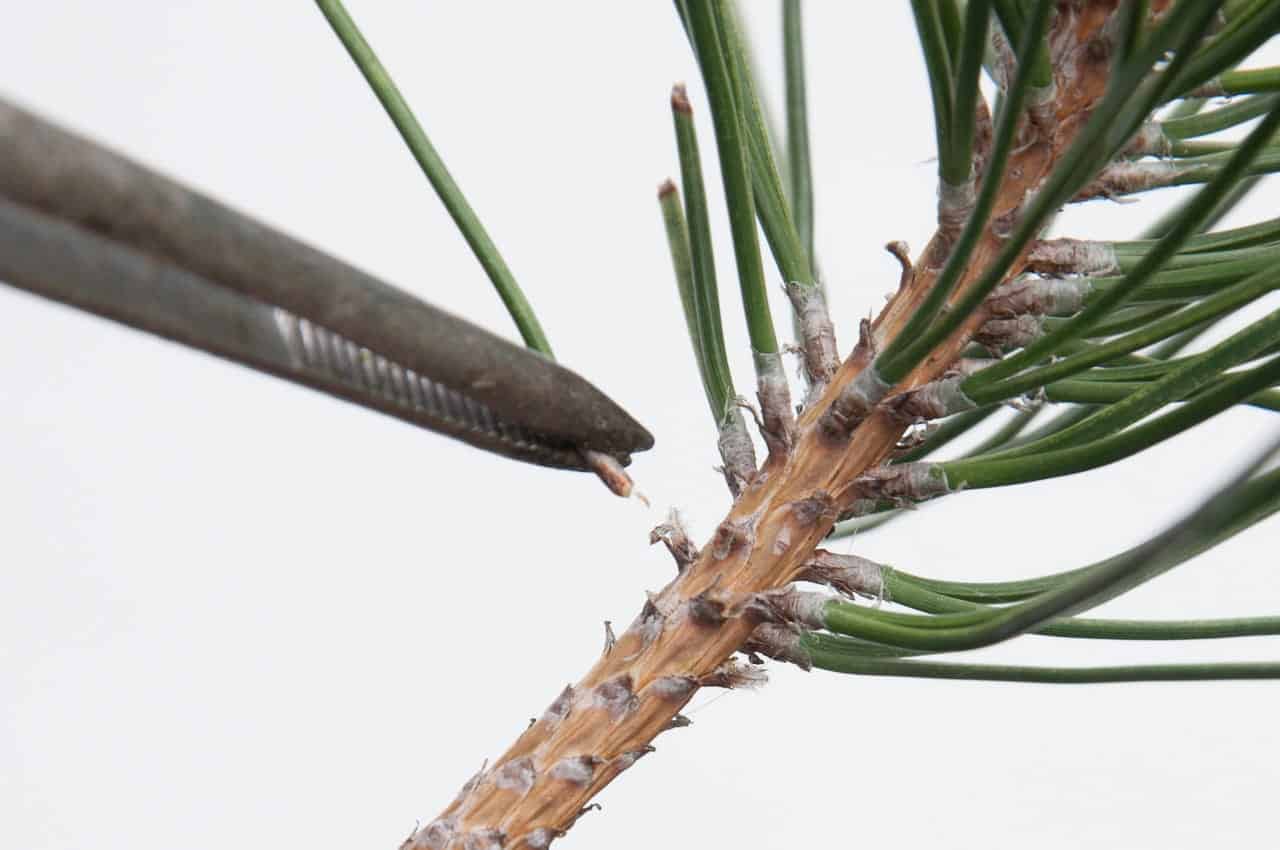
Removing Cones
It’s common for pine cones to develop at the ends of candles once they start elongating. Remove cones when they’re big enough to twist off with your fingers.
There’s no need to remove pollen cones. Gently brush these away once they dry up and begin to fall off naturally. See “Easy pine maintenance” for details about removing pine cones.
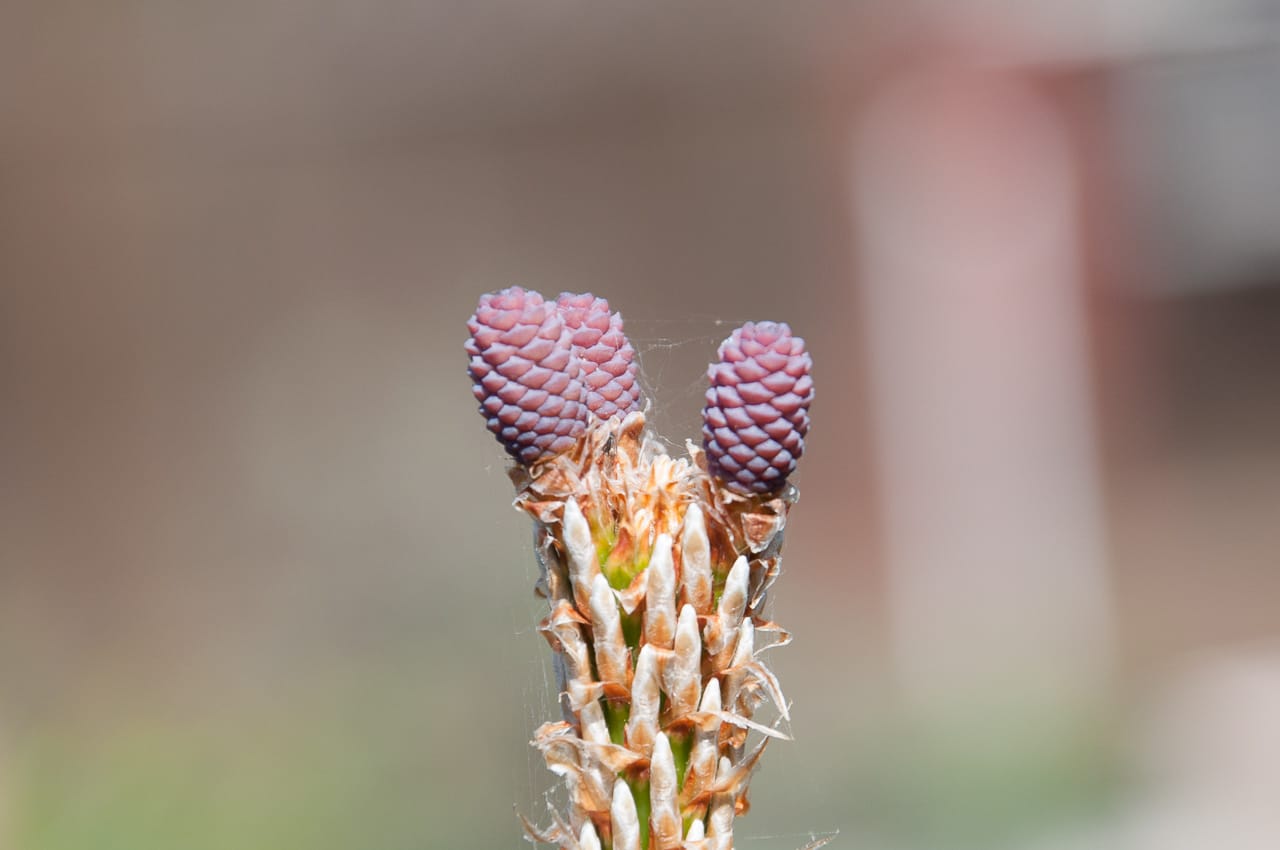
Pine cones ready to be removed
Decandling
Decandling is the primary technique for developing branch density in black pines. To identify the best time to decandle, record the date on which you decandle and note how the tree responds. Adjust the dates accordingly the following year. I decandle pines from late May through mid-July in the Bay Area. See “Decandling black pine bonsai – an in-depth guide,” for details.
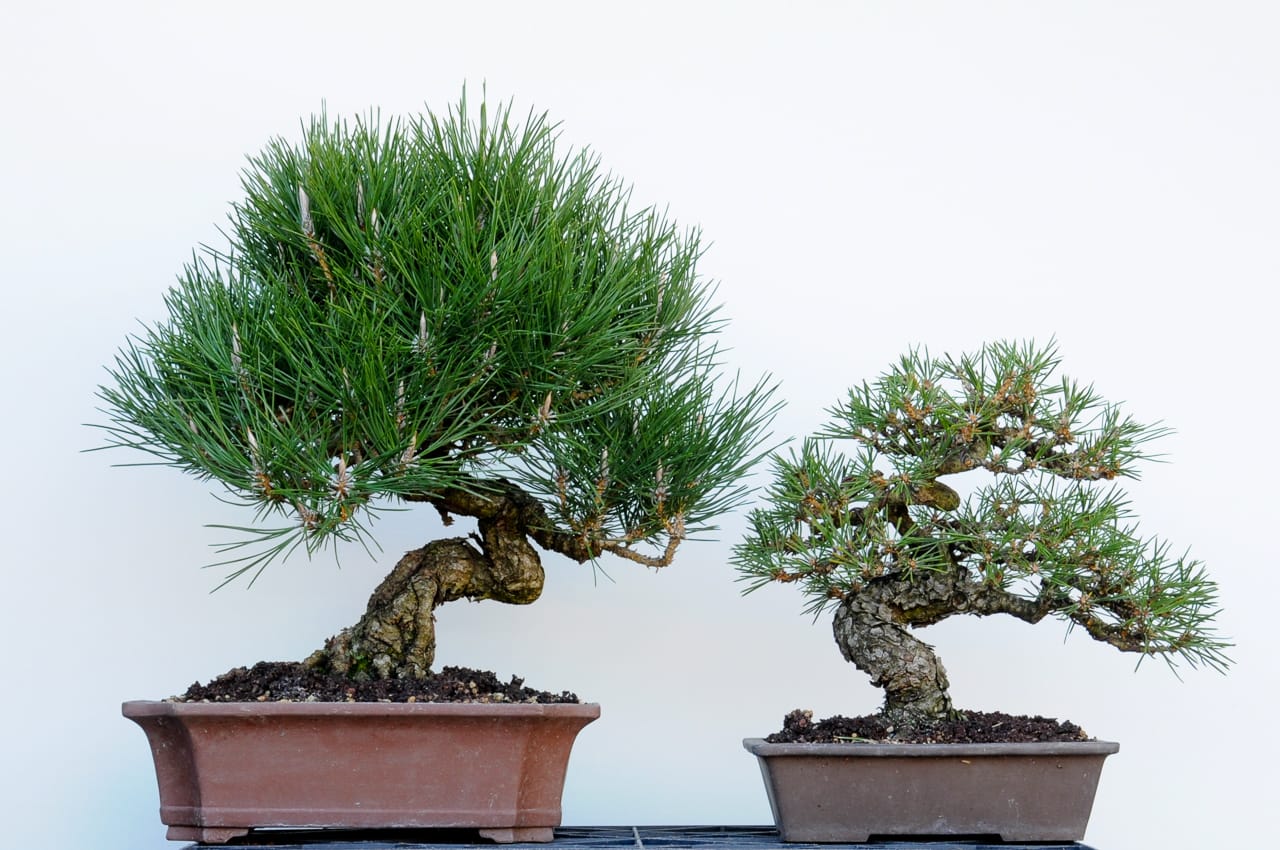
Black pines before (left) and after (right) decandling
Bud Thinning
Some approaches to managing vigor on black pines include thinning summer buds after decandling. This can be done with tweezers one-to-two months after decandling when the new buds are about the size of a grain of rice or a bit larger.
Cutback
The best time to prune black pines is in fall after summer growth hardens off up until one month before temperatures regularly drop below freezing. When winter temperatures are mild, pruning can continue through fall and winter up until shoots begin to grow in spring. I typically prune black pines in the Bay area from October through January. Decandling time is a good opportunity for light cutback. See “Pine cutback basics” for details.
The schedule is more flexible for pruning young pines. Summer, fall, and winter (excluding periods of excessive cold) are all good times to prune pines in early stages of development.
Needle Thinning
Thinning needles is required to reduce vigor in black pines and to maintain light in the tree’s interior. The best time to thin needles on mature pines is after summer growth hardens off in fall. If need be, continue thinning needles through winter up until the candles start to elongate in spring. In the Bay Area, I start plucking needles in October and continue through January.
You can further reduce vigor in pines by thinning needles at decandling time. See “Pulling pine needles” for details about how to thin pine needles.
Removing a pine needle with tweezers
Wiring
Black pines can be wired (or de-wired) from the time summer growth hardens off in fall through bud growth in spring. Protect wired pines when temperatures drop below freezing. October and November is a great time to wire black pines in the Bay Area.
As an alternative, black pines can be wired after decandling before summer growth appears, though it’s preferable to wire pines in fall. See “Be gentle with pines” for details about how to handle pines during wiring.
Winter Protection
Protect black pines when temperatures regularly drop below 28° F. Winter protection is rarely required in the Bay Area.
About This Series
The idea for the Teach Yourself Bonsai series is to provide starting points to help you figure out what’s best for your trees. Published information can be a great starting point, but it doesn’t always apply to the trees in your garden. If you have ideas for topics, feel free to post them below.
Subscribe to Bonsai Tonight
New Posts Delivered Every Tuesday and Friday
Percy Acutt says
Hi Jonas
I don’t normally leave comments but this article is gold. I live in Cape Town,South Africa and will adapt this timeline to my conditions. How about the same gold for Japanese White Pines?
Thank you for the info and experiences you share I learn from it each time
Jonas Dupuich says
Hi Percy, thanks for the note! Will see what I can do for white pine down the road as most don’t grow well where I live. Will be curious to hear what dates make sense for pines in Cape Town!
Edward Stanton says
Good morning, Jonas, good idea, the bonsai calendar for different species. I wondered why you did not include bud selection in the calendar for JBPs & JRPs?
Jonas Dupuich says
Hi Ed! Could you say more about bud selection? If you’re referring to the removal of young buds from pines not long after decandling, I may add that. I very rarely use that technique and typically wait until fall before thinning summer growth.
Edward Stanton says
Yes, Jonas, I was in fact referring to the removal of young buds shortly after decandling–leaving buds on either side of a shoot for balance, and if possible leaving bigger buds on weak shoots and smaller buds on strong shoots. But when one neglects to do this shortly after decandling–happens to all of us, with the disparity between big and small buds increasing with time–then my question is: at what point do you reduce the total number of buds on each shoot to the classic pair (two)?
Jonas Dupuich says
Well put Ed – the practice of selecting buds after decandling can be used to balance vigor through bud selection and thinning just as you described. The reason I don’t do this very often is that by thinning buds, the remaining buds will often end up larger than if I’d left all of the buds in place. If the tree is strong, I leave all buds in place until fall and then remove the extra shoots when I do cutback. I’ll look to do a post on this approach this year (assuming I have a tree that’s a good candidate for the technique).
Here’s a black pine that came out fairly even last year. The photo was shot in September before the branches had completely filled in but it’s a good example of a tree on which I’ve never thinned buds after decandling (from what I remember): https://bonsaitonight.com/2018/09/28/highlights-from-the-u-s-national-bonsai-exhibition/
Ray says
Thanks again Jonas for the generosity of sharing information. Much appreciated
Edward Stanton says
Jonas, Sorry for the delayed response to your response to my response. Your preference for NOT selecting buds makes perfect sense: in this way the buds and the resulting shoots will be smaller! Another example of how common sense wins out over tradition and habit. However, as you suggest, there may be cases where bud selection would be advisable even before fall cutback, as in the case of a very weak branch of a JBP, when you actually want larger buds and eventually larger shoots.
Can’t tell you how valuable and enjoyable your blog is! Thank you.
Jonas Dupuich says
Thanks Ed, that’s exactly how I think of it. I tried it out last year and it worked well. Will look to make a post on the topic the next time I put the technique to use.
Thanks again!