If you haven’t finished your fall pine work, there’s still time! Fall and winter, right up until buds start elongating in spring, is a good time to prune and wire dormant conifers including Japanese black and red pines.
The first step is to prune branches in crowded areas, the second step is to remove extra needles, and the third step is to wire the branches into place.
If you’re new to this work, here’s a simple example featuring a single branch.

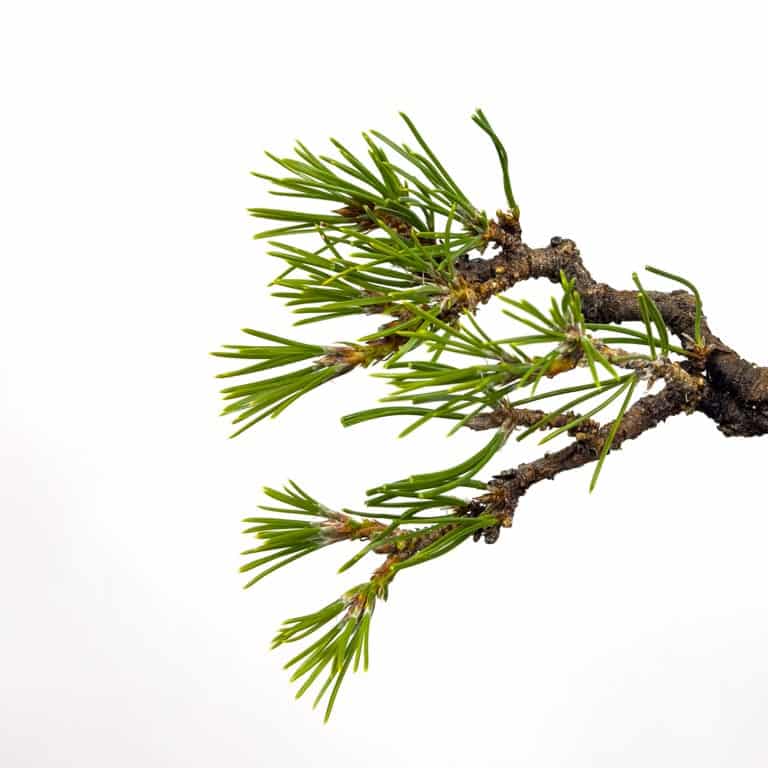
Japanese black pine – side view
The first thing I notice about this branch is that I can’t see the backdrop through the foliage. This is a sign that the tree needs thinning.
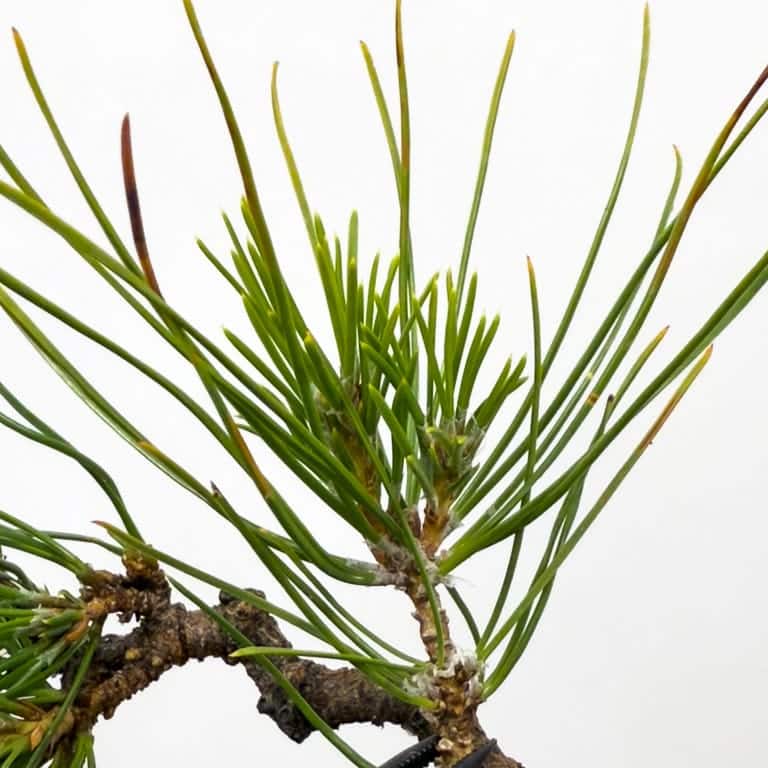
Before removing unnecessary needles
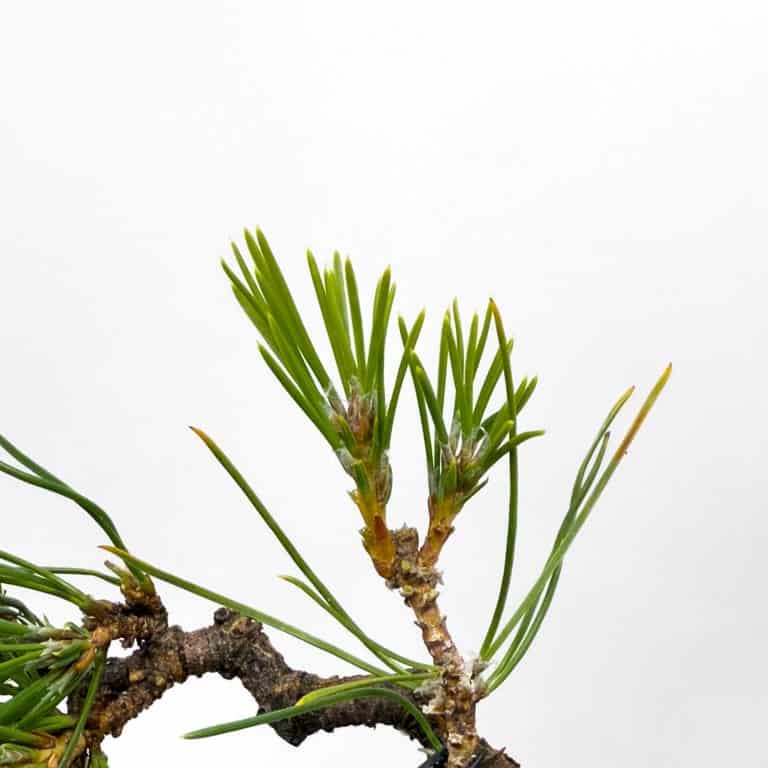
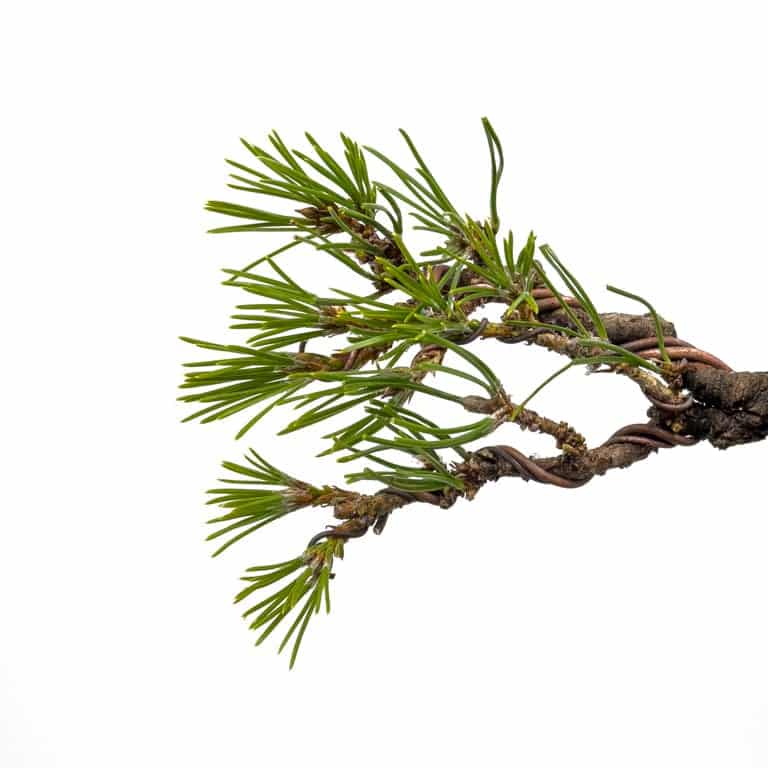
After plucking
You’ll notice that I removed most, but not all of last year’s needles (the long ones that developed in 2023) and a few of the new needles. I removed all of the long needles except for several growing in a location where I’d like a new branch to develop in the future. By leaving these needles, I increase the odds that a bud will form in this area.
I removed some of the new needles (the short needles that developed this past year) to reduce the overall density of the foliage and to make the number of needles per branch relatively equal.
Here’s what the rest of the branch looked like after thinning the needles.
After removing the extra needles
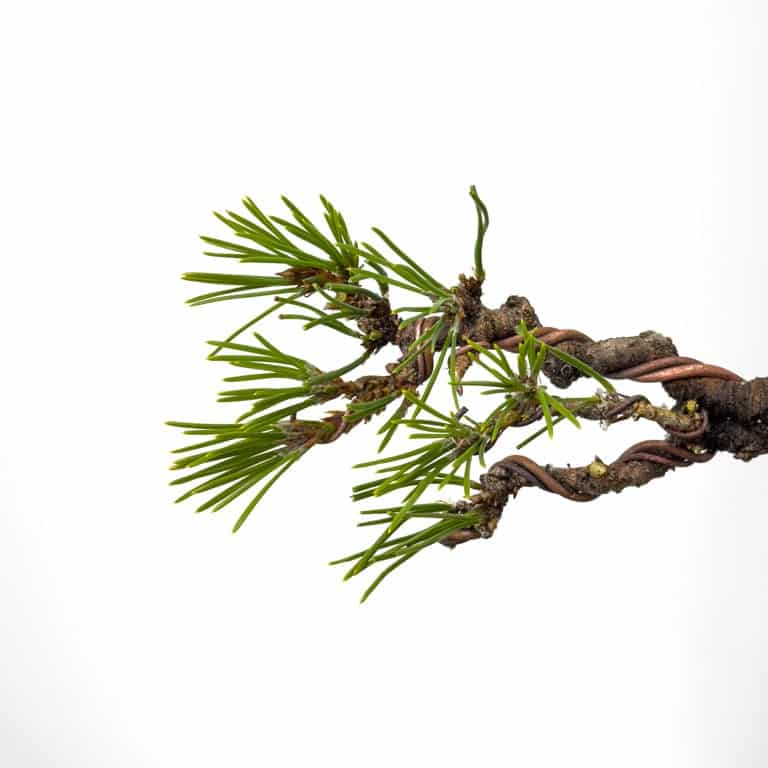
Once the extra needles are out of the way, the branch is ready for wiring.
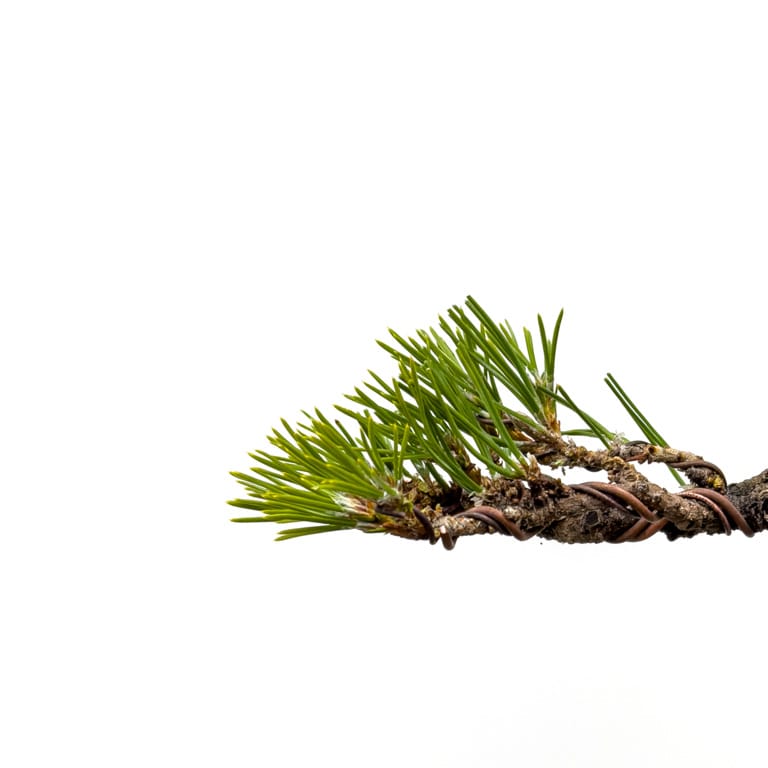
Branches wired and set
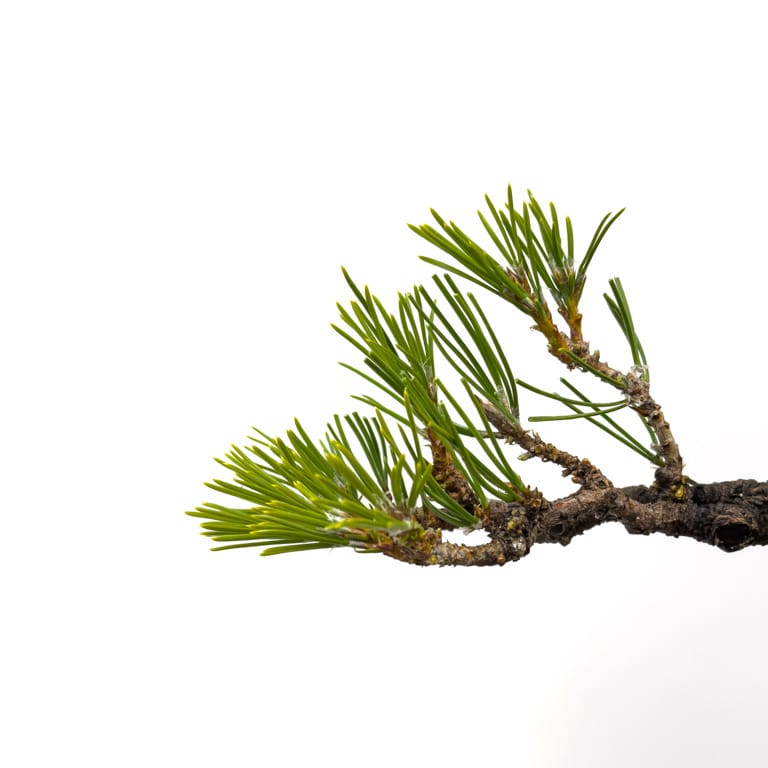
Here’s a view of the branch (before and after wiring) from above.
Before wiring – top
After wiring
This example shows just one of a number of ways this branch can be wired into a pad shape. The branches could be spread wider if the goal is for the branch to take up more space, or it could be reduced if the branch has grown too large.
After removing two small branchlets to create a more compact shape
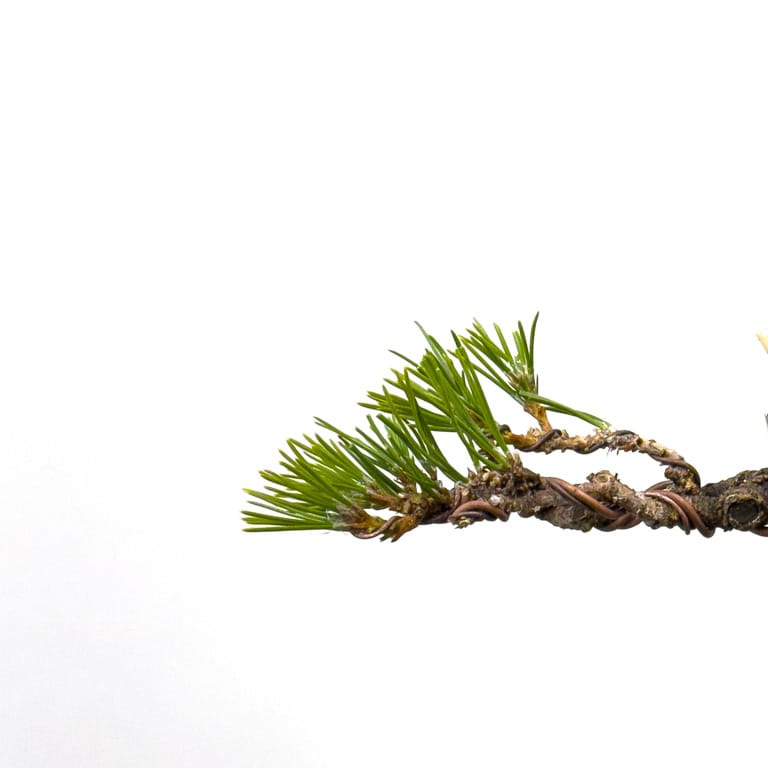
After reducing the pad – side view
To get a better idea about the scope of the work on this branch, here are all of the side-view shots together.
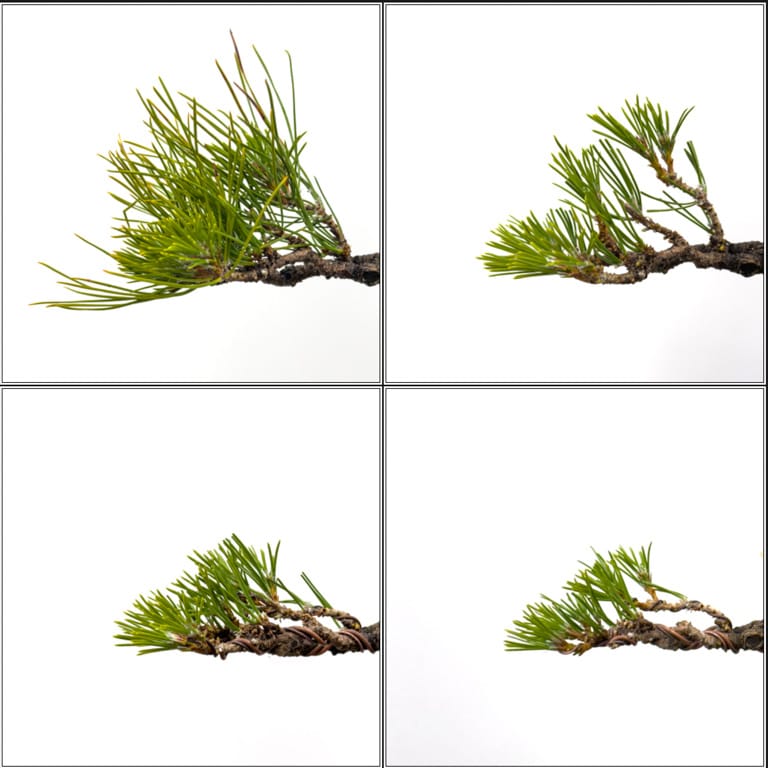
Before thinning, after thinning
after wiring, after making the pad smaller
As the photos make clear, it can be hard to tell how much work was done when looking at a branch from a single perspective. What is clear, however, is that it’s now possible to see the backdrop through the needles – the key sign that the tree has been thinned enough so that light can reach the interior branches.
Subscribe to Bonsai Tonight
New Posts Delivered Every Tuesday and Friday
Mats Hagstrom says
Words are not enough to share my appreciation for your contributions.
This was sooo timely and beautifully illustrated!
It 11 PM and I’m tempted to turn on the garage lights and pluck needles and wire pine branches until my finger tips are (you know what happens).
Great, just flippin awesome.
You da man!!!
Thank you Jonas,
MH
Patricia O'Connor says
Nice demonstration, Jonas, and a timely reminder. Happy New Year!
Kevin Meilleur says
Jonas, Hello from snowy and cold (13 degrees) Vermont. Thank you for posting all four pictures together. It does make it so much easier to understand the progression. Looking forward to more of that in the future.
Best,
Kevin
Jonas Dupuich says
Thanks, Kevin, great to hear from you! I’ll try to do more like this as I have time going forward.
Lars Larsson says
Thank you.
As someone at the level of field collector, base material muddle about this quick hit piece is outstanding. I say quick hit from a reader perspective . But I appreciate laying out the description and pics above as well as they are, is not a quick effort.
Thank you for your time.
All the best.
Cecil Hooker says
Thank you so much for your wonderful instructive blog. I love the before and after pictures
One question not so related, when do I replant from the field to a pot and do I let it grow in the pot before I prune? I live in zone 5
Jonas Dupuich says
Thanks, Cecil! If the trunk has reached the desired thickness, the best time to dig the tree would be right before the bud start moving in spring. When the goal is to improve the branches, you can train the tree in a pot.
Richard J Cote says
Another fantastic post Jonus. The way that you explain it step-by-step and illustrate it from different angles is so important for folks like me who are nearer the beginning of their Bonsai journey than the end (although not sure that there ever is an end!).
steve r perea says
I cut the needles where I would like more buds, seems the extra light triggers waking them up, if I don’t need buds I pull the needles.
Darth Masiah says
fantastic post for the visual learner. nice job gettin fall work started this winter instead of spring : )
Jonas Dupuich says
Thanks! And so true, though that was just a branch. I plan to start on actual tree work in a couple of weeks… Hope all’s well in your garden!
Bruce Williams says
This one, with the pictures, is especially helpful. Thank you.
Joe Cosio says
I agree with everyone else. You simplified something that sometimes can be confusing and overwhelming. I am finally working on my Japanese black pine ant it looks great with your tips from the article. Keep sharing!
Jonas Dupuich says
Thanks so much, Joe, I really appreciate it! Happy to hear your pine is looking great.