It would be nice if we could create beautiful bonsai by starting trees from seed or cutting and simply waiting for them to mature.
If you’ve tried this approach, you might have found that things don’t always go smoothly. Some care along the way, it turns out, is required to ensure young trees take the shape we have in mind for them.
I’ve been growing bonsai from seed for over 25 years and have learned more ways not to grow beautiful bonsai than I care to admit. To save you from making the same mistakes, I’ve outlined some best practices that can serve as a guide for what to do along the way.
Common approaches to developing bonsai stock
Chapter 1: Preparing trees for development
1.1 Starting with the right material
1.2 Establishing attractive surface roots
Chapter 2: Building the trunk
2.1 Establish an attractive shape for the trunk
2.2 Creating attractive taper in the trunk
2.3 Rapidly increase trunk size with sacrifice branches
2.4 Ground growing vs. container growing
Chapter 3: Creating branch ramification
3.1 Encouraging short internodes
3.2 Species-specific techniques for reducing vigor
Common approaches to developing bonsai stock
Most of North America’s bonsai stock comes from the retail nursery industry. Sometimes these trees are shaped by wire or pruning to distinguish them from common nursery plants, but they are generally left to grow freely in the pot. This process yields trees that have consistent quality but lack the character we look for in pre-bonsai.
A second approach is followed by many growers who produce trees for the bonsai community. These growers focus on rapid trunk development by growing trees in the ground and leaving branch development to the hobbyists.
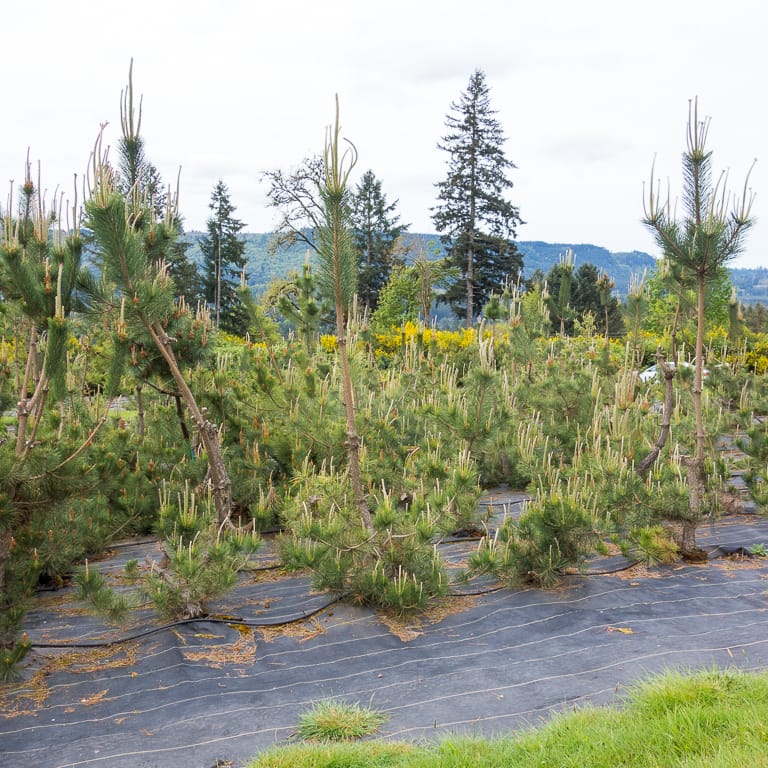
Field-grown Japanese black pines
When these growers aim for high production numbers, there isn’t always time to prepare young trees for rapid growth, to shape the trunks while they are in the ground, or to address structural concerns when they arise. This results in trees that vary in quality from grower to grower and from tree to tree within a grower’s collection.
A third approach has been common among hobbyists since the beginning. Young trees are planted in small containers and treated like mature bonsai.
This approach requires no special development techniques and it has the added benefit that the trees look good as they develop. The problem with this approach is the time it takes to make compelling bonsai. In some cases, decades may pass before a tree takes on the form of a mature bonsai, and it’s nearly impossible to develop large trunks when trees grow slowly in small containers.
This brings us to a contemporary approach in which we tailor our efforts in each phase of development to enhance trees’ beauty and minimize flaws as they arise. The process has three parts:
- Preparing trees for development
- Developing the trunk
- Refining the branches
The main benefit of this approach is that it lets us develop high quality trees in as little time as possible. The approach is also simple in that it allows us to focus on one development goal at a time. Here’s what the process looks like.
Chapter 1: Preparing trees for development
The goal of the first phase of development is to make sure we’re investing in the right material. We’ll do this by selecting material with good characteristics for bonsai and by establishing attractive surface roots.
1.1 Starting with the right material
Whether you’re aiming to produce bean-sized mame bonsai or large field-grown trees, your first step is selecting the best available material.
Failing to select seeds or cuttings with the characteristics we prize in bonsai can undercut your efforts for the entirety of a tree’s life.
When growing bonsai from seed, sow more seeds than you think you’ll need so you can cull out plants with poor characteristics. Because the genetic variation between seedlings varies from species to species, it’s safer to start with larger numbers upfront that you can reduce over time.
If you are growing bonsai from layering or cutting, select material from the best specimens you can find. Growing bonsai from layering or cutting offers the most control over a tree’s genetics so it can be a great way ensure quality from the start.
What qualities are you selecting for? That depends on the species. Here’s a starting point for identifying good material for bonsai.
- Grow specimens with small leaves. This is relative to the species so the more familiar you are with a species, the easier it will be to identify good candidates to grow. This is particularly important for deciduous species like Japanese or trident maples.
- For species that produce needle-shaped leaves like pines, select specimens with short, straight needles. Standing in front of a row of different pines will reveal differences between needles at a glance. Avoid growing trees with long or floppy needles.
- Grow specimens that develop with good bark. For pines, this means selecting trees that produce attractive plates of bark. For maples, this means selecting trees with trunks and branches that turn white quickly.
Once you’ve researched the options and selected material that you’d be happy to develop long-term, it’s time to focus on the roots.
Recommended reading: Air-layering a Japanese maple, How to grow Japanese black pine from seed, and Shimpaku cuttings.
1.2 Establish attractive surface roots
It’s easy to overlook the importance of developing good surface roots when creating stock for bonsai. However, skipping this step can make it difficult to create bonsai with attractive taper and it can lead to structural flaws that are difficult to fix.
Fortunately, it’s easy to improve faulty roots on young trees.
Root work begins in the first year of a tree’s life. The most common technique for producing surface roots on species like pine, stewartia, and zelkova is the seedling-cutting technique. By removing the taproot on a young seedling, we can encourage lateral roots to develop that will form the future nebari.
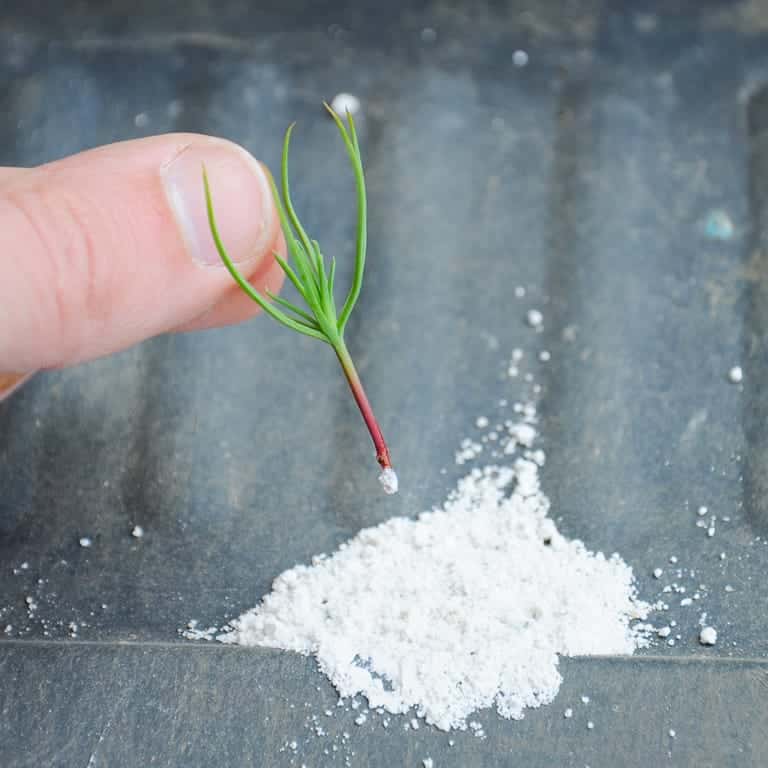
Dipping a seedling-cutting in powder rooting hormone
As an alternative to the seedling-cutting technique, you can cut the taproot on seedlings back to a lateral root one-to-three months after germination. Reducing the taproot yields less dramatic results than the seedling-cutting approach, but in some cases, this is a good thing as too many lateral roots can create a flat or even character that looks unnatural.
When growing trees from cutting, you can do similar root work the first time you repot. Cuttings often develop roots at different points along the stem. When this happens, identify the area where most of the roots emerge and remove all of the others.
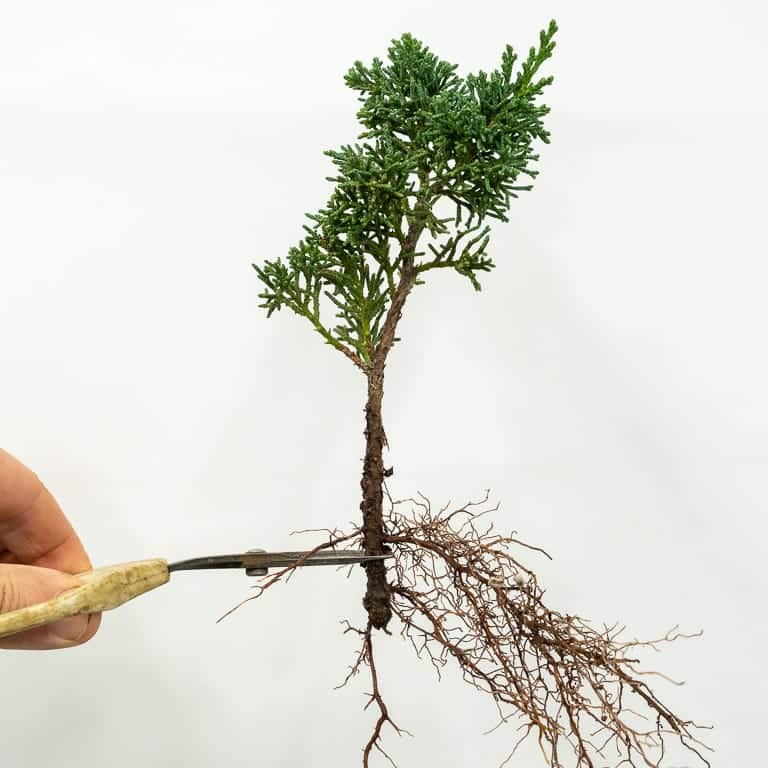
Removing the lower section of the roots
After establishing good lateral roots, you can make improvements over the next few years before rapid trunk development begins. Although cutting roots slows growth, failing to address structural problems will not make problems go away, and it will likely make things worse. The steps are the same as they are for mature trees.
- Untangle or remove crossing roots
- Remove or reduce large roots to encourage fine roots
- Remove roots that grow primarily up or down
- Reduce long roots that don’t divide into smaller roots
If you are interested in creating shohin bonsai, take note of this last step.
When surface roots extend too far from the trunk before they divide into smaller roots, it is impossible to fit a tree with a large trunk in a small pot. By reducing long roots that don’t divide when they are young, you can create more attractive roots that will work well for shohin or larger-sized bonsai.
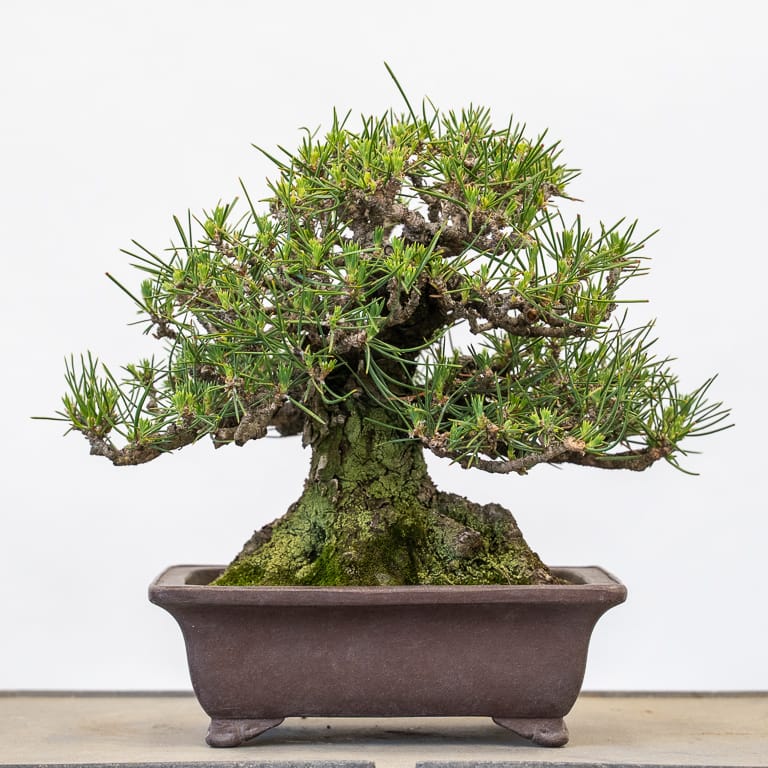
Note the space between the base of the trunk and the sides of the pot
Once you are happy with the surface roots, you can focus on developing the trunk.
Recommended reading: How to create seedling-cuttings, Effect of hormone treatments on pine seedling-cuttings, How to repot a young black pine part 1 and part 2.
Chapter 2: Building the trunk
The key difference between nursery stock and pre-bonsai stock is in the trunk. Nursery stock typically features slender trunks that lack taper or character whereas well-grown bonsai stock have both. We’ll create these features by focusing on two goals: establishing an attractive trunk-line and rapidly growing the trunk until it reaches the desired size.
2.1 Establishing an attractive shape for the trunk
Many species grown for bonsai naturally produce straight trunks. This is especially true of young trees. Although it’s fine for some sections of the trunk to be straight, it’s not the predominant characteristic we look for in most bonsai styles.
This is another step that’s easy to skip – it’s the size we’re after, right? Unfortunately, neglecting to give our trees an attractive shape when they are young will limit their ability to become compelling bonsai.
You can avoid creating trees with straight trunks whenever you wire young trees. Here are a few tips for doing this:
- Create bends in all three dimensions. Trunks that grow side to side may look good from the front and back but not from the sides. Create depth by ensuring the trunk moves left and right, forward and back, and, when appropriate, up and down.
- Prefer twisting movement to side-to-side movement. By twisting when making bends, you can add character to the bark and ensure that branches emerge at a variety of angles and positions. This step is especially important for junipers if you plan to create deadwood features like jin and shari.
- Create the largest bends near the base of the trunk and the smallest bends near the apex. This is an artistic convention based on the way trees grow in nature. Because young trees are more likely to produce coarse growth when they are young, the lower sections of the trunk typically have less movement. Older trees produce more refined growth which creates more movement near the apex.
- For bonsai like junipers that look good with deadwood features on the trunk, create the deadwood features early. If you wait for a trunk to thicken before creating shari, the trunk will resemble a curving cylinder. By creating deadwood features when the tree is young, the trunk will only produce new wood in the live areas resulting in interesting and irregular trunk shapes.
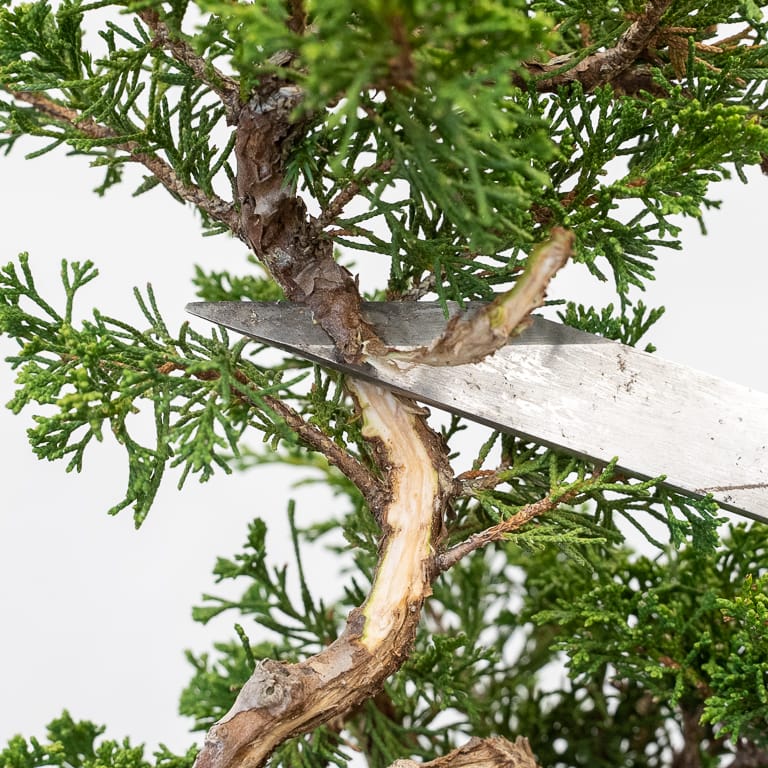
Creating deadwood on a young juniper
Recommended reading: Avoid growing trunks with straight sections
2.2 Creating attractive taper in the trunk
While the above steps describe the general character of bends in the trunk, they don’t suggest how to actually create a bonsai. With the exception of azaleas, it’s hard to create a compelling tree by bending a whip into shape and letting it thicken as this approach creates trunks with limited taper and conventional movement.
The alternative is to create movement through pruning. Although bending shoots can make attractive curves, pruning back to a branch that grows in a different direction can create dramatic movement in the trunk and improve the taper.
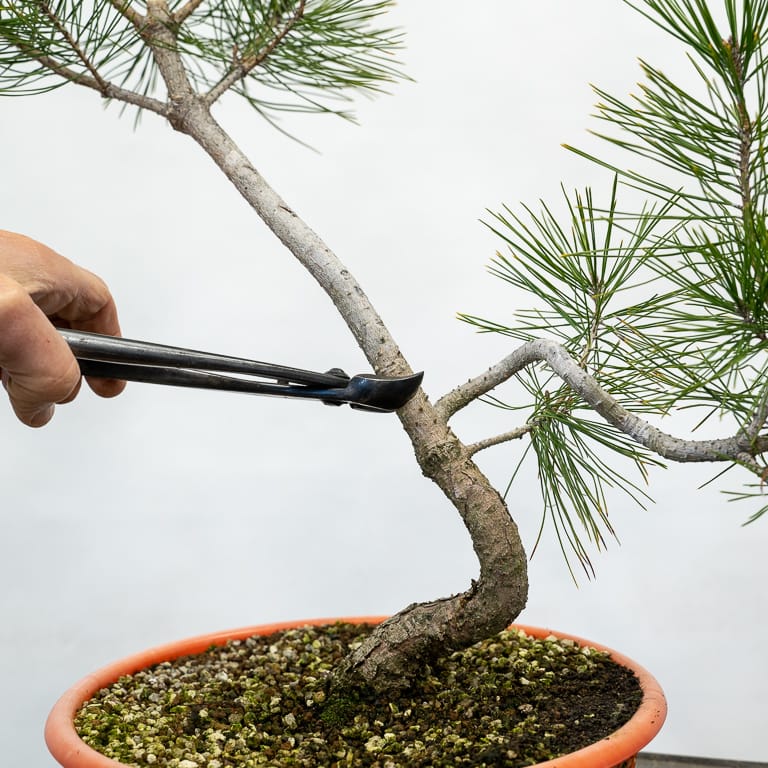
Creating movement by removing a straight section of the trunk
The thickest part of the trunk on most bonsai is the base of the trunk. As we follow the trunk toward the top of the tree, each successive section gets smaller and smaller until the trunk divides into the fine branches that form the crown of the tree. The transition from one section of the trunk to the next is known as the transition of taper.
When a large section of the trunk is followed by a slender section, we can identify this as a poor transition of taper.
The most common cause of poor transitions of taper is when large cuts are made in the trunk. For this reason, it’s best to avoid creating bonsai by making large cuts. Large cuts leave behind scars that can take years to heal, and the resulting shape of the cut area will be awkward until a new leader thickens enough to make the transition appear natural.
The alternative to making large cuts is to plan ahead and prune trunks and branches before they become too large.
Recommended reading: Developing trident maple, Sacrifice branches – the last mile.
2.3 Rapidly increase trunk size with sacrifice branches
The fastest way to thicken the trunk is to allow selected branches to grow as vigorously as possible. Once the trunk reaches the desired size, these branches, known as sacrifice branches, can be removed.
While the mechanics of sacrifice branches are simple, using them effectively isn’t always intuitive. Here are tips for avoiding the most common problems relating to sacrifice branches.
- Avoid using sacrifice branches on the lower part of the trunk. While low branches can create taper, they can also leave unsightly scars even after they callus over. The best way to create taper low on the trunk is to develop good lateral roots.
- Avoid swelling at branch intersections. When more than two branches emerge at any single point along the trunk, unwanted swelling can occur. To avoid this, reduce the number of branches growing from a single location before they are allowed to thicken.
- Remove unproductive growth. Root sprouts can thicken roots but they don’t help thicken the trunk and they can slow growth on the upper part of the tree. Remove these as soon as possible.
- Remove unnecessary branches that emerge from the trunk. Although it’s OK to use multiple sacrifice branches along the trunk, using too many can lead to unnecessary scars.
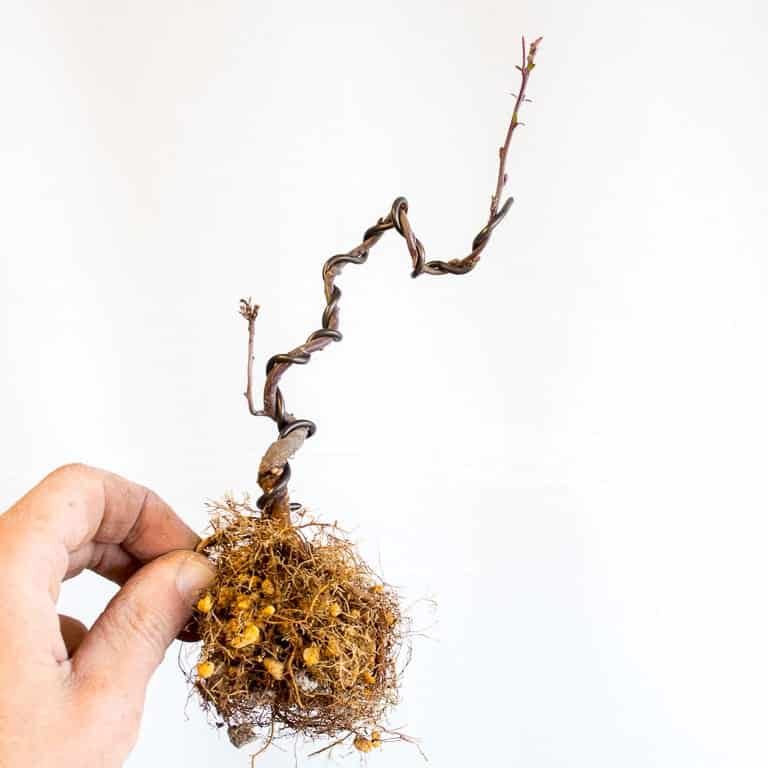
Wiring a young crabapple
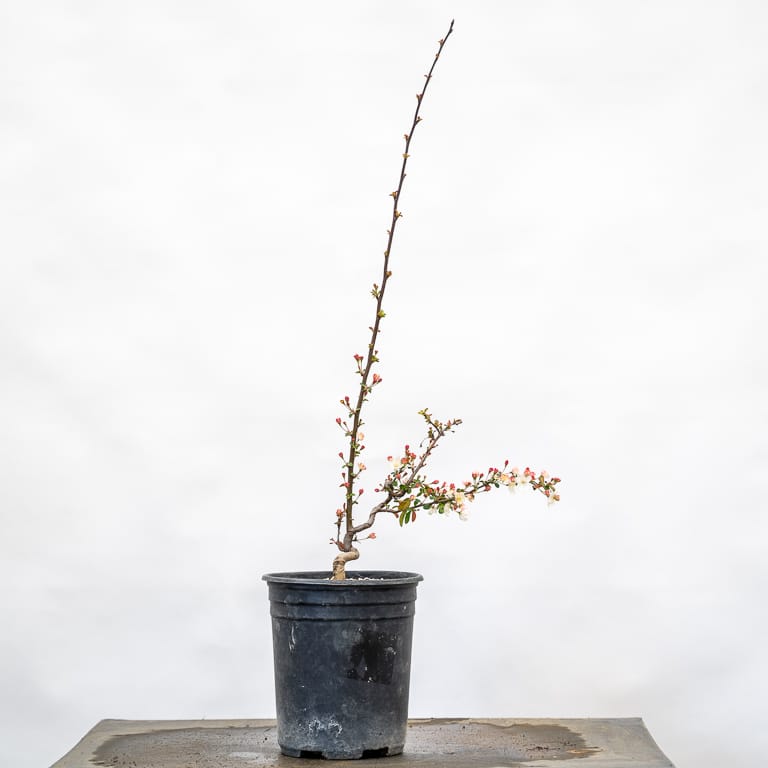
The same tree one year later; note the sacrifice branch growing straight up
Recommended reading: Sacrifice branch basics, Developing the trunk with multiple sacrifice branches,
2.4 Ground growing vs. container growing
The most important decision relating to growing trunks is whether to grow trees in the ground or in containers.
Some of the trade-offs are straightforward. If we grow trees in the ground, they will develop faster than they would in containers. Because few people are interested in stretching a five-to-ten-year project to ten-to-fifteen years, ground growing is a popular option among hobbyists and a necessity among commercial bonsai growers.
If, however, the goal is to produce the best bonsai possible, think about how you’d answer the following questions before deciding where to grow your pre-bonsai. When a tree is planted in the ground:
- What are the odds you’ll be able to identify the best front?
- How many opportunities will you have to improve the roots when the trunk is growing quickly?
- How effectively can you wire trees growing in the ground?
- How likely are you to remove wire as soon as it begins to cut in?
- How quickly will you notice and respond to infestations?
If you do opt to grow pre-bonsai in the ground, I’ll provide a single tip: space trees farther apart than you think.
When deciding how far apart to space pre-bonsai, imagine how wide you expect each tree to grow and double that. This will give foliage enough sunlight to stay healthy, it will allow you to have space for wiring and pruning, and it will reduce the odds that you’ll damage roots on nearby plants when it’s time to remove the tree from the ground.
Ground growing can be a good approach if you know what can go wrong and keep a close watch as your trees develop. If, however, any of this sounds off-putting, container growing can be a great alternative.
Container growing requires more work than ground growing, but the effort can result in better overall quality and less time spent in the refinement stages.
One thing that makes container growing labor intensive is that young trees need frequent repotting and much more frequent watering than trees growing in the ground.
The type of container – plastic, wood, or ceramic – is less important than the shape and size of the container. Some tips to keep in mind:
- Planting small trees in huge containers cuts down on repotting frequency but can actually slow overall growth and reduce opportunities to improve the roots (see Bonsai Heresy from Michael Hagedorn for details).
- Shallow containers are great for deciduous bonsai as they encourage lateral root growth which in turn causes the base of the trunk to flare.
- Consider using colanders or other mesh-sided containers if you are growing species where surface roots are an important attribute of the tree and making corrections on mature specimens is difficult. Colanders produce dense feeder roots and support frequent watering without retaining too much moisture.
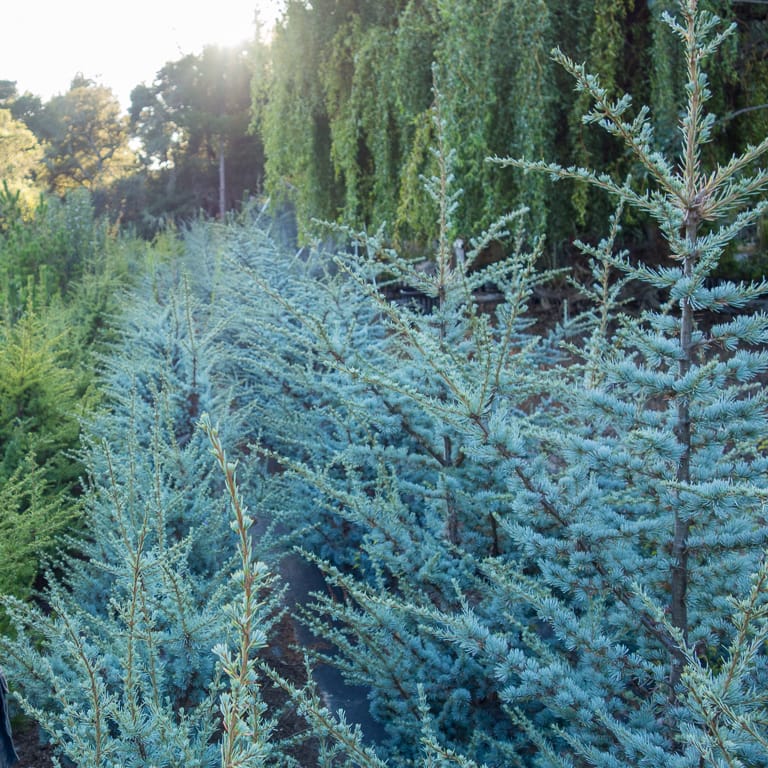
Atlas cedars growing in the ground
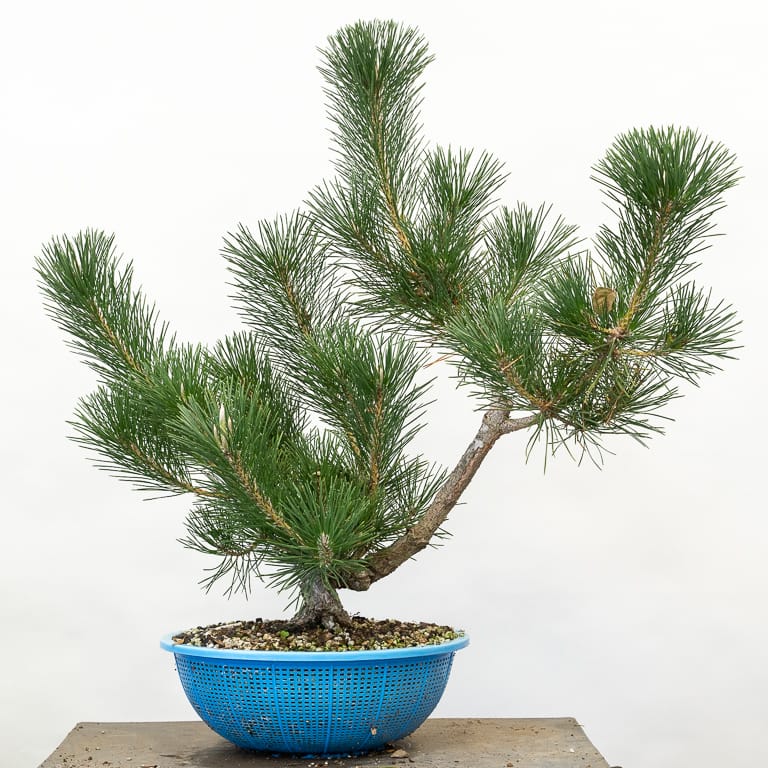
Black pine growing in a colander
Recommended reading: Evaluating field-grown material,
Chapter 3: Creating branch ramification
When the trunk reaches the desired size, whether in a container or in the ground, the next phase of development focuses on improving branch ramification.
This is the most common starting point for bonsai enthusiasts who work with pre-bonsai material. Few commercial growers have the opportunity to perform this work as their primary focus is developing trunks, so much of this work is left for the rest of us.
The temptation at this stage is to treat field or container grown material the way we treat refined specimens. This can, in some cases, be counterproductive. By employing a few techniques that apply specifically to trees at this stage of development, you can save time and improve your results.
3.1 Encouraging short internodes
In the first two phases of development, we try to grow trees as quickly as possible. In the third phase, we slow them down. The main reason for this is to produce short internodes.
Internodes are spaces along a trunk or branch that are not capable of producing buds. The longer these spaces, the fewer opportunities we have to create compact, well-ramified trees.
It’s likely that most of the branches that developed in step two grew quickly and have large internodes. When these branches are not usable in the final design, we have to remove them.
Although your instinct might be to remove flawed branches as soon as possible, this isn’t always the best approach as dramatic pruning can stimulate long shoot growth. You can avoid this by leaving more branches than the tree needs for the final design and reducing them gradually over several years.
How does this work in practice?
If a tree has too many branches, try removing half of them one year and the other half in the following year. The overall time frame for removing unnecessary branches isn’t important as you can spread out the pruning over as many years as it takes for the tree to produce balanced growth throughout this phase of development.
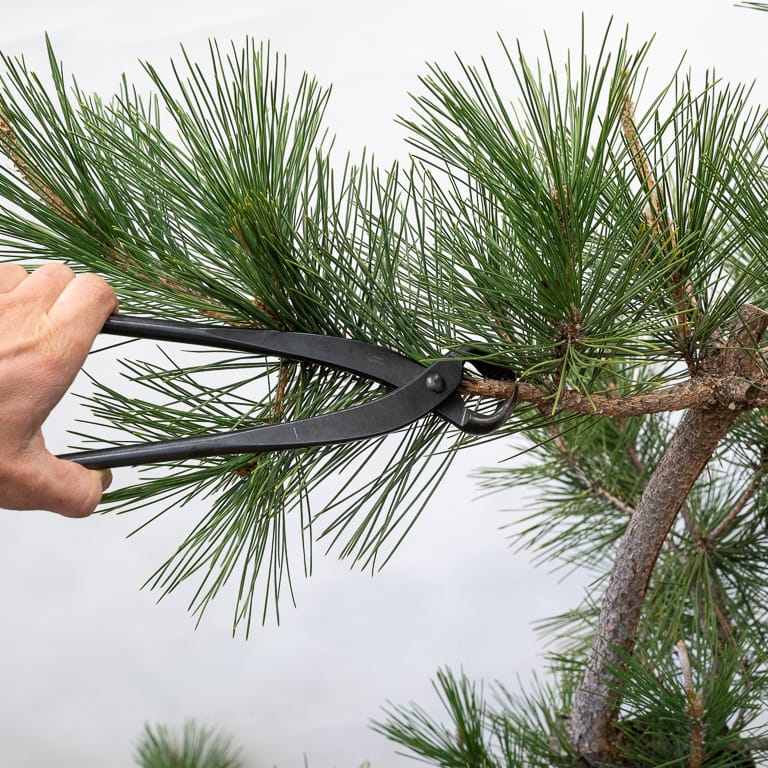
Pruning a field-grown pine
Recommended reading: Reducing internodes on Japanese maple
3.2 Species-specific techniques for reducing vigor
Depending on the species you are growing, there may be specific techniques that can help you create the branch structure you have in mind for your trees. We’ll focus below on two such techniques, defoliation and decandling.
Defoliation is the removal of a tree’s leaves. It’s a stressful technique that can weaken or even kill trees if it’s done at the wrong time or on species that cannot recover from it. Few conifers, for example, can bounce back after defoliation, and not all deciduous species respond well to it.
There are two main approaches to defoliation: full defoliation and partial defoliation.
Full defoliation is where you remove all of a tree’s leaves. This is the most stressful type of defoliation and is only appropriate for healthy trees that are known to respond well to the technique (trident maple, for example, is a species that responds well).
Full defoliation is useful if you want to a tree to produce back buds – shoots that emerge from the base of branches or directly from the trunk.
Partial defoliation is the removal of some, but not all of a tree’s foliage. Partial defoliation is useful if you want to balance vigor. Removing the leaves on the outside of the tree gives interior branches the sunlight needed to grow stronger.
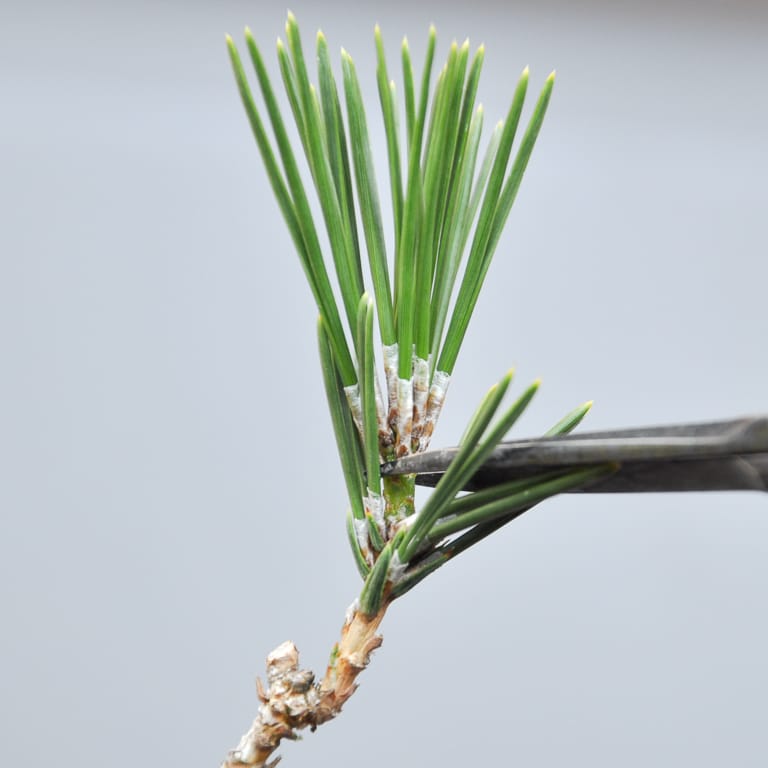
Decandling a Japanese black pine
Although you can’t defoliate pine bonsai, you can decandle some species. Decandling is the removal of shoots that develop in spring to stimulate summer growth with shorter internodes.
This technique works great for red and black pines, but it can dramatically weaken white pines. In general, the more vigorous the species of pine, the more likely it will respond well to decandling.
Recommended reading: Decandling black pine bonsai – an in-depth guide, Spring maintenance for a refined Korean hornbeam.
Additional tips
The following tips are general in nature, but they have helped me more than all of the above strategies combined.
- Grow trees in batches. If you only have one or two trees of a given species, you won’t have the opportunity to try different approaches and learn from them along the way. The more trees you have the time and space to work with, the faster you’ll learn which approaches work best in your garden.
- Cull your trees along the way. Despite our best efforts, trees will develop according their own criteria for success, and these don’t always line up with our aesthetic goals for them. If you cull your least inspiring trees every year or two, you’ll be able to invest more energy in your best trees and leave behind trees that lack beauty or the genetics required to develop into amazing bonsai.
- Study beautiful trees. The more you understand about what makes bonsai beautiful, the easier it is to produce beautiful trees. When you see a compelling tree, look to see if the branches grow up, out, or down; check to see if the trunk movement is gentle or dramatic; measure how far up from the roots the first branch emerges from the trunk; find out what makes your favorite trees stand apart from the others.
- Get help. Many of the best growers in the U.S. and in Japan are hobbyists who’ve learned from years of experience in their backyards. When you find someone in your area who produces trees you like, ask them how they did it – they may have some great discoveries to share!
Above all, don’t worry if things don’t go the way you planned. Following your intuition is just as valuable as following your intentions when growing bonsai, and a mix of both can yield impressive results.
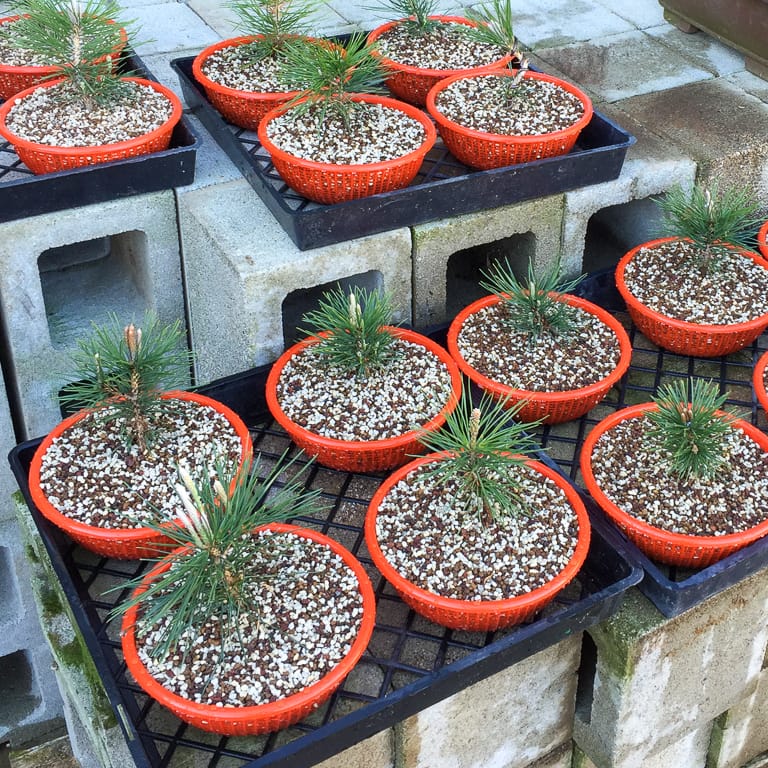
Young pines in colanders
Want to learn more about developing quality bonsai from scratch?
I post updates on the above topics along with in-depth examples in a series of blog posts known as the Bonsai Development Series. You can find a feed for the posts in this series at the link below:
Bonsai Development Series
Subscribe to Bonsai Tonight
New Posts Delivered Every Tuesday and Friday